


Please note:
The solution is based on the US PC version of the game. There may be divergences from the Spanish version and / or for other platforms.
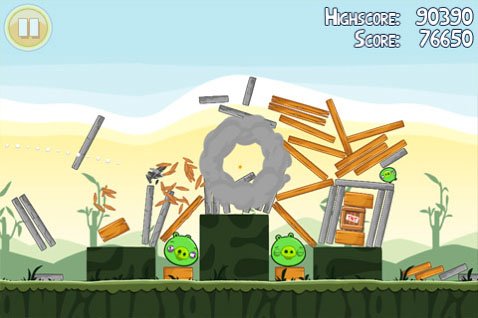
First World
Levels 1-1 to 1-5
Shoot a red bird at the support tube. Then one to the first pig, another to the hill beyond the last pig. One to the smiling face, so that it bounces and hits the two pigs. One to the wall above, causing it to collapse. One to the wall even higher, causing the boulder to fall.
Levels 1-6 to 1-10
One towards the crates above the first pig. One towards the wall around the second pig. One to the stone support, so that the pig in the center is hit by the falling walls. One directly upwards, so that it falls on the boulder and it falls to the left. One towards the wall that protects the first pig, so that the latter is crushed. A blue bird up, so that it falls between the two walls of the pigs - immediately split it in two, so that it hits both walls.
Levels 1-11 to 1-15
One towards the rock on the left. One blue in the center, separate it at the last minute so that it hits all the walls. Another blue towards the center, also to be separated at the last minute, so that the tower is destroyed, crushing the pigs. One red to the pile of boulders, so they fall and hit the pigs around. One blue up, so that it falls in the center, then pull it apart to make each bird hit each tower.
Levels 1-16 to 1-21
A yellow one in the center, accelerating it while near the wall, so that it falls and hits the pigs below. Another yellow below, causing it to accelerate on its way down the lower section of the wall, causing the upper section to fall. Three yellows, one for each level, causing objects to fall, one at a time (perhaps aiming at the supporting wall). One blue bird ahead to smash the glass, yellow one up, then accelerate along the wall to cause the pig to squash. Two yellows to destabilize the left wall, then a blue one towards the other left wall to break the glass, one green in the same area to break the wall, one yellow still there to hit the two pigs, one last yellow to hit the last pig.
Video - Trailer Halloween
Second World
Level 2-1
A red one aimed in such a way as to align the bird's tuft with the brown bands, hitting the tower on the right which will kill the three pigs below. One yellow, aimed in such a way that the upper part of its tuft corresponds to the lower part of the skin that makes up the sling; immediately after shooting him, use a boost, so that he can pulverize the wood and kill all the pigs.
Level 2-2
You will need to throw three blues. The first at maximum power, completely pulling down the slingshot bands; activate the blue power when it has passed the apex of its parable, so that it goes to hit all the green pigs. The second must be similar to the first, but aimed slightly more to the left; here too, you will have to activate the power at the apex of the parable. The third must be identical to the second.
Level 2-3
Three red shots. For the first one, pull the bird back all the way to the right, so that its "center" is in the middle of the union of the two roots, then shoot to hit the second floor of the tower. The second will have to be identical to the first, thus destroying the tower. For the third, load the sling so that the top of the bird's plume is equal to the top of the brown band, then fire to destroy the rest of the tower.
Level 2-4
One yellow and one blue shot. For the first, pull the band so that the "yellow" part of the bird is equal to the lower part of the brown band; then activate the boost when the bird is at the same level as the green pig. For the second, pull the band to the lower left corner, then activate the boost when it is 3 inches from the platform so it hits the boulders.
Level 2-5
Two blacks. The first will have to be "pulled" so that the top of its plume is just under the brown skin of the slingshot, thus hitting the top of the central tower. The second will have to be slightly "higher" than the previous one, hitting the left tower on its top and completing the work.
Level 2-6
One shot, black - throw it at maximum power, and so that the top of the plume is equal to the bottom of the brown band. The blow should impact the right of the top pig, destroying the tower.
Level 2-7
Two yellow shots. For the first one, you will have to make sure that the top of the head corresponds to the lowest part of the brown band; activate the boost when you are level with the wooden section of the tower. For the second, you will need to aim slightly higher than the previous one, then activate the boost when you are 3 centimeters from the earth walls.
Level 2-8
One shot, yellow. The upper part of its plume must correspond to the lower part of the skin of the sling; activate the boost when you are 5 centimeters from the far left tower, causing a "chain reaction".
Level 2-9
One black, one blue, one yellow shot. For the first, pull so that the bird's eye is aligned with the bottom of the brown band, hitting the woody structure underneath the small blocks. For the second, pull so that the top of the head is equal to the bottom of the brown band; activate the separation when you are about to hit the small blocks. For the third, make the plume match the top of the brown band; activate the boost when you are about to hit the small blocks.
Level 2-10
One yellow, one red shot. For the first, pull in such a way that the top of the tuft is equal to the upper part of the skin; then activate the boost when you are about to hit the wood. For the second, make sure that the central part of the red is equal to the top of the U-shaped part of the sling, hitting the tower on the far right.
Level 2-11
You will need to use four black shots. For the first, the top of the bird's head must be level with the area where the two pairs of the sling join. For the second, you will have to move your shot slightly downwards, so that the arc created by it becomes more hanging. For the third, you will have to lower the slingshot even further, increasing the slope again. The fourth must be identical to the third.
Level 2-12
Two blue shots, one yellow. For the first, the beak must be even with the top of the V-shaped part of the sling; so activate the boost when you are immediately above the stone tower on the left. For the second, you will have to repeat the procedure, but activate the boost when you are after the left tower. For the third, you will have to pull the sling so that the top of the head is equal to the lower part of the V of the sling; activate the boost when you are above the small block of stones on the left tower.
Level 2-13
One yellow, one black shot. For the first, the top of the tuft must be equal to the top of the brown skin of the sling; activate the boost when you are 5 centimeters from the wooden block. For the second, repeat the positioning of the first.
Level 2-14
Two white shots. For the first one, you will need to align the top of the first of the three black hairs with the top of the brown band; activate the boost when you are in the gap between the engine and the first car. For the second, you will need to make the top of the white part of the head equal to the bottom of the brown band, activating the boost when you are above the last pig.
Level 2-15
Three whites. For the former, the top of the plume should be equal to the top of the brown band; activate the boost when you have passed the left parapet of the stone tower. For the second, you will have to repeat the strategy seen for the first. For the third, there is no precise strategy: locate the last pig left and hit it.
Level 2-16
Two white shots, one yellow. For the former, the top of the hair at the far right of the plume should match the top of the brown band. Then activate the egg when you are between the two pagoda. For the second, repeat the strategy of the first. The third will need to be aimed directly at the remaining pig.
Level 2-17
Two white shots. For the first one, the top of the hair on the far right must be equal to the lower part of the brown band, then activate the egg just before the top of the tower. The second must be similar to the first, but slightly lower, activate the egg just before you have passed the tower on the far left.
Level 2-18
One blue, one white and one yellow shot. For the first, you need to make sure that the top of his head is just below the bottom of the brown band; activate the special power when you are 3 cm from the tower on the left. For the second, the top of the last plume of feathers must be equal to the bottom of the elastic; activate the egg just before hitting the tower on the right. For the third, the top of the head (not of the plume) must be equal to the bottom of the rubber band; activate the boost just before the central tower.
Level 2-19
Two black shots. For the first, the area of intersection between black and yellow feathers must be equal to the elastic. For the second, repeat the procedure.
Level 2-20
One white shot. The top of the plume should be just below the rubber band, activate the egg immediately after passing the fort on the right.
Level 2-21
White, yellow, red, yellow, black strokes. For the first, the top of the white area must be equal to the bottom of the brown elastic; activate the egg after passing the pig on the far left. For the second, the top of the plume must be equal to the bottom of the rubber band; activate the boost when you have passed the left side of the fort. For the third, the top of the plume should match the bottom of the brown rubber band, destroying the debris. For the fourth, the top of the plume will need to be equal to the bottom of the V in the sling, activate the boost when you are at the same height as the wooden block on top of the castle. For the last, the top of the head must correspond to the lowest part of the V.
Third World
Level 3-1
One shot, red. The top of the head must be equal to the lower part of the V, then going to hit the box of dynamite.
Level 3-2
One black shot, one blue. For the first one, pull slightly up and to the left, hitting the pig in the lower right. For the second, aim directly at the pig above.
Level 3-3
A red shot. The top of the plume should match the top of the brown elastic. You will hit the second boulder from the right, causing it to fall.
Level 3-4
One red shot, one blue. For the first, pull the sling so that the lower part of the bird is equal to the lower part of the piece that connects the two pairs of the sling. For the second, repeat more or less what you saw for the first, activating the power when you have reached the highest part of the parable.
Level 3-5
Two red shots. For the first one, the top of the plume will have to be equal to the top of the brown rubber band, hitting the left stone. For the second, place the bird completely under the U but slightly to the left, hitting the TNT.
Level 3-6
Two yellow shots. For the first, the top of the head must be equal to the V of the sling; activate the boost when you are in correspondence with the tank with the pig inside. For the second, the top of the black plume must match the top of the brown elastic; then activate the boost after hitting the tank on the left.
Level 3-7
Strokes red, blue, yellow. For the first, make the top of the plume equal to the top of the rubber band, hitting the tower in the center. For the second, make sure that the top of the head is equal to the bottom of the V; activate the separator when you are directly above the mini-tower. The third will hit the last remaining pig.
Level 3-8
One black shot, two yellow, one black. For the first one, the head will need to be slightly above the brown elastic. For the second, the top of the head must be equal to the lower part of the V, activating the boost when you are equal to the left part of the tower. For the third, the plume should match the top of the brown rubber band - you'll need to hit the dynamite charge. For the fourth, the top of the head should be slightly above the top of the brown elastic.
Level 3-9
Three red shots. For the former, the top of the plume should be slightly below the bottom of the brown band. For the second, the top of the head should be equal to the bottom of the elastic. For the third, simply target the remaining pork.
Level 3-10
Blue, yellow and white strokes. The first will need to be pulled all the way down from the U, slightly to the left. Activate the separation at the tower on the left. The second must be the same, activate the boost when you are at the leftmost point of the left tower. For the third, the top of the plume must be slightly below the elastic; activate the egg when you are between the two remaining pigs.
Level 3-11
Three blue shots. For the first, the top of the head should be slightly below the brown elastic; activate the special power a few inches before hitting the glass wall. The second should be similar to the first, but aimed slightly lower. For the third, you will have to repeat what we saw for the second.
Level 3-12
Blue, yellow, white, yellow, white strokes. For the first, the top of the head must be equal to the lower part of the elastic; activate the division two centimeters before the far left pillar. For the second, the top of the plume must be equal to the top of the rubber band, activate the boost when you are equal to the pillar on the far left. For the third, the top of the plume should be immediately above the brown band, activate the egg immediately after the second pillar. For the fourth, the top of the plume should be equal to the bottom of the V, activate the boost before hitting the debris. The fifth will have to be almost identical to the previous one, but you will have to activate the special power when you are between the two pigs.
Level 3-13
One red, one black shot. For the first, the top of the tuft must correspond to the upper part of the elastic. The second will have to be positioned similarly.
Level 3-14
One red, one yellow, one blue shot. The first will have to see the top of the tuft and the top of the elastic aligned. The second, the top of the tuft and the lower part of the V; activate the boost immediately after the start of the downward flight. The third, the upper part of the bird aligned with the lower part of the elastic; activate the "special" immediately after launch.
Level 3-15
Strokes black, white, white. For the former, the top of the being will need to line up with the top of the rubber band. For the second, the upper part of the tuft aligned with the upper part of the elastic; activate the egg when you are between the two pigs. Repeat for the third.
Level 3-16
Strokes red, white. For the former, the top of the plume must be aligned with the bottom of the V of the sling. For the second, the alignment will have to be the same, and you will have to activate the egg when you are immediately above the deepest ravine, next to the tower.
Level 3-17
Strokes black, black, yellow. For the first, you will have to pull the elastic all the way under the U, making sure that the right side of the being touches the left side of the sling. The second, identical. The third, similar but slightly to the left, activating the boost just before hitting the debris.
Level 3-18
Strokes red, yellow, yellow, white. The first should see you line up the top of the plume with the bottom of the brown elastic. The second, identical position but activate the boost when you are in the middle of the bridge. The third, the top of the plume will have to be equal to the junction of the sling, activating the boost when you are 3 cm from the bridge. The fourth, the plume must be equal to the top of the rubber band, activating the egg where you first activated the boost.
Level 3-19
Strokes red, red, yellow. For the former, the lowest part of the bird should be equal to the top of the sling. Second, the lower part is equal to the junction between the two branches of the sling. Third, the top of the head matches the top of the brown elastic, activating the boost when you are 3 cm from the tower.
Level 3-20
One black, one white, one black, one white, one black shot. First: the shot will have to be aligned at the junction between the two branches of the sling. Second: the top of the plume should be equal to the top of the rubber band, activating the egg just above the pig with the mustache. Third: the shot must be under the U of the sling, touching its left side. Fourth: the top of the head equal to the lower part of the rubber band, activating the egg when you are above the remaining pig. Last, use it to destroy what's left.
Level 3-21
Strokes white, black, white, black, white. First: top of the plume equal to the lowest part of the rubber band, activate the egg when you are on top of the pig with the mustache. Second: top of the head equal to the top of the elastic. Third: top of the plume equal to the bottom of the rubber band, activate the egg between the two pigs on the right. Fourth: align it like the previous one, slightly more to the left. Fifth: Like the previous one, activate the egg when you are above the king.
Fourth World
Level 4-1
A red shot; the top of the plume must be equal to the bottom of the rubber band.
Level 4-2
Two blue shots. First, the top of the head should be equal to the bottom of the elastic; activate the power when you are 10 centimeters from the first slope. Second, almost identical to the first, slightly raised, activating the power when you are immediately after the incline to the left.
Level 4-3
One blue and one red shot. For the first, the top of the plume should be equal to the top of the brown elastic; activate the power immediately after you are cast. Similar considerations apply to the second.
Level 4-4
Two yellow shots. First, the top of the plume equals the top of the sling, activating the power when you are 3cm from the bridge. Second, similar setting, but slightly lower.
Level 4-5
One red, one blue, one yellow and one black shot. First, top of the plume equal to the top of the rubber band. Second, similar setting and activate the power 3cm before hitting the tower. Third, top of the plume equals top of the sling, activate the boost just before the far left glass tower. Fourth, top of the bird equal to the top of the rubber band.
Level 4-6
Three yellow shots. First, top of the bird equal to the top of the brown elastic, activating the 3 cm boost before hitting the structure. Second, top of the head equal to the bottom of the brown elastic, activating the boost just before the far left of the tower. Third, top of the plume equal to the bottom of the brown elastic, activating the boost 3 cm before impact.
Level 4-7
One red, two blue, one yellow shot. For the first, you will have to position yourself equal to the top of the sling. For the second, position yourself similarly and activate the power just before impact. Third, identical to the second. Fourth, top of the plume equal to the top of the brown rubber band, activating the power 3 cm before the tower on the right.
Level 4-8
Two white shots. First, the top of the plume should be even with the top of the brown rubber band; start the egg between the second and third tower. Second, the top of the plume equal to the lowest part of the brown rubber band, releasing the egg between the central tower and the one on the right.
Level 4-9
Red and yellow strokes. First, the top of the head should match the bottom of the brown elastic. Second, the top of the plume matches the top of the rubber band, activating the boost 3 centimeters from the barrel.
Level 4-10
Red and yellow strokes. First, the top of the plume should match the bottom of the rubber band. Second, the top of the plume will need to be just below the top of the brown rubber band, activating the boost when you are next to the dynamite.
Level 4-11
Two white shots. First, the top of the plume should be just above the brown elastic, activating the egg above the pig on the left. Second, the top of the plume equals the top of the slingshot, activating the egg when you are above the left end of the tower.
Level 4-12
Three yellow shots. First, the top of the plume equals the top of the sling, activating the boost 5 centimeters from the left tower. Second, the top of the head is even with the top of the elastic, activating the boost 3 cm from the speakers. Third, top of the head equal to the bottom of the brown elastic, activating the boost immediately after the speakers on the left.
Level 4-13
One red shot, two yellow ones. For the former, the top of the plume should be equal to the top of the rubber band. Second, identical to the first but activate the boost 5 centimeters from the tower. Third, top of the plume equal to the top of the brown rubber band, activating the boost just before the platform.
Level 4-14
Yellow, blue, yellow, blue strokes. First, the top of the head will need to match the top of the brown rubber band, activating the boost just before hitting the ground. Second, the center of the bird's body will need to be equal to the sling joint, activating the power 10 centimeters from the tower. Third, the top of the plume should match the top of the brown rubber band, activating the boost when you are about to hit the support. Fourth, the center of the body will need to match the sling joint, activating the power just before hitting the first glass tower.
Level 4-15
Strokes black, white, black. First, the top of the head should be equal to the junction between the two branches of the sling. Second, the right tuft must be equal to the top of the sling - activate the egg after hitting the barrier on the left. Third, the upper body should be equal to the top of the sling.
Level 4-16
One black shot, two yellow ones. First, the upper body should be halfway up the brown elastic. Second, the tuft must be equal to the lower part of the brown elastic. The third must be identical to the second.
Level 4-17
Two yellows. First, the top of the plume should be equal to the bottom of the junction; activate the boost when you are above the wooden triangle on the far left. Second identical to the first.
Level 4-18
Two white shots, one black. First, the top of the plume should be slightly below the brown elastic, activate the egg when you are halfway between the two towers. Second, identical to the first. Third, pull the elastic at the bottom left, so that the right side of the body touches the center of the sling.
Level 4-19
One red and two blue shots. For the first, pull the elastic all the way back. For the second, the top of the plume should be at - or slightly below - the brown elastic; activate the division immediately after the tower. For the third, the top of the plume must be equal to the brown elastic, activate the vision 3 cm before impact.
Level 4-20
One black, one yellow, one white and one black shot. First: the top of the bird should be just above the top of the brown rubber band. Second: the top of the head should be equal to the lowest part of the elastic. Third: the top of the plume should be equal to the bottom of the elastic. Fourth: the top of the plume should be equal to the top of the rubber band.
Level 4-21
Four yellow shots. First: you will have to drag the rubber band to the extreme bottom right, until it almost touches the sling with the right side of the bird; activate the boost immediately after the far left tower. Second: identical to the previous one, but slightly shifted to the left; activate the boost at the same time. Third: the plume must match the top of the brown elastic, activate the boost in the area between the slingshot and the tower. Fourth: identical to the second.
Fifth World
Level 5-1
Two white shots. For the former, the top of the plume will have to match the top of the brown elastic; activate the egg when you are just above the left side of the inclined plane. For the second, the top of the right hair should be aligned with the top of the brown elastic.
Level 5-2
A blue shot. Pull the rubber band all the way down to the left so that the top of the bird's head is slightly below the U-shaped part of the sling. Activate the division immediately after the shot is fired.
Level 5-3
One white and one red shot. For the first, the tuft must be about halfway through the brown elastic; pull the egg when you are above the sting on the far left. Second, the top of the tuft should be halfway up the brown elastic.
Level 5-4
One blue and two yellow shots. First, pull everything down to the right so that the top of the head is under the lower part of the sling; activate the power when you are just above the left end of the pig with the helmet. Second, the top of the tuft must be equal to the top of the sling, activate the boost when you are about to hit the wheel. The third must be identical to the second.
Level 5-5
Two white shots. For the first, pull the rubber band at the bottom left, so that the bird's right touches the left of the base. Activate the egg when you are on top of the coffin. Second, the top of the head should match the top of the brown elastic.
Level 5-6
One blue, one yellow, one black shot. First, the top of the plume should match the brown elastic. Second, identical position but you will have to activate the boost 3 cm from the left end of the balcony. Third, the top of the head should be equal to the elastic.
Level 5-7
Two yellow shots, one red. First, the top of the head should be equal to the bottom of the elastic; activate the boost when you are level with the left side of the boat. Second, identical to the first. Third, the top of the plume should match the bottom of the brown elastic.
Level 5-8
Three yellow shots. For the first, the right end of the bird must touch the left end of the lower part of the slingshot; activate the boost when you are immediately to the left of the mast. Second, identical to the first. Third, the right edge of the bird must touch the left edge of the duct, activate the boost when you are above the pig on the far left.
Level 5-9
One blue and one yellow shot. For the first one, the top of the head must match the top of the brown rubber band, activate the split when you are about to hit the control booth. Second, the right edge of the bird must touch the left edge of the slingshot, activate the boost when you are immediately above the left side of the carousel.
Level 5-10
One blue and one red shot. For the first, the top of the head should be slightly below the brown elastic; activate the split when you are immediately above the fishing handle. Second, the top of the plume should match the top of the brown rubber band.
Level 5-11
Three yellow shots. First, the top of the plume should be equal to the top of the brown elastic; activate the boost past the left side of the pig in the car. The second slightly lower than the first, but the boost will have to be activated at the same time. The third, the top of the rubber band is even with the top of the sling.
Level 5-12
Two red shots, one yellow. For the first one, the top of the head should be equal to the top of the brown elastic. Second analogous to the first. Third, the right side of the pig will need to touch the left edge of the sling base.
Level 5-13
Two black shots. For the first, the top of the bird must be equal to the top of the slingshot. The second must be identical to the first.
Level 5-14
One white and one yellow shot. For the former, the top of the plume should be immediately above the top of the elastic; activate the egg when you are on the last stone square. For the second, the top of the plume should be in the middle of the brown band; activate the boost when you are 3 cm from the building.
Level 5-15
Four yellow shots. For the first, the top of the plume will have to be equal to the top of the sling, activating the boost just before hitting the platform. Second, slightly lower than the first. Third, make the bird's right touch the left of the slingshot base, activate the boost above the pigs. Fourth, repeat the previous one.
Level 5-16
Three black shots. First, the top of the bird equal to the top of the brown elastic. Second, the top of the bird equal to the bottom of the rubber band. Third, the bird's head equal to the top of the sling junction.
Level 5-17
Five yellow shots. First, have the right side of the bird touch the left side of the slingshot base, activating the boost when you are 3cm from the wooden platform. Second, third and fourth must be identical to the first. The fifth will need to be positioned slightly lower.
Level 5-18
Strokes white, yellow, black. For the first, the tuft will have to be aligned with the top of the brown elastic, activating the egg when you have almost hit the mountains. The second, identical to the first. For the third, the central part of the bird should be just below the top of the rubber band.
Level 5-19
Yellow and white strokes. For the first, the top of the head must be equal to the bottom of the V, activating the boost just before the supports. For the second, the top of the plume will have to be even with the bottom of the rubber band at the bottom, activating the egg immediately after passing the ravine.
Level 5-20
Three blue shots. For the first, bring the elastic to the extreme bottom left; activate the power just before you find yourself on the top of the stone towers. The second should be similar to the first, slightly to the left. The third will have to be similar to the previous one, only slightly lower, activating the power before hitting the bridge on the left.
Level 5-21
One black shot, two yellow, one white. For the first, the top of the bird must be equal to the top of the slingshot. For the second, the bird's eyes equal the lowest part of the junction of the slingshot, activating the boost at the "top" of the dish. For the third, the top of the plume should be equal to the top of the brown elastic. For the fourth, the top of the plume equals the top of the slingshot, activating the egg when you are immediately above the royal pig.
Sixth World
Level 6-1
Two red shots. For the former, the top of the plume should match the bottom of the brown elastic. The second identical to the first.
Level 6-2
One red and one yellow shot. For the first, make sure that the right side of the bird touches the left side of the support. For the second, use a similar angle, but slightly shifted to the left; activate the boost once you reach the top of the structure.
Level 6-3
One yellow and one white shot. For the first, make sure that the top of the head is equal to the top of the brown elastic; activate the boost when you have reached the extreme left of the island. Second, the top of the right tuft must be equal to the top of the brown elastic; activate the egg when you are between the stone mushroom and the wood mushroom.
Level 6-4
Two yellow shots. First, the top of the head should be equal to the top of the sling; activate the boost after the first bounce. Second, the top of the head aligned with the bottom of the elastic.
Level 6-5
One boomerang. The top of the beak should be equal to the bottom of the sling.
Level 6-6
Two boomerangs. First, the top of the beak equals the bottom of the sling. Second, top of the beak equal to the junction between the two branches.
Level 6-7
A boomerang and a yellow. First, the beak should be equal to the bottom of the U. Second, the top of the head should be equal to the top of the sling; activate the boost 3 cm from the structure.
Level 6-8
Two black shots, one white, one black. First, the right side of the bird must touch the left side of the slingshot. Second, the top of the bird should match half of the rubber band. Third, the upper part of the hair must be positioned slightly below the lower part of the elastic; activate the egg just before it hits the ground. Fourth, the top of the beak should touch the bottom of the rubber band.
Level 6-9
Two yellow shots. First, the top of the head should match the brown elastic; activate the boost halfway between the slingshot and the tower. Second, similar to the first but slightly to the left.
Level 6-10
One black and one white shot. First, the top of the head should be equal to the bottom of the brown elastic; activate the egg when you are above the left corner of the stone house. Second, the top of the bust should be half the size of the elastic band.
Level 6-11
One boomerang shot. The top of the beak must be equal to the lower part of the U.
Level 6-12
Three boomerangs. First, the top of the beak must be equal to the lower part of the U. Second, slightly lower than the previous one, so that the beak almost touches the extreme left of the sling. Third, even lower, with the beak touching the left end of the sling.
Level 6-13
Three yellow shots. First, the top of the head should be equal to the top of the sling. Second, the top of the tuft equal to the lower part of the brown elastic; activate the boost when you have passed the top of the central gazebo. Third, the top of the head equal to the lower part of the U; activate the boost when you are about to hit the last pig.
Level 6-14
One boomerang, two yellows, one white and one boomerang. First, the top of the beak should match the bottom of the U. Second, the top of the head should match the top of the brown rubber band; activate the boost when you are about to hit the ball. Third, identical to the second. Fourth, identical to the third but activate the egg when you are about to hit the tower. Fifth, the top of the beak should be equal to the bottom of the rubber band.
Level 6-15
One black, two yellows, one boomerang. First, the top of the bust should be just above the brown elastic. Second, the top of the plume equals the bottom of the brown elastic. Third, identical to the second; activate the boost after passing the first ball. Fourth, the top of the head should be equal to the bottom of the brown elastic.
7 world
Level 7-1
Three black shots. First, the top of the plume should match the bottom of the brown elastic. Second, the top of the head must be equal to the top of the sling. Third, the top of the plume should be equal to the top of the sling.
Level 7-2
Two black shots, one white. First, the top of the head should match the bottom of the brown elastic. Second, the top of the plume equals the top of the sling. Third, bring the rubber band to the far left, then activate the egg when you are just above the remaining pigs.
Level 7-3
Three yellows. First, the top of the head should match the top of the brown rubber band; activate the boost before hitting the truck. Second, identical to the previous one but slightly shifted to the left; activate the boost just before hitting the tracks. Third, top of the plume equal to the lower part of the brown elastic; activate the boost just above the car debris.
Level 7-4
One yellow, two boomerangs. First, the right side of the body must touch the left side of the crossbow; use the boost immediately after the apex of the dish. Second, the top of the beak equals the bottom of the brown rubber band. Third, top of the beak equal to the lowest part of the junction.
Level 7-5
One red shot, two yellow ones. First, the lower part of the bird must be equal to the lower part of the U, hitting the corner of the central tower. Second, the top of the head must be equal to the lowest part of the elastic; use the boost at the apex of the ascending parabola. Third, the top of the head equal to the top of the brown rubber band.
Level 7-6
One white, one black, one white shot. First, the top of the plume just below the top of the sling; activate the egg just above the H. Second, the top of the torso in the middle of the brown elastic. Third, aim upward to get past the rest of the letters, releasing the egg when you reach the rest of the pigs.
Level 7-7
One yellow and one black shot. First, the top of the tuft should be equal to the bottom of the brown elastic; activate the boost after reaching the tower on the left. Second, the top of the torso should be equal to the top of the sling.
Level 7-8
Two white shots. First, the top of the plume should match the bottom of the brown elastic; activate the egg when you are about to hit the top of the bus. Second, the top of the head equal to the top of the brown elastic; activate the egg after hitting the bus. Third, the top of the head equal to the lower part of the V.
Level 7-9
A red shot, a boomerang. First, the top of the head should be equal to the lowest part of the brown elastic. Second, the top of the beak equals the lowest part of the brown rubber band.
Level 7-10
Shots yellow, boomerang, black, white. First, the top of the head should be equal to the top of the brown elastic; activate the boost halfway between the slingshot and the wall. Second, tie the bird's torso to the lower part of the V. Third, the top of the tuft should be equal to the upper part of the brown elastic. Fourth, aim beyond the debris, releasing the egg when you are on top of the last pig.
Level 7-11
Four white shots. First, the top of the hair equal to the top of the sling; drop an egg when you are on top of the pig with the military hat. Second, almost identical to the previous one, but slightly lower; shoot the egg when you are about to hit the stone. Third, the top of the head should be equal to the top of the brown elastic; activate the egg before hitting the debris. Fourth, identical to the previous one but slightly shifted to the left; activate the egg when you hit the debris.
Level 7-12
Two yellow, one white. For the first, the eyes must be equal to the lower part of the U formed by the sling; activate the boost when you have passed the center of the bridge. Second, the right side of the bird will have to touch the left side of the sling. Third, the top of the head should be equal to the top of the brown elastic; activate the egg when you have passed the last pig.
Level 7-13
A white, a yellow, a white. First, the right side of the bird must touch the left side of the slingshot; use the egg when you have almost hit the ship. Second, the top of the head must be equal to the lowest part of the elastic; activate the boost when you are about to hit the debris. Third, identical to the first but slightly more to the left; activate the egg when it is about to hit the debris.
Level 7-14
One yellow, one white, one blue shot. First, the top of the head should be equal to the bottom of the U; use the boost immediately after the apex of the dish. Second, the right side of the bird must touch the left side of the slingshot; activate the egg when you are exactly above the observatory. Third, the lower part of the bird must be equal to the lower part of the junction of the two branches; activate the power of division immediately.
Level 7-15
A blue, a boomerang, a black and a yellow. First, the low part of the bird must be equal to the low part of the U; activate the bonus immediately after the top of the dish. Second, the top of the beak should match the bottom of the U, hitting the second building from the left. Third, the far right of the bird must be equal to the left side of the slingshot, hitting the pig on the far left. Fourth, make sure that the top is in the middle of the brown elastic.
Video - Movie Trailer
8 world
Level 8-1
Two black shots. First, the top of the torso should match the top of the brown elastic. Second, the top of the bust should be equal to the bottom of the same brown elastic.
Level 8-2
One yellow, two white, one black shot. First, the top of the head should match the top of the brown rubber band; activate the boost when you are halfway between the slingshot and the tower. Second, the top of the plume on the right should match the bottom of the brown rubber band, activate the egg when you are on top of the pig with the helmet. Third, identical to the previous one, activate the egg when you are immediately above the last passenger on the plane. There will be only one pig left, to be finished with the last black shot.
Level 8-3
A yellow shot. The top of the head must be equal to the junction of the V; activate the boost a few seconds before hitting the tower.
Level 8-4
Two black shots. First, the top of the bird must be equal to the top of the root at the far right of the sling. Second, the top of the bust should be equal to the top of the elastic.
Level 8-5
Two red shots. First, the top of the plume should match the bottom of the brown elastic. Second, the lower end of the bird must be equal to the lower part of the junction. Third, identical to the second.
Level 8-6
Three blue shots. First, the top of the plume should be equal to the lowest part of the rubber band; activate the power when you are about to hit the central structure. Second, identical to the previous one. Third, there will be one last pig left, hit him directly.
Level 8-7
One black and two white shots. First, the top of the torso should be just above the top of the brown elastic. Second, the top of the plume should match the top of the brown rubber band; activate the egg just before hitting the tower. Third, identical to the previous one, you will have to completely throw the tower down.
Level 8-8
Two blue, one yellow. First, the top of the bird should be equal to the top of the brown elastic; activate the special power just before you "touch" the wooden sign. Second, the top of the plume should be equal to the bottom of the brown elastic; activate the power before hitting the debris. Third, the top of the plume should match the top of the brown rubber band; activate the boost before hitting the wooden structure.
Level 8-9
Three black shots. First, the right end of the bird must touch the left end of the sling. Second, almost identical to the previous one, slightly further to the left. Third, this too almost identical to the previous one but even more to the left.
Level 8-10
Two boomerangs. First, the beak should be halfway between the junction and the U-shaped area. Second, the beak should be at the top of the brown rubber band.
Level 8-11
Two yellow, one black, two yellow shots. First, the top of the head should match the top of the brown rubber band; activate the boost when you are a few centimeters to the left of the slope. Second, the top of the plume should match the top of the brown rubber band; activate the boost where you activated it the previous time. Third, the top of the bust should be equal to the top of the brown elastic. Fourth, the top of the plume should be equal to the top of the brown elastic; activate the boost 5 centimeters from the debris. The fifth must be identical to the fourth.
Level 8-12
One white shot, one boomerang. First, the top of the plume should match the bottom of the brown elastic; throw the egg when you are just above the glass barrier. Second, the bird's body should be about halfway down the bottom of the U-shaped zone.
Level 8-13
Two yellow shots. First, the right edge of the bird must touch the left section of the slingshot; activate the boost when you are immediately above the banana on top of the first diamond. Second, the head must be equal to the lower part of the brown elastic; activate the boost after passing the second tower.
Level 8-14
Two red shots. First, the top of the plume should be just below the bottom of the brown elastic. Second, the top of the head should be equal to the bottom of the V.
Level 8-15
Two yellow shots. The top of the head must be equal to the lowest part of the V-junction; activate the boost after passing the purple soft material. Second, almost identical to the first but slightly shifted to the left; activate the boost when you have almost reached the pig furthest to the right.
Ninth World
Level 9-1
A big red shot. Top of the plume equal to the top of the sling.
Level 9-2
A big red shot. The top of the plume should be halfway between the top of the brown rubber band and the top of the sling.
Level 9-3
A big red shot. The top of the plume should be equal to the top of the sling.
Level 9-4
A big red shot. Top of the plume equal to the top of the sling.
Level 9-5
A big red shot. Top of the plume equal to the top of the rubber band.
Level 9-6
A boomerang shot, a big red shot. First, the top of the plume equals the bottom of the brown elastic. Second, top of the plume equal to the top of the sling.
Level 9-7
Two big reds. First, the top of the plume should be equal to the top of the sling. Second, the top of the plume should be just below the top of the sling.
Level 9-8
Two big reds. First, the top of the plume equals the top of the brown rubber band. Second, the top of the plume slightly lower than the brown rubber band at the top.
Level 9-9
Two big reds. First, the top of the plume slightly higher than the brown elastic. Second, identical to the first.
Level 9-10
A big red. The top of the plume should be slightly above the brown elastic.
Level 9-11
A boomerang and a big red. First, the top of the plume should match the bottom of the brown elastic. Second, top of the plume equal to the top of the sling.
Level 9-12
Two boomerangs, two big reds. First, the top of the beak should be equal to the top of the sling. Second, the same as the previous one. Third, top of the plume slightly higher than the brown elastic. Fourth, completely downwards, so that the right side goes to "join" the central part of the sling.
Level 9-13
A big red; the top of the plume must be equal to the top of the sling.
Level 9-14
Two big red shots. First, the top of the plume should be equal to the top of the sling. Second, the top of the plume should match the top of the topmost rubber band.
Level 9-15
Three red shots. First, the top of the plume equals the top of the crossbow. Second, top of the plume equal to the top of the brown rubber band. Third, top of the plume slightly higher than the brown elastic.
Tenth World
Level 10-1
One boomerang shot, two big red shots. First, the top of the plume should match the bottom of the brown elastic. Second, the top of the head should be equal to the top of the sling. Third, the top of the plume should be equal to the top of the sling.
Level 10-2
Three big red shots. The first must be equal to the lower part of the brown elastic. The second will have to be pulled completely back, hitting the lower part of the tower. Third, equal to the lower part of the junction.
Level 10-3
Two big red shots. First, pull all the way back and shoot to destroy the left side of the bridge. Second, almost identical to the previous one but about half a centimeter lower, splitting the right side of the bridge.
Level 10-4
Two big red shots. First, the eyes should match the bottom of the brown elastic. Second, identical to the first.
Level 10-5
Two more big red shots. First, top of the plume equal to the top of the sling. Second, pull back all the way and fire at the dynamite charge.
Level 10-6
Two big reds. First, the top of the plume should be just above the top of the rubber band. Second, identical to the first.
Level 10-7
Two great reds, again. First, the top of the head should be equal to the top of the brown elastic. Second, the top of the plume is equal to the top of the brown elastic.
Level 10-8
Two big reds. First, the top of the plume should match the top of the brown elastic. Second, the bird's eyes should match the bottom of the brown elastic.
Level 10-9
Two boomerangs, two big reds. First, the top of the beak should be equal to the bottom of the sling joint. Second, identical to the first. Third, the eyes should match the bottom of the brown elastic. Fourth, the top of the head should be slightly below the top of the sling.
Level 10-10
Three big reds. First, make sure that the center of the bird is "even" with the bottom of the junction. Second, the eyes should be about the same size as the brown elastic. Third, the eyes should be equal to the top of the elastic.
Level 10-11
Three big reds. First, the beak should be slightly below the bottom of the brown band. Second, the body must be equal to the lower part of the junction between the two branches of the sling. Third, the body should be equal to the lower part of the brown band.
Level 10-12
Two big reds. First, the eyes should match the bottom of the brown elastic. Second, the top of the plume should match the bottom of the brown elastic.
Level 10-13
Three big reds. First, the top of the eyes should match the bottom of the brown elastic. Second, almost the same as the previous one, but a few centimeters lower. Third, the top of the eyes should be equal to the bottom of the joint.
Level 10-14
Two big reds. First, the eyes should match the bottom of the brown elastic. Second, the top of the eyes should match the bottom of the rubber band.
Level 10-15
A big red. Pull the rubber band all the way down, so that the rightmost part of the bird's body touches the "body" of the sling.
Eleventh World
Level 11-1
One boomerang and two big reds. First: pull to the far right, making sure that the top of the head is equal to the top of the brown elastic. Second, same as the first. Third, top of the plume equal to the top of the sling.
Level 11-2
Three big red shots. First, the top of the plume will be equal to the top of the sling. Second, the top of the plume will be halfway between the top of the sling and the top of the brown rubber band. Third, the top of the head should be equal to the top of the sling.
Level 11-3
Three big reds. First, the top of the head will need to be slightly above the sling. Second, the top of the plume slightly above the sling. Third, top of the plume equal to the top of the sling.
Level 11-4
A big red shot. The top of the plume should be equal to the top of the sling.
Level 11-5
Two big red shots. First, the top of the head equals the top of the sling. Second, the top of the plume equals the top of the brown rubber band.
Level 11-6
A boomerang and a big red. First, the top of the plume equals the bottom of the brown elastic. Second, the bird's eyes equal to the top of the rubber band.
Level 11-7
Two big red shots. First, the eyes will need to line up with the top of the brown elastic. Second, the eyes aligned with the bottom of the brown elastic.
Level 11-8
A big red shot. The top of the plume will need to line up with the top of the sling.
Level 11-9
Three big red shots. First, the top of the head should be equal to the top of the sling. Second, the top of the plume equals the top of the sling. Third, target the remaining pigs.
Level 11-10
One boomerang and two big reds. First, the top of the beak should match the bottom of the U. Second, the top of the head should match the top of the brown rubber band. Third, the top of the plume equals the center of the brown elastic.
Level 11-11
Three big reds. First, the top of the head equals the top of the sling. Second, the top of the plume equals the top of the sling. Third, identical to the second.
Level 11-12
Three big reds. First, the top of the head equals the top of the rubber band. Second, the top of the tuft slightly above the top of the elastic. Third, the top of the tuft exactly in the center of the brown elastic.
Level 11-13
Three big reds. First, the center of the bird's body should be equal to the lowest part of the brown rubber band. Second, the eyes should match the bottom of the elastic. Third, the lower part of the bird must be equal to the lower end of the sling.
Level 11-14
One boomerang and two big reds. First, the top of the plume should be equal to the top of the right root. Second, the top of the plume equals the top of the sling. Third, identical to the second but slightly lower.
Level 11-15
Two big reds and a boomerang. First, the top of the plume halfway between the top of the brown rubber band and the top of the sling; will have to fly between the left tower and the yellow ball. Second, the top of the beak equals the bottom of the brown rubber band. Third, the top of the bird's head equals the lowest part of the brown rubber band.
Video Solution - Playlist
Click here for the playlist!
Video Solution - Level 1-13
Video Solution - Level 2-13
 Angry Birds iphone
- iphone
- pspgo
- ps3
- x360
- Wii
- 3ds
- pc
- android
- ipad
- wph
Exit date: February 12 2010


