


Please note:
The solution is based on the American version of the game, so it is possible to find differences for the Spanish version.
EPISODIO 1: THE FIRST TURNABOUT
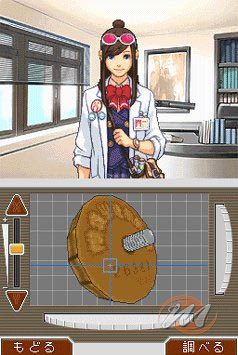
This is your first case. At any time, you can take a look at the COURT RECORD by clicking on the top right. For now, the only evidence you have is your attorney's certificate, and the victim's autopsy. You will be asked questions by the judge. Your answers must be, respectively, to the first: Larry Butz; to the second: Cindy Stone, to the third: Hit with a blunt object. A statue will then be added to the trials. After that, Cindy's passport too. Let Larry do the talking. Both times, your answer doesn't matter. Now is the time for testimony.
SAHWIT'S TESTIMONY 1
Your goal is to find a lie in the testimony, and prove it with evidence, of course. However, if you take the wrong evidence too many times, a game over will come out. You will have to press on the sentence concerning the time of the murder. Look for evidence that contradicts what he said. Look at the autopsy and you will find them, because it says that Cindy died between 4 and 5. You have found the lie.
SAHWIT'S TESTIMONY 2
Press on the second sentence, and Mia will say it sounds false. In fact, the televisions are turned off when there is no electricity. Present the blackout sheet as proof.
DAY 2
Mia won't help you. The inconsistency concerns the presence of a watch as a murder weapon ... although it is already known that the murder weapon is a statue. Present it as proof. So when the judge asks if you have any problems, say YES. The contradiction lies in the fact that Payne would have had to enter the apartment to find out about the clock. Phoenix will continue in his reasoning. Now choose "Try souding the clock". You will see that there is a 3 hour gap, which is the same gap between Sawit's response and the time of the murder! However, you will have to prove that the clock was three hours behind ONLY the day of the murder. Turns out the clock was three hours behind because the victim was previously in Paris. You will have solved the case.
EPISODIO 2: TURNABOUT SISTERS
DAY 1
Examine Maya's body, taking the items. Now examine the note that falls from Mia's hand. Then click on the arrow that goes to the right. Examine the phone, trying to make a phone call, to notice that there is something strange about the receiver. Beware of the woman outside. Go back to the reception. Talk to Maya. Then give her the RECEIPT. Gumshoe arrests Maya. When you meet her again, say "It's up to you". So talk to her again, about everything. He will give you a MEMO for his cell phone. Accept his request. Talk to her again about the day of the crime. Remember to tell the detective the right name, Gumshoe. Talk to him about Mia to get the Autopsy report. So talk to him about Maya, and about Edgewort. Don't forget to give Gumshoe the Memo from Maya's cell phone. Talk to Edgeworth. Give the MEMO from Maya's cell phone to Gumshoe. He'll give you the phone. Go to the Gateway Hotel. Examine the two glasses on the table, then pay attention to the screwdriver. Then talk to April. Now try to find the lawyer for Maya. Head to the Grossberg office. As soon as he hears Maya's name, he will refuse to cooperate. Go back to the prison. Talk to Maya about her family. You will learn something about his mother's enemies. You will be the one to defend it. Before you leave, give your cell phone to Maya. Then go back to the Hotel. You will be asked to give Maya a message about a Mr. White. Now is the time to look in the drawer. You will find the WIRETAP, add it to the evidence. Now get ready for the court.
GUMSHOE'S TESTIMONY 1
If you don't find any contradictions, press all the details until the witness says something wrong. In particular, regarding the second sentence from the end. Gumshoe will tell you he has something else to say about it.
GUMSHOE'S TESTIMONY 2
Watch the autopsy immediately to see the contradiction. Prove it, but Edgeworth will ask you when you had the autopsy. Be honest in your answer. Your topic will be quite destroyed by this, then choose a random option from the dialogue. Now you have to take care of Miss April.
APRIL'S TESTIMONY 1
Say yes to the judge's question. Go to the last sentence of the testimony and use PRESS. Ask "I question your testimony". Then "I'm willing to bet that You're lying".
APRIL'S TESTIMONY 2
Use the THINKER on the last sentence of his testimony. After that, choose the phrase "It couldn't have run". So say "because it's empty". To then answer the next objection, present MAYA's cell phone. At the next question, say "Yes". Again, present the THINKER as proof in your favor. To the next question, answer "You had heard about it". Now give the WIRETAP you found in his room. After that, give Edgeworth Maya's cell phone. After that, it no longer matters what question you ask. You will now have two choices: you can continue to examine April May, or you can call Bellboy at your booth. Call Bellboy.
BELLBOY'S TESTIMONY
Click on its last two sentences. Edgeworth and the judge will try to get the witness away. Pick any question, no matter what. After that, say "The man with Miss May". After that, you will get the MAY TESTIMONY, add it to the evidence available to the court.
DAY 2
Try talking to April, but without success. Go to the Grossberg office. You will notice the paintings, and the things on the corner. Examine the corner to find two photographs. Take photo B. Go to the hotel. Talk to Bellboy. Give him the photograph. Take it to the officer to receive the BELLBOY'S AFFIDAVIT. Now go back to the detention center. Introduce the Photograph, to Make Reaction May. Give her the BELLBOY'S AFFIDAVIT too. Now choose "Push her hard". It will give you the info. Go to Bluecorp. Ask him for the up. Say "I've seen it before" about the painting. Go back to the Grossberg office. Talk to him about the testimony, then about his refusal, and then about Mr. White. Mention the painting. Then say "He's blackmailing you". He will tell you everything immediately after. He will tell you to search Mia's office for the next trial. Before you leave, give the photograph. Go to Mia's office now. Examine Mia's desk, then look at the three files. If you search for TZ, you will find that "White" is completely empty. Also look in AI to find a file with Mia and Maya's mother. See also JS. You will notice a file called "Suicide". You will also take the Newspaper Clipping, to put it among the evidence available to the court. Click on Redd White returning to Bluecorp. Give him the NEWSPAPER CLIPPING. As soon as you accuse him, say "You blackmailed him". So say "You're wrong". Now he will testify against you. You will now be in the detention center. You will see Maya on the other side of the window, but she is outside. He will ask you what he can do to help. You can have him leave the cell.
DAY 3
WHITE'S TESTIMONY 1
Go to the second sentence, and press to make it more specific. Look at MAY TESTIMONY. Present the testimony to prove him wrong. Then select "Both are right". Then, indicate the K to represent where the killer was.
WHITE'S TESTIMONY 2
Present the AUTOPSY to contradict it.
WHITE'S TESTIMONY 3
Click on the first sentence he said. Say "very odd", and phoenix will keep pressing. Present the Glass Shards as proof. Now, you will have to present the FLOOR PLANS as proof. It's the showdown.
WHITE'S TESTIMONY 4
Keep pressing on his statement. Mia, however, will have the final test. THE RECEIPT. Go back to the court, prove it, and White will be torn apart. Objection to the request for an extension of the trial, then Mia will give MIA'S MEMO. White will confess everything.
EPISODIO 3: TURNABOUT SAMURAI
DAY 1
Go talk to Maya whenever you want. Then go to the detention center. Ask them about the Steel Samurai. Once the information is obtained. Head to the studio. Ask the guard about the study. Ask her why she suspects Will is guilty. Go back to the detention center. Talk to Will about his Alibi, who contradicts what the security woman said. Ask him about the security lady to receive the POWER'S LETTERS. Now you can investigate the study. Go back to it. Give the POWER LETTERS to Oldbag. Maya will find a GUIDEMAP of the study there. Head out of the studio. Talk to Gumshoe to receive the Autopsy report. There's a photo that serves as evidence against Will. Examine the door to the study. It is blocked. Then examine the mascot on the ground. Then examine the camera. Go back to the gate. Talk to Oldbag again. Ask her everything. Until you get to the automatic camera. Examine the computer. Oldbag will stop you, so head to the employee area. Examine the dishes. Then left, and examine the grate. Enter Will's dressing room. You'll find a CARDKEY in Will's bag. Now you can enter the studio. Go to the employee area. Then towards the main gate, then out of studio one. Examine the door again, use the cardkey. Examine the camera. The assistant will come out. Ask her questions. Talk to her again by choosing "sensig someone", then go back to the main gate. Talk to Oldbag about the assistant. Maya will say something, and Oldbag runs to get her. Now look at the computer. So write 307 for the room number. You will get a photo.
DAY 2
The samurai spear will be added to the test list.
OLDBAG'S TESTIMONY 1
Go to the last sentence, and present the POWER'S PHOT. Oldbag is surprised.
OLDBAG'S TESTIMONY 2
Press on his sentences. Now back to the second or third sentence. You will now have some info about the assistant. Object to the judge.
OLDBAG'S TESTIMONY 3
Choose the third sentence, and present the POWER'S PHOTO.
OLDBAG'S TESTIMONY 4
Click on its last sentence. This is important information. You will have to accuse someone of the crime. Choose the woman of security. Press again on the witness when possible. Introduce the SAMURAI SPEAR.
OLDBAG'S TESTIMONY 5
Go to its second sentence, and press. So ask for a break.
DAY 2
Go to studio two. Look at the dishes. Now the door. Also look at the place card with the symbol 2 on it, the study van, the flower bed, and the incinerator. Now go to the employee area. Examine the grate, and go back to the main gate. Talk to the guard. Then head to Will's locker room. Talk to Sal. Ask him about the day of the murder. He'll say he was in the studio with the producers. Go back out of studio two. You will hear a noise coming from inside the building. Go to the main gate. Talk to Oldbag. Now go to the employee area. Talk to the boy. Maya will find you at the EMPTY BOTTLE. Go back to the gate. Get the key from the guard station. Go back to the studio. Come in. Talk to the woman. You will receive the VASQUEZ MEMO. You will have to take it to Sal. Go back to him. Enter studio one. Look at the director's chair. Examine the chair, you will receive the script. Give the script to Vasquez. It will give you important information. Go back to your office. Go back to the studio. Give Oldbag the CARDKEY. He'll give it to the hostage. You will receive the STEEL SAMURAI CARD. Head to the employee area. Talk to Cody. Give him the STEEL SAMURAI CARD. Go to studio two. You will need to find the assistant. Talk to her. When you talk about the hammer, he will say that he knows nothing about it. Give her the STEEL SAMURAI CARD. You will now have the URP CARD. Go to Cody. Now give the card to Cody. Talk to him. You will receive the PATH TO GLORY. Tell Mia "I believe".
DAY 3: HEARING
MANELLA'S TESTIMONY 1
Select the phrase about "skipping lunch", and then click about it. Mia will ask if you find anything strange, you will say it is contradictory. Now Phoenix will talk about the dishes. Go to the last line and tap on it. Sal will admit.
MANELLA'S TESTIMONY 2
You will simply have to press on the witness. First the first thing he says, then the third. Answer "No, It's possible". Then place the CODY'S ROOM at the court.
CODY'S TESTIMONY 1
Present CODY'S CAMERA as evidence.
CODY'S TESTIMONY 2
Click on the second sentence pronounced by Cody. Keep pressing harder and harder. Then give the judge the proof of CODY'S CAMERA, again.
CODY'S TESTIMONY 3
Click on Cody's phrase "That 'all that happened". Then present the "PATH TO GLORY" as proof. Then say "The Steel Samurai didn't win". Again "Steel Samurai was the victim". Look at Cody's photo. Look at number 2 on the photo, which indicates how the Steel Samurai was in studio 2. Point at the number 2 in the photo. Say "Pick the trailer is here". Say "I have a proof". It's about the bottle. Present the EMPTY BOTTLE as proof. You will have to answer the judge's questions now.
DAY 3
Talk to Maya about the case. So go visit Will. Talk to Will. Head through the main gate. Talk to Oldbag. Now to the employee area. Talk to Gumshoe. Add the STEAK PLATE to the tests. Talk, and you will get the SLEEPING PILLS BOTTLE. Now go to the clothes room. Talk to the assistant. Present the "PATH TO GLORY" to the assistant. Now ask her about five years ago. Talk to Oldbag again. Give Oldbag the STEAK PLATE. Oldbag will give you a photo, the FIVE-YEAR-OLD PHOTO. Now go out of studio two. Give Miss Vasquez the photo. So once inside, talk to her.
DAY 4: HEARING
VASQUEZ'S TESTIMONY 1
The NPV will now be added to the evidence. Give the STEAK PLATE at the time of the second answer from the end. Now choose "You didn't eat the steak". Now say "You couldn't, could you?". Read the description of the spear. Present the SAMURAI SPEAR as proof. Then say "I can tell you". Give the court the FIVE YEAR OLD PHOTO. Say "She had another way". Give the NPV to the court. Choose "Of course he was".
VASQUEZ'S TESTIMONY 2
Press on the second sentence starting from the last one. Then present the POWER'S PHOTO as proof. Now say "You saw Hammer limping". Then say "Of course I can prove it". Give the FIVE YEARS OLD PHOTO. Now say "She had no motive". Then choose "Show evidence", and give him a photo of the Steel Samurai, ie POWERS PHOTO.
EPISODIO 4: TURNABOUT GOODBYES
DAY 1
Go to the detention center. Talk to Edgeworth. Give him your ATTORNEY'S BADGE. He will refuse your services. Talk to him for a while. Now head to Gourd Lake. At the entrance you will meet Detective Gumshoe. Talk to him about everything you can. He will have to go back to the police station. Return to Gourd Lake Public Beach. Examine the hot dog. You will then receive a POPPER. Go to the woods. Examine the camera. Use POPPER to destroy it. The guard arrives, give her your ATTORNEY'S BADGE. Talk to her about everything she knows. FIGHT'S CAMERA will now be added to your trials. Go ahead and give her her camera. Go back to the entrance, then towards Criminal Affairs. Talk to Gumshoe, then ask him about the victim. You will receive the AUTOPSY REPORT. Return to Gourd Lake Woods. The first photo has two profiles of people on a boat, with one of them holding a gun. It doesn't matter now what answer you give. The LAKE PHOTO will be added to the available evidence. Return to Gourd Lake Public Beach. Talk to Larry. He will react when you mention Edgeworth's name. Talk to him about Gourdy. You will receive the GOURDY ARTICLE for your proofs. Go back to your office. Then go to the Grossberg office. Talk to him about the accident. Give him the AUTOPSY REPORT. Talk to him about the DL-6. Go back to the detention center. Give Edgeworth the MISTY FEY'S PHOTO. Talk to him about the DL-6 Incident. Talk to him about the suspect. Talk to him about his father. Give him the LAKE PHOTO. Say "Of course we will". He will give you the EDGEWORTH REQUEST. You have to give it to Gumshoe.
DAY TWO: SESSION
The OVERHEAD MAP will be added to the process maps.
GUMSHOE'S TESTIMONY 1
Click on the second sentence starting from the end. The PISTOL BULLET will be added between the tests. Now click on the last sentence. Now it will change version, press this too. The GUN will be added to the evidence. Now you will talk a little with Edgeworth; say "No, I need you here" to Maya.
TESTIMONY OF FIGHT 1
Say "I think there was". Start pressing. You will have to press on all the sentences except the first one. Say "Wrong".
TESTIMONY OF FIGHT 2
Look at the photo. Give the LAKE PHOTO to the witness.
TESTIMONY OF FIGHT 3
Press his sentence about binoculars. Press again, then tap on the new version. Then present the LOTTA'S ROOM. Now choose "Show evidence". Give the GOURDY ARTICLE. Choose "I have proof". Present the FIGHT'S ROOM as proof.
TESTIMONY OF FIGHT 4
Underline the sentence regarding "Watching the boat", then submit the GOURDY ARTICLE again. Now Lotta admits she was looking at the lake. Say "Make her show the englargement". The LAKE PHOTO will then be updated. Then say "Object to the enlargement". Aim at the hand of the guy who fired, then present the GUN to the court. Now say "The victim himself". The AUTOPSY REPORT will be updated. You will now have a copy of LOTTA'S DEPOSITION.
DAY TWO
Talk to Maya for a while. Give her proof. Now head to Gourd Lake Forest. Talk to Gumshoe. Go back to the detention center. Grab Maya, and take her to the entrance to Gourd Lake. Lotta will come upon you, talk to her. Say "Deal". Head to the Public Beach. Talk to Larry. Go back to Criminal Affairs now to see if Gumshoe can help you. Use the METAL DETECTOR. Head to the Boat Rental Shop. After a skit, you will have the AIR TANK. Go back to the public beach. Present the AIR TANK to Larry to see if he can explain anything. Ask him "Is it yours?". Now say "To inflate something". Then "To ask more about the tank". Now talk about "flying air tank". Go to Gourd Lake Woods. Talk to Gourdy's Struggle. Say "Gourdy doesn't exist". Then say "is here". So give her the AIR TANK. Ask her for information. It will also give you the SECOND LAKE PHOTO. Now go to the boat rental. Then enter the tent. Now show the man your ATTORNEY'S BADGE. Say "Promise to run the Noodle". Present the LAKE PHOTO. Now ask him "What he saw". Now examine Polly. PARROT will be added to your item collection. Now talk to the old man about Polly. The combination is 1228. Now ask Gumshoe for info. Ask him about the DL-6. Give him the PARROT. You will now be able to enter the Records Room. Ask Maya for the case summary. The DL-6 CASE FILE and the DL-6 INCIDENT PHOTO will be added.
DAY 3: HEARING
UNCLE'S TESTIMONY
Press on the last sentence of the testimony, the one about man. Press the new phrase now. Edgeworth will be found guilty of murder. Larry will come, and there will be a break. Now you need to hear his testimony.
LARRY'S TESTIMONY 1
Present the FIGHT'S DEPOSITION against the last sentence of Larry's testimony. Larry will provide a new version.
LARRY'S TESTIMONY 2
Click on Larry's last sentence. Now say "We should care". Then present the FIGHT'S DEPOSITION against Larry. Then say "Larry's right". Then present the SECOND LAKE PHOTO. Now introduce the PISTOL. Then say "Edgeworth and the murderer". Now say "I don't know". Then, when the judge asks you, choose the boat shop, and press Present. Then say "The boat shop caretaker". Then say "To create a witness". Watch the process unfold.
DAY 3
Talk to Larry about Phoenix's past. Now go to the detention center to talk to Edgeworth. Ask him why he refused to become a PM. Now ask him about Von Karma. Now head to the Gourd Lake entrance. Talk to Gumshoe, then head to the boat rental shop. Enter the rescue tent. Examine the green box above the television. Inside you will find a letter, which says that you must take revenge. The LETTER FROM THE SAFE will be added to the tests. Give it to Edgeworth. Talk to him about Yanni Yogi. Now after the cutscene head over to Grossberg. Talk to Grossberg about Gregory. Now talk to him about the medium. Now give him the LETTER FROM THE SAFE. You will be given some important information; go to the recording room, in Criminal Affairs. Examine the open drawer in the room. The DL-6 file is empty. Give Von Karma the LETTER FROM THE SAFE. It will attack you both. The bullet will then be added to the evidence.
DAY 4
UNCLE'S TESTIMONY
Click on the fourth sentence. So on the last one. Choose the answer "Yanni Yogi". Then say "Yes, I'm doing it"
POLLY'S TESTIMONY
You will have to press on the first sentence. Now ask "Have we forgotten anything?". Now ask "What is your name?". Then say "Of course". Look at the DL-6 file. Submit the file as proof. Say "Suspect Data". Press the first sentence again. Now ask "What is the safe number?". Say "Actually, it does". Look at the DL-6 and present it as proof by pointing to the Case Summary. Listen to the old man. Look at the continuation.
EDGEWORTH'S TESTIMONY
Choose the sentence in which Edgeworth says there was only one esparto, and give the DL-6 CASE FILE as contradicting evidence. Say the page is "Victim data". Then say "Yes". Look at Gregory's photo. Present the DL-6 INCIDENT PHOTO. Place the pointer over the bullet hole in the door. You will now be able to choose one of the two answers without any effect. Then say "The murderer didn't need it". Now choose "Show evidence" and then present the METAL DETECTOR. Your final test turns out to be the DL-6 BULLET.
EPISODIO 5: RISE FROM THE ASHES
DAY 1
Head to the detention center after hearing the story. Then talk to the woman. Now tell her about Mia. Now Phoenix agrees to stand up for Lana. Head to the crime scene. Go to the right side of the parking lot. Examine the small object on the ground. Add the WALLET to the court evidence. Now point the pointer on the button. There is an ID inside the wallet that belongs to Bruce Goodman. It will be added as evidence. Then talk to the woman, and head to the High Prosecutor Offiice. EDGEWORTH KNIFE will then be added as proof. Examine the trophy on Edgeworth's sofa. It will also be added to the evidence. Also present the prize. The EDGEWORTH PARKING STUB will also be added. Go back down the stairs, then back to the police department. As soon as you arrive, Phoenix and Ema will notice a dancing piece of paper. Talk to the detective. Examine the Blue Budger. It will be added to the evidence. Give Gumshoe the GOODMAN'S ID. Now give him the PROSECUTOR TROPHY. Ask him about the spinning noises. Now Gumshoe will try to help you investigate the case. He will give you the LETTER OF INTRODUCTION. Give Marshall the LETTER OF INTRODUCTION. Now you can look at the garage. Mention the victim, and Jake will provide you with the autopsy. Now go look for your cellphone. Examine the blue key to light it up, then press the recall button. The mobile will be added to the tests. GOODMAN'S NOTE will be another item added to the evidence. Now talk about the "office atmosphere".
DAY 2: HEARING
You will receive the PARKING LOT FLOOR PLANS.
ANGEL'S TESTIMONY 1
Try to press on its first sentence. Then press also on the second one. Now also on the fourth. Now the CRIME PHOTO will be added. Present the Crime Photo, then object as soon as you get the chance. Then present THE EDGEWORTH KNIFE as proof.
ANGEL'S TESTIMONY 2
Submit the GOODMANS 'AUTOPSY REPORT as proof. Then present the CRIME PHOTO as proof.
ANGEL'S TESTIMONY 3
Now click on the second sentence. So again when he asks the question. Now on the third sentence. Again, "Ask further". Now present the PARKING LOT FLOOR PLANS as proof. Choose "Where she saw it". Now head towards the security room. Now make an objection. There is another testimony.
ANGEL'S TESTIMONY 4
VICTIM'S SHOE will be added. Click on Angel's last sentence. Turn the shoe when the judge asks you about the problems. Then present the CRIME PHOTO. Then point at the object that comes out of the counter. Then give the LANA'S CELL PHONE to the judge. After that, Damon Gant will be introduced. The SWITCHBLADE KNIFE will be added to the tests.
GANT'S TESTIMONY 1
Look at the writing on the knife. Then present the GOODMAN'S NOTE as proof. Click on the sentence that begins with "This knife ...". Now click on the sentence that says "A detecive was killed". Ask Gant "Where the Victim was found". Now click on Gant again. Also click on the phrase "I'll cooperate". Now you will need to ask for the victim's ID. Say "This tells me something". Give the GOODMAN'S ID.
DAY 2
You will be back at the Phoenix office. Follow Ema. Use the item given to you by Ema. Look at the blood stains. Dite "The Amount of Blood". LUMINOL TESTING FLUID will then be added to the court. Talk to Angel Starr. Datele la "VICTIM'S NOTE" oppure lo SWITCHBLADE KNIFE. Now give the GOODMAN'S ID. Time the data to CRIME PHOTO. Talk to her about the SL-9. Talk to her about jake. Angel will give you the STEAK LUNCH. Datela a Jake. Now go to the police station. Then to the security office. Leave, and go back to the entrance. Here, talk to Gumshoe. Talk to the man after going to the detention center. Give him the GOODMAN'S ID. Now ask him about the details of the crime. Now ask him the reasons for the arrest. Andate ai Criminal Affairs. Talk to Demon Gant about Edgeworth. Quidni about the accident. Examine the man who is sitting on the desk in the room. The detective will give you the GOODMAN'S LOST ITEM REPORT. Now talk to Gant about "Permission". Now you can enter the rehearsal room. Now Gant will leave. Go back to the Police Department. Then go back to the Security Guard Office. Examine the door in the evidence room. Jake will turn on the player for you. Give him the STEAK LUNCH. Talk about the office desk, then about Jake. Talk to him about the security system, and he will tell you about the ID Card record. Give him the GOODMAN'S ID. Jake will give you the ID CARD RECORD. Now go to the rehearsal room. Gumshoe will meet you there. Vi darà gli EVIDENCE ROOM FLOOR PLANS. Talk to him about everything you can. Dategli lo SWITCHBLADE KNIFE. Now ask him about the SL-9. Now give him the ID CARD RECORD. Gumshoe will recognize the second number. Now examine in the room the white object coming out of the locker on the left, then the imprint of a bloody hand you see on the right side of the room, the broken pieces on the ground behind the yellow box, then the glove coming out of the box itself. , then the cabinet open. Now put the broken pieces all together. Once done, you will have the UNSTABLE JAR. Now break the Luminol and spray the whole area under the yellow box. Now put the spray on the blood print. Now on the top left of the locker. You should find another footprint. Now gumshoe should go, and you go to Edgeworth's office. Now talk to Edgeworth about his trial request. Give him the ID CARD RECORD. The SCREWDRIVER will then be added to the tests. Ora date ad Edgeworth la VICTIM'S NOTE. He will give you the FINGERPRINTING SET. Go back to the evidence room. Choose a print and examine it. So throw the dust away. Look at the two prints under the blood. Add some powder, then throw it away again, getting the fingerprints. Now go back to the locker and examine it. Emma will ask you if you want to look at the footprints. Place the pointer next to the footprints. Now do some kind of comparison.
DAY THREE: HEARING
MEEKIN'S TESTIMONY 1
Click on all his sentences. The ID will also be updated. Now watch the video. After that the video itself will be added to the tests.
MEEKIN'S TESTIMONY 2
Press on the last sentence. Say "There's a problem". Watch the video now. Use the keys to go forward, back, etc. When you see the error, pause, and highlight the error. You will have to watch at the beginning of the video, when people go over to Goodman's locker before it's open. There is indeed a light above the cabinet. Point towards it. Then look at the moment the suspect opens the locker, there is something falling to the ground. Point and press present. Now present the RUBBER GLOVE.
MEEKIN'S TESTIMONY 3
Present the GOODMAN'S LOST ITEM REPORT on the last sentence, the one that says "the detective had to use his card". So say "Object". Call Officer Jack Marshall to testify. You will receive the SL-9 INCIDENT FILES.
JAKE'S TESTIMONY 1
Choose the sentence in which it says it was on the street side of the salon, and present the MARSHALL PRINTS.
JAKE'S TESTIMONY 2
Click on the first sentence. Now click on the last one. Click on the sentence that will be added to the testimony. Then choose "Show evidence". Now watch the video. Then present the EVIDENCE LOCKER as proof. Place the pointer on V. Pause the video immediately after Jake cuts himself.
JAKE'S TESTIMONY 3
Click on all his sentences. Don't ask him when he adds a piece. Introduce the SL-9 INCIDENT FILES on Jake's last stage. After that, say "I object". Present the BLUE BADGER PANEL as proof. Now look at the floor. Present the ID CARD RECORD now.
THIRD DAY
Talk to the girl for a while. Talk about "something puzzling". Now go to the Detention Center to talk to Lana. Talk about today's trial. Talk about Darke's investigation. After that, go to the police department. Talk to Jake Marshall. Talk about the injuries, and also about the friendship between Gant and Skye. Before he leaves, he says he knows Edgeworth is not his enemy. Now head to the Criminal Affrairs, then to the chief's office. The GANT TEAM PICTURE will then be added. Head back to the Criminal Affair. Talk to Gumshoe. Give him the SWITCHBLADE KNIFE. Talk to him about the weapon. NEIL'S AUTOPSY REPORT will be added. Talk about Darke's crimes. Go to Edgeworth's office. Give him the GANT TEAM PICTURE. Talk to Edgeworth about the trophy. Examine the piece of paper that Edgeworth threw away. The investigation letter to the Court will be added. Go down the stairs, go to the parking lot. Talk to Angel. Then go back to Criminal Affairs. Present the LETTER OF RESIGNATION to Gant. You will now receive the GUMSHOE'S ID. Go back to the Chief. Talk to Gumshoe. Examine the lock. Choose "Input number". Put 7777777.Or examine the lock again. There are two things inside. Give Gumshoe the UNSTABLE JAR. Then do "Assimble fragmentes". It will now be made available to the court. Then present the FINGERPRITING SET. Examine the finger in the middle for a good result. Throw away the dust. STRIP OF CLOTH will be added to the evidence available to the court. Now examine the desk. The EVIDENCE LIST will be added. Chief Gant will tell you to leave. Go back to the detention center. Talk to Lana. Tell her about "Damon Gant". Talk about him. Give her the EVIDENCE LIST, the UNSTABLE JAR and the STRIP OF CLOTH. Then talk about "Darke's knife". Now there will be the hearing.
FOURTH DAY: HEARING
TESTIMONY OF EMA 1
Click on Ema's fourth sentence "I'll never forget". After "Hear more". So "Ask about the picture". Look at the evidence you found on Gant's bench. Turn them over, it's a side painting of a man with a weapon. Then present the EVIDENCE LIST.
TESTIMONY OF EMA 2
Look at the photo. Submit NEIL'S AUTOPSY REPORT against the last sentence. When prompted to be more specific, indicate the highest point of the weapon. Then say "There is another one". Show the GANT TEAM PICTURE.
TESTIMONY OF EMA 3
Present the UNSTABLE JAR against Ema's statement in which she said she saw a Blue Badger. Now you need to make the vase look like the Blue Badger. Use vertical positioning to place the thickest part of the pot towards you. Use the arrows to make the two handles point north-east and north-west. Now turn the jar slightly down. You should then form something similar to the Blue Badger. Once this is done, move on. Now say "the location". The next thing to say is "Is in the evidence". Again, introduce THE UNSTABLE JAR. EVIDENCE LAW will be added to the tests. Choose to bring Damon Gant as a witness.
GANT'S TESTIMONY 1
Present the UNSTABLE JAR as proof. Present him against his last sentence.
GANT'S TESTIMONY 2
Press on the last sentence. So on the sentence starting with "I wouldn't be anyone ...". Then choose "Point out accomplice". Then choose Lana. Then present the ID CARD RECORD as proof. Now show the GOODMAN'S LOST ITEM REPORT. Then present the SCREWDRIVER as proof regarding Ganti. You will then have to say "I have no proof yet".
WOOL'S TESTIMONY 1
Click on Lana's line in which she says she made some adjustments to the crime scene. Press again, at the phrase "I broke off ...". Then present the UNSTABLE JAR as proof.
WOOL'S TESTIMONY 2
Present the UNSTABLE JAR as proof. Now Lana will testify.
WOOL'S TESTIMONY 3
Look at the EVIDENCE BOOK. Examine it in all its parts. LANA'S PICTURE will be added. Then say "I cannot show evidence". Now choose "Show evidence", then show "STRIP OF CLOTH". Say "Ema Skye" then. Now look at Neil's photo. Present LANA'S PHOTO as proof. Now say "I did not". Present EVIDENCE LAW to the court. Now it will be the end of the game. Give Edgeworth the EVIDENCE LIST.
 Phoenix Wright: Ace Attorney (Gyakuten Saiban) ds
- ds
- iphone
- Wii
- ipad
Exit date: March 31 2006


