


Please note:
The solution is based on the US iPad version of the game. There may be discrepancies with any other versions.
First steps
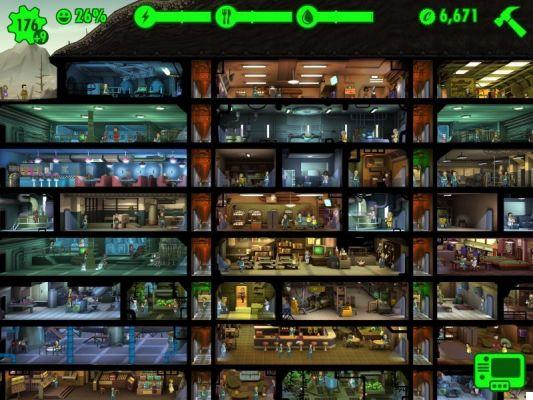
The first impact with Fallout Shelter can be quite alienating due to the large amount of information that the game sends on the screen. So let's first try to clarify the most important ones. At the top left, a number is displayed indicating the number of Inhabitants in your bunker. With a tap on the number you can expand the list of inhabitants, displaying detailed information on each of them. To the right of the number of inhabitants you will find a smiley face, the expression of which summarizes the average happiness level of the bunker. Further to the right you will find the status of the resources available to you. For each resource, a green bar indicates the minimum amount of each resource you need to survive. Always proceeding to the right, we now find the number of Caps in your possession, the hammer-shaped Build key that allows you to build a new room for the bunker and the Upgrade key in the shape of an arrow with which to improve one of the rooms already present in the bunker.
Moving on to the icons on the bottom of the screen, on the left you will find a paperclip that allows you to find out which inhabitants have been assigned to each room: obviously this button only works with the room selected at that moment. Likewise, the Room Stats button located a little further to the right shows the SPECIAL Ability that best suits the room, the time left to complete the production process in progress in the room and a series of other information such as the name of the room. In case you are in a hurry, you can press the Rush button, also on the right. This will speed up the success of the production, but be careful: working in a hurry, mistakes happen and every now and then instead of a product packaged in advance you will find yourself faced with an accident to be fixed.
Finally, the Pip-Boy at the bottom right opens a new submenu that includes five different items: the settings for dealing with music, sensitivity and notifications; the Survival Guide which offers useful information on game elements; the inventory where you can find the objects in your possession that are not assigned to any Inhabitant; the objectives you are dedicating yourself to at that moment (you can tackle a maximum of three every 24 hours); finally, the area dedicated to lunch baskets, to be opened or bought.
S.P.E.C.I.A.L Ability
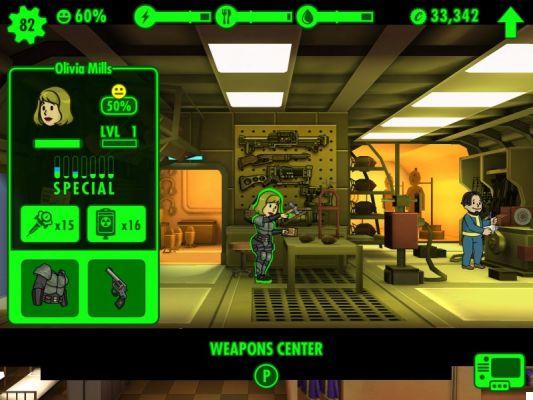
In Fallout Shelter, each Villager is different from their other bunker neighbors. To understand which is the most suitable for a task, rather than another, it is necessary to master the SPECIAL Ability system through which the Inhabitants are classified. The qualities of a Dweller are represented by several letters and the level in each letter indicates the Dweller's propensity towards a particular assignment.
S: strenght - Force
An indispensable feature for those who work in the Power Stations, but also useful for explorers and for the inhabitants assigned to control the door of the bunker.
P: perception - Perception
Intuitively, a good perception is essential for the explorers, facilitated in the finding of useful objects during the outings in the contaminated area. However, it is also very important for those who work in the Water Treatment Plant.
E: endurance - Endurance
Once again, a feature that cannot be missing in the good explorer. Getting tired a few kilometers from the entrance to the bunker could be fatal.
For some reason, however, it also favors the work in the Storage Room.
C: charisma
The charisma will translate into a magnetic attraction that will lead the owner to be the ideal candidate to take care of the conception inside the bunker. However, make sure that the radio "deejay" also has a large quantity of them to make communications more effective.
I: intelligence - Intelligence
The most intelligent of the Inhabitants must undoubtedly be assigned to Medabay or the Science Lab.
A: agility - Agility
Needless to say, agility is a prerogative of the good explorer, thanks to which he will be able to overcome obstacles and unexpected events by returning to the bunker safe and sound. However, the more agile Inhabitants can also be assigned to the kitchen with good results.
L: luck - Fortuna
The accompaniment of good luck is useful for everyone, and certainly also for explorers, whose mission is to find useful objects during their excursions. Our advice, however, is to use the luckiest Inhabitants when you have a great need to rely on Rush, to hope that their precious quality will help you escape a disaster.
Accidents
Given what has just been said, let's immediately deal with the dangerous situations in which you may run into. The most common is the fire that usually occurs as a result of a failed rush. In this case, if there is a Villager present in the room, he will independently take care of coping with the flames (unless she is pregnant, in this case she will flee to safety). The longer the Dweller is exposed to heat, the greater the damage suffered. For this reason it is always better to move other Inhabitants to the room where the fire broke out to speed up the resolution of the problem. The inhabitants moved on this occasion will return to their occupations by themselves once the emergency has ceased. Another consequence of a failed Rush is the infestation of huge cockroaches. These large beasts sneak into a room and from there set out to storm the entire bunker, unless they find one or more armed villagers in their way who can stop them. As before, it may be a good idea to bring some of the nearby Denizens into the room the cockroach is in, but make sure you only select Armed Denizens. The last dangerous situation is the least predictable, but also the most devastating: the attack of the marauders. It happens rarely, but every now and then some human survivors outside rush to conquer your bunker, robbing it of all those resources essential to your survival. From the moment the first raider has entered the bunker, your resources will slowly begin to decline, inexorably, at least until you have eliminated all the raiders inside the bunker. To reduce the devastating impact of this random event, it is advisable to place at least two well-armed, high-level Inhabitants in S (strength) next to the door, to ensure that the marauders do not go far before reinforcements arrive.
Weapons
After reading the previous paragraph you will have understood why the presence of armed men in your bunker is essential to ensure the survival of all. Initially the scarcity of resources will lead you to have to make choices. Therefore, start arming at least one Dweller per room, making sure that in every room in which you activate a Rush there is an armed man to be able to face a possible invasion of cockroaches. Another room that must be equipped with armed personnel as soon as possible is the entrance door to the bunker, which is the first room to come into contact with the marauders.
Understanding how weapons work in the game isn't overly complicated. In general, each weapon is characterized by two numbers that represent respectively the minimum level and the maximum level of damage inflicted by its hits.
To be clear, a 10-12 pistol can inflict between 10 and 12 points of damage per shot. Within this range the damage is established with a virtual dice roll from the CPU, of course.
As you will soon learn, there are different types of weapons, namely low and high level, but also different types of clothing. In fact, the garments that can be assigned to the inhabitants affect their SPECIAL Ability, therefore through the management of the clothing you can condition the skills of the Inhabitants at your disposal and improve their predisposition to particular types of work.
how To
How to build the bunker
Obviously, there is no universal method to build the perfect bunker, so much depends on your propensity (or obsession) towards the organization. In general, there are two different macro-strategies that lend themselves to countless variations on the theme: the all-on-one-floor and the layered-bunker. In the first case, each floor of the bunker will house all or almost all the rooms that can be built, in the second case each level will be characterized by a particular type of rooms (for example, the residential rooms on the first floor, the kitchens on the second, the Power Plant to the third and so on). It is important to remember that it is not necessary to finish a level before starting to build in the one below. Initially give yourself six levels as a limit and before continuing further, stop to increase the level of the population and accumulate a good amount of caps to continue with, but not before having eliminated any rocks still present. Then upgrade the Power Plant and the Water Treatment Facility, then equip yourself with Nuclear reactor and elevators to move faster. At that point your bunker will be equipped enough to expand further underground.
How to balance resources
Maintaining resources is essential for survival. The key to achieving this is balance. Don't get caught up in the rush and the everything-and-now, otherwise failure will inevitably peek around the corner. Whatever strategy you have decided to adopt, pursue it by reasoning about your real needs. Often you will be tempted to expand for the sake of it, but don't give in to temptation. Build an extra kitchen only when you need to feed more inhabitants and upgrade your Power Plant only when the energy produced starts running low. Another detail to always keep under control is the level of the population: having rooms without any Inhabitant to work is not only counter-productive, but even dangerous in the event that an accident occurs nearby.
How to take care of your inhabitants
Initially your main concern will be to increase the population of the bunker. To do this, it is sufficient to leave two Inhabitants of the opposite sex and with high levels of charisma alone in the residential neighborhoods. After conception it takes about 4 real hours for your Inhabitant to give light to the baby and another 4 hours for it to grow and become socially active.
However, there is no need to exaggerate: children burn resources and do not produce them, having too many babies lying around the vault can put a strain on your supplies. In reality it is possible to obtain new inhabitants also by other ways, that is by calling them with the Radio Studio (but in this case they will present themselves at a very low level and their specialization can be long and expensive) or by finding special ones inside a lunch basket. . The number of inhabitants is only one of the elements to be taken into account. The quality of their life is equally important. The higher the happiness level, the greater the amount of resources produced. Keep an eye on the general level of happiness, but don't forget to check the situation of individual workers from time to time. Then make sure that everyone works right and not too much, but also that each worker is assigned to a job for which he is suited. A fairly quick way to increase the happiness of a Villager is to place them in the residential area with another Villager of the opposite sex: in short, the two will end up in bed bringing their happiness level to 100% for some time. But beware of unwanted pregnancies! Finally, pregnant women keep their happiness at 100% for the entire period of pregnancy, during which they can be assigned to certain tasks (Medbay or Radio Studio) with profit. Ah, one last piece of advice: happiness is ok, but don't neglect your health! RedAway and Stimpak are used to maintain the health of your inhabitants to the maximum, an indispensable condition for carrying out their daily tasks in a good mood.
How to cope in the event of an accident
As already mentioned, accidents occur almost exclusively in rooms where a Rush does not give the desired outcome and fails. This means it's not that complicated to predict where and when an accident might break out. To prevent the situation from degenerating, it is therefore sufficient to implement a good preventive work. In general it is best to never leave an empty room without Villagers checking it, but this is even more true for those rooms in which you are setting up a Rush. Whether it's a fire or an invasion of large and angry cockroaches, make sure there is a well-fed group of villagers to face the disaster, possibly well armed. On the other hand, it is less easy (indeed, impossible) to predict the arrival of the marauders, but once again by acting in advance it is possible to contain the damage: specifically, a couple of armed men at the door of the bunker can represent an excellent deterrent, or at least an obstacle. able to save you precious time waiting for you to be able to move reinforcements to that area.
How to be successful in Rush
Rush is risky, but often, very often, just as comfortable. To be successful in the Rush, the only hope is the statistic. In each room, the game provides you with a convenient number to refer to, which is the percentage of probability that the Rush will fail miserably. How to use that number? Well, a lot depends on your experience. In general, 40% is the percentage limit beyond which you should wisely avoid risking a Rush. Yet in emergency situations you will have happened to groped a crazy Rush and see it go to port. Of course, that doesn't mean trying 90% Rush is suddenly a wise idea, of course. In any case, episodes of this type remind us that statistics are statistics: they indicate possibilities, not certainties. So if you think you need it, take some risks, the important thing is to be ready to face the consequences (if you have any doubts, go back to the previous paragraph).
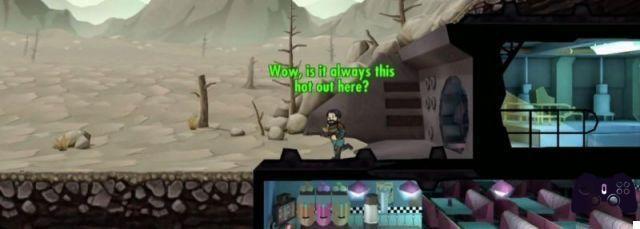
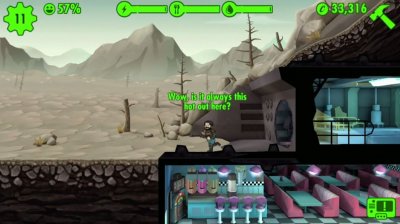
How to bring explorers home (alive)
The activity of the explorers is very important: it is on them that the arrival in the bunker of objects coming from the vast external world that extends outside the bunker depends. In order for this to happen, however, you will need to make sure that the explorers return to the bunker alive after spending time outside. For this purpose, make sure to provide them with a good number of RedAways and Stimpak along with the right equipment that enhances all the SPECIAL Abilities necessary for exploration (i.e. almost all, but above all the stamina).
Finally, remember that once an explorer is called back to base, it will take half the time spent outside to make the journey back home!
Help video
 Fallout Shelter iphone
- iphone
- ipad
- android
- pc
- Xone
- nsw
- ps4
Exit date: June 15 2015


