


Mission 1: The Stark Archives
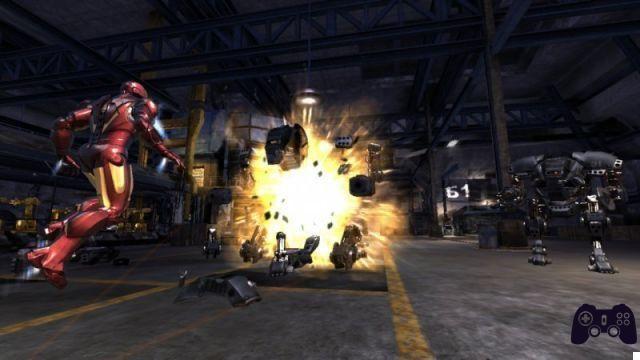
When the cinematic introductory part ends, you will be in control of Iron Man. He has crashed into a building. The first goal is to activate the generator shield. In the left corner of the office there is a hole in the ceiling, indicated by a yellow box (target indicator). Move towards this and press Triangle to fly through the opening. As Iron Man moves around the room, there will be an explosion on the left. At this point the tutorial will illustrate the health bar, at the bottom left of the screen. Fly through the hole in the ceiling to reach the next floor. Tear apart the control panel next to the door and go through. Once the shot has landed, press the on-screen button (Circle) several times to open the door. Now you will begin to try out some things from Iron Man's arsenal. Press R1 to lock onto the target, then press R2 to fire Iron Man's repulsors. Holding R2 will charge the attack. Destroy the bots in the room and head to the door on the left. More enemies will enter. It is necessary to carry out a charged attack or a couple of repulsors to take down the bots. The next room will teach you the combat maneuvers. This time you can learn how to use Iron Man's melee skills. Defeat the three machines that attack you. Once the attackers have been destroyed, try to stop the bots trying to download the data from the server. Tear apart the security panel and enter the next room. Three large mechs can cause problems. We learn that Iron Man can charge a shot by holding down the L2 and R2 keys. Aim at the enemy and you will unleash a powerful attack that will destroy them immediately. Two other big bots are looking for Iron Man. Get them out of the way with this attack if possible, otherwise use any combination of fighting techniques to win the fight. When the enemies are destroyed, fly to the balcony above to continue the game and protect the archives.
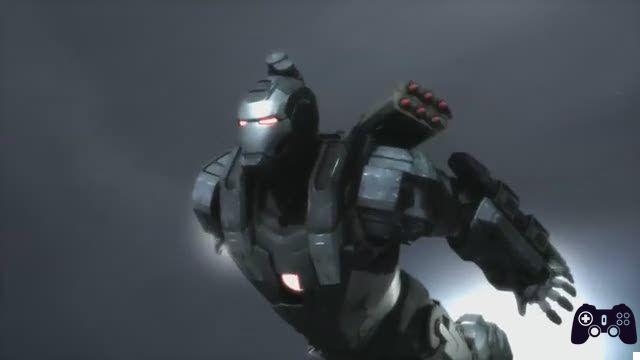
Stark has a brilliant idea to protect the archives, but he needs War Machine to fend off the attackers while he builds the rig. There will be flying bots and helicopters to annoy you. Fly around the area attacking helicopters with missiles and bots with a combination of melee and machine gun attacks. Several smaller bots will enter the scene. Their purpose is to steal the data Stark is trying to protect. Target them (they are identifiable by the green laser they emit) and attack them with the machine gun. A new wave of enemies will enter, again in an attempt to steal the data. At this time we learn of a new skill. Holding the d-pad downwards will activate invincibility or the War Machine's Omega System (increase firepower). Unfortunately, these abilities can only be used once per mission, so use them wisely. Keep flying around the battlefield destroying data stealing bots with your machine gun. After taking them all down, the mission will end with Iron Man and War Machine leaving the archive location.
The Mark VI armor will be unlocked.
Mission 2: Russia and Roxxon
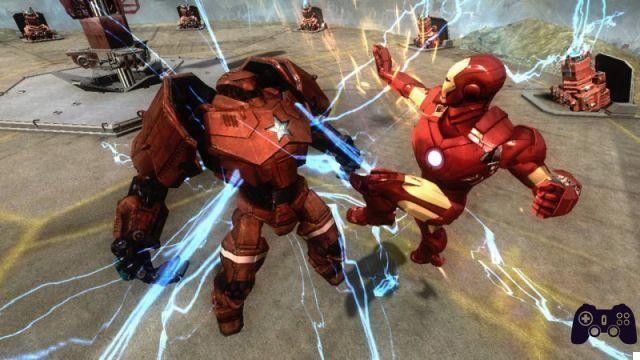
Iron Man leads a SHIELD convoy to Russia. The canyon ahead is lined up with enemy weapons. The convoy is attacked from the ground and air. Iron Man's responsibility is to see that SHIELD planes are not destroyed. Quickly fly between ground missile launchers and air strikes while firing at the enemy. Keep going and fighting until the group arrives at the checkpoint. Once the cutscene is over, Iron Man will have to keep Roxxon "Armiger" away. This enemy has a lot of HP and firepower. The initial attack will come in the form of numerous missiles. When the circle appears on the screen (just above the target) press to deflect the missiles and send them back to the enemy. This will allow Iron Man not to take damage, to the detriment of Armiger. Since the repulsors do not need to be reloaded, use them as your main weapon and continuously. You can also switch to secondary fire such as Rocker Launcher or Missile Launcher. These weapons are very powerful, but they need to be reloaded. Keep your distance from the battle platform and go around firing continuously. If necessary, give a quick touch of L1 which will allow Iron Man to use increased speed to dodge an oncoming attack. When Armiger's energy is waning, he will attempt to hit our Iron Man with a laser. This attack will be difficult to dodge, but try to fly up / down depending on the direction of the attack. The trick is to stay on the offensive. When the enemy is nearly dead, a circle button icon will appear. Press it to deliver the killing blow.
With Armiger finally destroyed, continue down the canyon destroying the enemies you encounter along the way. The convoy is led to a well-armed base. Iron Man's new goal is to eliminate the local planes. The AA Guns won't be the only enemies to face, but there will also be bots and helicopters joining the fight. When the area is clear, enter the tunnel to get to the next area.
This place is overrun with enemy fighters. Fly left to locate the entrance to the target. The door is protected by an energy field. Jarvis recommends finding the power source of that shield protecting the gate. The generators that supply the power for the safety gate are located inside a warehouse in front of the blocked entrance. Fly to the warehouse and go through one of the doors. Inside should be a set of generators, as well as a large mech protecting them. Destroy your opponent, then take out the generators. Return to the now open security gate and enter the building. Log in to the terminal. Move to the deck of the battlecruiser and locate the displacement doors. The opening of the bridge is indicated by the yellow target signal. Find the console and activate it. This action will release another Armiger. This fight will be exactly like the one against the first Armiger. Once you have destroyed it, fly into the hangar indicated by the beacon.
Inside, Iron Man will encounter more resistance in the form of enemy attacks. Take them down mercilessly and move to the part of the room where the Tesla unit is, then destroy it. Once the unit has been destroyed, head to the opposite side of the starting room to locate a second Tesla unit. Be careful, there will be numerous large mechs. If you still have the power of invincibility available, use it, it could prove very useful. Either way, destroy the mechs and then the Tesla unit to complete the mission.
The Iron Man Mark II costume will be unlocked.
Mission 3: The Crimson Dynamo
Iron Man will now face an even tougher battle. Numerous mechs enter the department store and have only one thing in mind: destroy Tony Stark. Do not stand still and fire the repulsors without ever stopping. If you get close enough, the mech will appear to be vulnerable to melee attacks. Then, look for the exit marked by the yellow square. Interact with the wires next to the gate and the gate will open freeing enemies. Take them out, then exit through the open door.
Two mechs will try to hit Iron Man around the corner. Charge one attack and destroy one, then fight the other (or make another charged attack). At the end of the corridor Iron Man will have to blow up a door. Inside the next room are several mechs and a Tesla reactor. The Tesla unit has stabilizers which are located in every corner of the room. After clearing the room of enemies, destroy each of the stabilizers. After destroying the last stabilizer, a ventilation door will open. Fly through this hole and escape the explosions within a minute and a half.
Stark is now on the hunt for the missing SHIELD agent, Black Widow. Jarvis recommends penetrating the area system to locate its location. The base has two well-guarded locations marked as targets. One of them is a console that will allow Iron Man to communicate with Black Widow. After clearing both areas of enemies, you can find the console in the area to the left of the start of this part of the mission. Once the console has been hacked, when Iron Man comes out of the buildings, many enemies will appear. Aim at them and fire to take them down. The second goal is to find Widow's location. It appears to be inside the building guarded by Armiger. Fly and circle the Armiger, staying far away. Alternate repulsors and missiles until Armiger is destroyed. If you're having trouble, this may be a good time to use Iron Man's invincibility.
With the Armiger destroyed, Iron Man and Black Widow will reunite. After the cutscene, the goal will be to defend the landing zone until our allied team arrives. A new bar will appear at the top of the screen. It's about Black Widow's health. Try to defeat the enemies as fast as possible. Quickly alternate aiming at enemies and keep a steady stream of fire to keep her safe.
Black Widow has been rescued and Iron Man will be able to shift his attention to Crimson Dynamo. The first objective that must be achieved is to destroy the coils indicated by the yellow signal on the central structure. Once destroyed, it will be necessary to defeat Crimson Dynamo. He has the ability to come dangerously close to Iron Man to try and do some damage. The first thing that needs to be accomplished is to hit the boss. Similar to the fight against the Armigers, you need to alternate between repulsors and missiles to get the maximum damage possible. Trying to get around Dynamo in circles could be a mistake. We must take advantage of the central structure, it will serve to block the attacks, keeping the HP level of Iron Man at an acceptable level and hitting as much as possible.
At the end of the mission, Mark I's outfit will be unlocked.
Mission 4: PROTEAN
Activate the console just in front of you and listen to the conversation between Stark and Jarvis. Once the door opens, enter the next room and use the console to activate the next platform. You will have fallen into a trap as you will fall downstairs with lasers crossing the screen. Avoid them and reach the bottom, fight against the bots. Afterwards, enter the hall and destroy the turrets that protect the next door. Once the turrets have been knocked down, the door will open, to reveal a console in the corner of the room. Iron Man's costume was infected with PROTEAN. Stark commands Jarvis to eliminate the affected systems.
The door behind the console that compromised Iron Man's suit leads to several bots to destroy. Iron Man can safely take out most of the room's enemies without even entering. There will be at least two near the exit (yellow marker) that will not run towards Iron Man. In order to take out these two, move to the right and target them from a distance. Use the environment to protect Iron Man from any incoming attacks. Blow up the door that the enemies were protecting and go up the ramp.
At the top of the ramp are a couple of bots. These enemies mostly favor melee attacks and can easily damage Iron Man. Once the two bots are destroyed, blast yet another door to find more enemies to take down. Iron Man must reach the room where his weapons system was infected with PROTEAN. At this point, melee attacks will be the only option. When the room is clear of the enemies, go left to destroy the two generators. Use the console.
After doing this, fight the incoming enemies, then exit using the same path as the first leg. When you get to the marked target, you should notice a large hole in the ground. Go down into the opening in search of Kearson Dewitt. As you move between the doors, you will encounter a PROTEAN hybrid in a hall. Unleash Iron Man's most powerful attacks on this powerful bot. Take cover and ... start running! Fly to the end of the corridor to start a cutscene. You will be taught a skill to defeat the hybrid. Iron Man will have to move to each of the three marked targets nearby and turn on the devices. Press Circle on each and move the left stick from side to side to activate each portion of the power supply. Once the device is powered up, attach Hybrid with everything you have. When his health is depleted, the PROTEAN hybrid will begin to repair itself. During the repair procedures, it will be immobile. Fly away and enter the adjacent room. Find the console in the center, near the window overlooking the room with the hybrid. Activate the console to defeat the PROTEAN hybrid!
Mission 5: Operation Daybreak
The SHIELD helicarrier is under heavy attack. Iron Man will have two objectives in this mission: to defend the Helicarrier and to protect Stark's plane. There is no specific strategy, move to the enemy and try to defeat them. Get up in the air around the area where the enemies are attacking and constantly use the repulsors, alternating between missiles.
Mission 6: War Machine
The AIM Armiger has a lot of HP that War Machine absolutely needs to reduce, but it also contains enough weapons to bring any super hero to its knees. To complicate matters, the presence of bots and the need to protect a Helicarrier. By themselves, they wouldn't have been a big deal, but in the presence of this Armiger it's a whole other thing. By the way, keep an eye on the two bars at the top of the screen. The HP of the Armiger and that of our Helicarrier are reported.
The weapons of the Armiger include regular pistols and a dreaded missile launcher. The real problem will be later when you have to avoid a powerful laser beam that reduces War Machine's shield and HP very quickly. So try to avoid the laser absolutely.
This is a more difficult mission than the others, so upgrade your gear. You will have enough points to upgrade the Armor Piercing Ammo, the Minigun and purchase some modules (damage, rate of fire, efficiency). Improved miniguns and missile launchers should lead you straight to victory!
Combat is similar to previous ones against the Armigers, except for the obvious reason that the latter is more powerful. The Armiger will move around the helicarrier attacking the SHIELD ship and War Machine. Sometimes, the Armiger will become immobile and glow green. During this phase, mini-drones will be released that will attack with multiple lasers. The missile launcher will do a nice job, hitting several enemies at a time. When the target is locked on the Armiger and the War Machine is attacked by a flying bot, the crosshair highlights the latter. However, the primary objective always remains the Armiger, it is only to pay attention to the bots that often distract you from your primary task and that in any case must be eliminated. Make the most of your skills and you will be able to destroy this tough enemy as well.
Mission 7: Storm Warnings
Stark has rearranged AIM's Arimger and is going to use it on this mission. Escort the Armiger through the base by attacking the bots and turrets that try to stop your progress. The turbos for Iron Man and War Machine are disabled during this mission. Instead, holding down the d-pad allows Iron Man to highlight a target to attack for the Armiger (turrets for example). Use the aiming system to take down the wall. Once you get past the area, you will need to fight a couple of bots and turrets before you get to a checkpoint. If the Armiger takes too much damage, it can be repaired, just move to the machine and press Circle to "heal" it.
After the cutscene we find a group of Armigers who have come to greet Tony. Iron Man must remain close to his "stolen" Armiger during this battle. Proximity to the car will have the double benefit of providing protection and easy aiming at enemies. Destruction of the enemy will lead to another checkpoint. From this point to the arrival of the great wall that blocks the path, simply escort the Armiger through the canyon, paying attention to the usual turrets, while Iron Man will concentrate on the flying bots.
Once you get to the huge wall, destroy it using Armiger's weapons. The goal is now to disable the GrEENGRID framework. Here, too, it is necessary to get rid of the turrets. Iron Man, on the other hand, will not only have the task of taking down flying bots. In the center of the area is the structure that moves below the ground level. We need to find the large aperture marked by the yellow lens. Shoot the blue pulse of energy. Once it has been deactivated, Iron Man will have to fly into each of the three transmitters and move them. Find the yellow marker and press Circle next to it. Once the animation begins, quickly tap Circle to move the device. If Iron Man is hit by a turret or bot during the movement of the power arm, the power arm will return to its original position. Also, you won't need to move all three arms before time runs out. If the timer reaches zero, simply attach the blue pulse again to allow the arm movements to be activated again. This part of the level will become much easier after the turrets are destroyed.
Mission 8: LAST
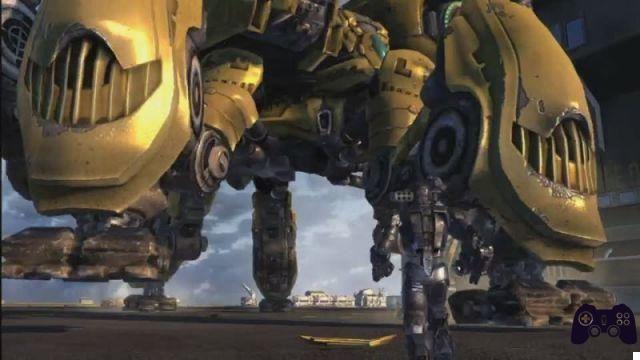
This mission will require the joint efforts of Iron Man and War Machine. The Ultimate boss is a very large and powerful enemy. Unfortunately (for him) his attacks follow a set pattern, not very demanding to learn. When Ultimo raises his arm, he is about to unleash a barrage of missiles. Press Circle when it appears on the screen to send them back to him. If this fails, Ultimo will throw a laser from his eyes. This laser can easily be avoided by going up or down at the right time. Another attack of his is to try to hit you with his right hand, which can be avoided by simply moving away from his arm. Finally, when War Machine approaches Ultimo, the enemy will attack with a large explosion that can knock War Machine backwards. If the latter falls to the ground, Ultimo will attempt to trample him. In order to avoid being crushed by Ultimo's inevitable massive weight, War Machine must first stand up (by pressing Circle) and then shoot (aim, then fire!) At the target at the bottom of the villain's foot.
Next, move close to Ultimo's chest. This will have two positive effects: 1) it avoids a lot of Ultimo's attacks; 2) allows War Machine to direct fire at the blue circles on Ultimo's chest. Once one of the blue circles is hit, an icon will appear on it. Move to this and press Circle to remove a piece of Ultimo's armor. There will also be some targets to hit in the back of Ultimo. These can be attacked when the enemy is stunned, i.e. by throwing missiles back at him, firing at him or hitting his foot. Once these "targets" have been removed, the fight will go inside the giant bot with Iron Man.
Inside, Iron Man will face Kearson DeWitt. The latter will try to hit him with a spin attack. The best way to avoid damage and unleash your attacks on the enemy is to always turn the area in circles. Press the L1 button to dodge DeWitt's attack. After Iron Man does enough damage to him, DeWitt will release turrets. Continue with the same strategy used previously against DeWitt (turn, turn ...), and shoot the turrets using the L1 key dodge when they try to hit you. Once the last turret is destroyed, the gameplay will return to War Machine.
The goal is now to remove four of the arc reactors. Once the fourth reactor has been removed, you will regain control of Iron Man. This fight against DeWitt within Ultimo remains the same as before. Turn around the enemy, shooting tons of lead at him and avoid his shots with the usual L1. The key to success is not to stay at close range. Once it runs out of different energy, it will release turrets. Also take down these turrets to enter the last phase of the fight against DeWitt that will not bring new surprises. Once DeWitt is out of action, return to War Machine outside. Avoid Ultimo's attacks and hit his head to end the mission!
Congratulations, game complete and Iron Man costume unlocked!
Video - Part 1
Video - Part 2
Video - Part 3
 Iron Man 2 ps3
- x360
- ps3
- Wii
- psp
- ds
Exit date: April 29 2010


