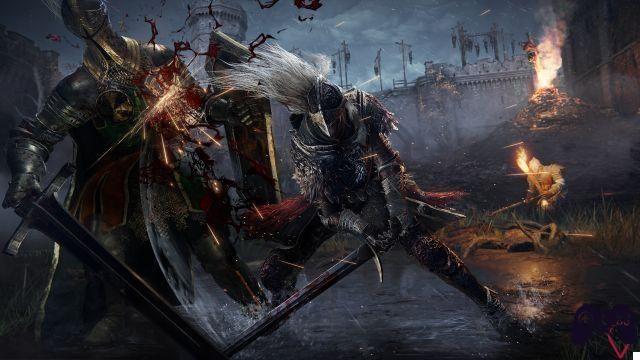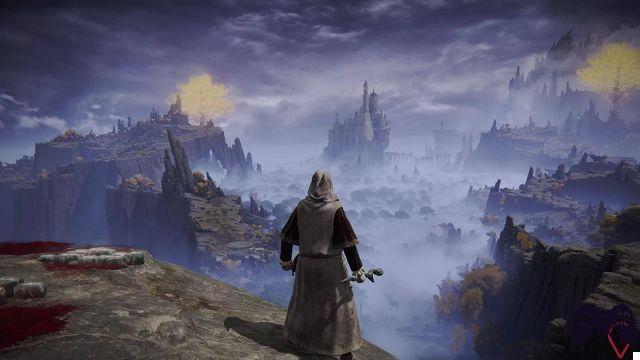
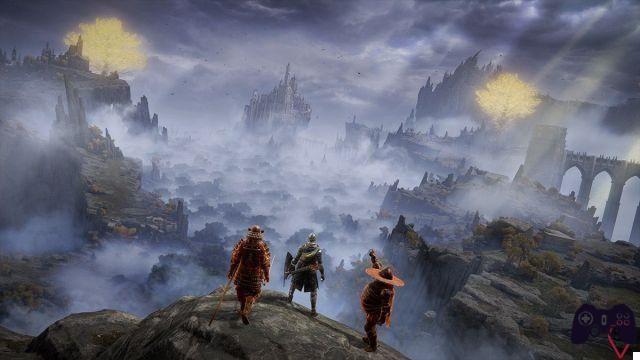
After triumphing against the first real boss of Elden Ring and having obtained the Rune Major, you will pass the Castle of Grantempesta, and you will arrive at Lake Liurnia, Located north from Sepolcride. It is a stimulating land to explore, and in which you will find different points of interest, both in terms of churches or important buildings, and of course the bosses to defeat: in this guide we will show you where to find and how to defeat all the bosses of Elden Ring in Liurnia Lacustre.
We remind you that if you are in difficulty with some of the aspects concerning Elden Ring, you can find everything you are looking for in our guide to trophies and platinum, including those to the bosses of the other areas of the game, such as that of the Peninsula of tears, of the most initial Sepulcride, or of the underground areas. If you have not read it, we also refer you to our review of the game.
Before continuing, thank you the portal powerpyx for making their demonstration videos available to the public, some of which we report below to get you an idea. The tactics described in the text are written based on our gaming experiences, and will not always coincide with the videos, which may show only one of the possible approaches. There will also be links with the fights we have carried out.
ATTENTION: we remind you that being a guide to the bosses, you may receive unwelcome spoilers about what awaits you in the Liurnia Lacustre area of Elden Ring, so we invite you to proceed in reading only with this awareness.
Rotting Knight - Very Easy / Easy
It is located in Liurnia lacustre, in the Acquacheta cave. Explore the dungeon to the end, being careful not to get poisoned (we recommend having items with you that can cure you of poison). The dungeon is located in the southernmost area of the lake, just below the first point of Grazia di Liurnia Lacustre. For both the dungeon and the bossfight, if you have obtained it, we recommend that you keep the Talisman of the blessed dew, to counteract the effects of the poison (since you will revive yourself very easily).
It is a knight who fights with two weapons: a spear that also inflicts sacred blows, and a sword. He will cross them in front of you to parry, so avoid attacking him in these cases, as he will be able to perform a counterattack of light. Being a humanoid knight, you may not have too much trouble taking him down, especially if you summon an ash to act as your scapegoat: if the knight tries to hit your invocation, you will have a free critical hit in the back every time, or you can hit it to the bitter end with your spells from a distance. If you are his target, simply dodge at the right time, or stay out of range of his attacks.
If you defeat him, you will receive theWinged sword emblem e 3300 rune.
Find the video of the fight at this link, a 1 hours, 55 minutes e 33 seconds.
Mother Tree Burial Guardian (3) - Easy
It is located in Liurnia Lacustre, in the Catacombs at the foot of the cliff. You will find the dungeon on a narrow slope, starting from the strip of land that on the map is to the right of Lake Liurnia (start from the point of Grazia Main road of Liurnia Nord). It is a very uncomfortable dungeon, which in addition to the usual mini feline gargoyles will see us fight with fierce brutes, much bigger and more dangerous (be careful of their holds!).
This is the third boss of this type we meet in Elden Ring, but the first who instead of using a sword uses a magic staff. The pattern of physical attacks is almost the same as the others we have encountered (he stands up to strike, uses flames and so on), however with his cane, when he falls from above, he manages to create shock waves with an average flow rate. Also, when we are at a distance, he will use the staff to attack us with magic.
Clearly it is a bit more difficult than the previous ones, clearly also accomplices a greater life and greater damage inflicted, however you can take advantage of the opportunities that you can create with the summons. If you have a magical build you will have an easier time, but be careful when it will cover the space that divides you in a short time. The melee tactic is still the same, but watch out for shockwave hits and homing magic.
As a reward for defeating him, you will get the Ceneri at mercenario in Kaiden e 3200 rune.
Find the video of the fight at this link, a 1 hours, 6 minutes e 45 seconds.
Adan, fire thief - Easy
It is located in Liurnia Lacustre, in the Eternal jail of the evildoer.
He is not an irresistible boss, and he does not have a disproportionate amount of life either. However do not underestimate it, and don't be fooled by the rather funny look when compared to the other bosses. It is a humanoid that makes use of fire spells, which given its small stature can avoid (without dodging) your spells cast at man height. Also, his spells are extremely harmful, and especially the fireball that then explodes could kill you in one fell swoop. Also be careful to get too close, because his very rapid flare-ups can roast you without giving you the opportunity to recover and / or react.
How then to fight it? As mentioned, it is not irresistible, so if you manage to get close and hit it hand to hand, with due caution, you can chain combos and take away a fair amount of life. Also, when he doesn't cast spells, he will often run towards you (almost awkwardly, at a not-so-fast speed), so you just need to take the right timing and make lunge attacks with a weapon that allows you to. This boss does not have a phase 2, so you can play your strategy on it for the duration of the fight (he has a vial to heal himself, but he can only use it once).
You will receive the powerful spell as a reward Flame of the fallen god, Besides 3800 rune.
Find the video of the fight at this link, a 2 hours, 7 minutes e 22 seconds.
Cavalier Limiere – Medio
You will find it in the Crystal clear lake cave in Liurnia Lacustre. This is a very dark dungeon, so we recommend that you equip the lantern on your belt, or always have a flashlight at hand. It is a den of demihumans, and also an important dungeon, because once the boss is defeated, a new door will take you to a new NPG () and a point of Grace.
The Cavalier Limiere will be fought basically like the Limiere Alacre we faced in Sepolcride, with the difference that in this case the arena will be smaller, and full of obstacles. Its features are clearly better, but you should have a few more levels too.
This is a very fast boss, try to dodge his attacks a lot. If you have a ranged build, try to use a summon to avoid being attacked and be able to hit it undisturbed, but remember that it dodges quickly, and could reach you in one movement. With a totally melee build, try to remember his pattern, and dodge at the right time, but it will take some patience.
When you defeat him, you will get the Cerulean amber medallion e 3600 rune.
Find the video of the fight at this link, a 2 hours, 32 minutes e 5 seconds.
Tibial Sailor (2) - Very Easy / Easy
It is located in Liurnia Lacustre, proceeding north from the point of grace Main road of Liurnia Nord, but do not follow the road, go up on the spit of land on the right, towards the octagonal tower.
Certainly one of the initial enemies that received the biggest boost. If you can watch out for its attack from above and the skeletons, it still remains harmless. The tactic is the same as that of the first encounter in Hydrocanto Village, but it will take longer as it will be more resilient, will have a higher life bar, and when it teleports it will do so at greater distances, causing you to lose sight of it more often.
Also defeat this sailor to get the Ashes of the skeletal bandit, a Deadly root e 4700 rune.
Find the video of the fight at this link, a 3 hours, 22 minutes e 48 seconds.
Crystallian - Easy
You can meet him at Lake Liurnia, in the dungeon of the Crystal Gallery of Raya Lucaria. A fairly recommended dungeon, since in its caves you can find many forging stones 2 and 3. Inside Elden Ring and Liurnia Lacustre you will also meet others, but not all will be bosses and not all within the guide.
It is a very deceptive type of enemy, given that its crystalline features they will prevent you from taking massive damage, but only at the beginning. To make him vulnerable you will have to hit him repeatedly, regardless of the type of attack. When he is first stunned (and you can perform a critical attack), the resistance will be destroyed and will begin to take much more damage (normal, in short).
His attacks are made with two rotating rings, one large and one small, which he can use as melee weapons or throwing weapons. The range of the attacks is not huge, so you can stay at a distance without risking much, but watch out for when it starts spinning like a top. If you have a summon to create numerical superiority and increase the pace of your attacks, you will quickly arrive at the moment when you can deal serious damage to him.
Defeating him will get you the The gray ball of the miner e 3000 rune.
You can find the video of the fight at this link, at 1 hour 28 minutes and 30 seconds.
Crystallian (stick) and Crystallian (spear) - Medium
You will find it in the Crystalline cave of the academy, a dungeon located in a cave on the west side of the island where the Raya Lucaria Academy is located (on the lake, you do not have to go up. This is the first double boss of Elden Ring that you will find in the guide of those present in Liurnia Lacustre.
More than difficult, we are facing a very uncomfortable fight. We will be against ben 2 crystals this time, one equipped with a stick, and therefore making use of stone-chisel magic, and a second with a spear that will continually try to tease us, even with single movements. As with the Crystallian we dealt with earlier, you will have to hit them with consecutive hits to bring them to collapse and take normal damage. The difficulty is that whomever you choose to strike first, the other will attack you, since you are outnumbered. Using a summon can even balance the score, but be aware that some area attacks may bother them (for example if you choose wolves).
If you have an intelligence build, try to keep your distance and go round and round, attacking the one with the spear (the one with the stick will practically always remain fixed in the center of the arena), and dodging the magical attacks that will reach you. The tactic is similar even if you play melee, but in this case the invocations take on even greater importance.
A general tip is to take advantage of impact weapons, take advantage of attacks from behind to stop the crystallians from attacking, and then try to hit them repeatedly as they rise, dodging and attacking again at the right moment.
Your reward will be witchcraft Crystalline emission e 3300 rune (However, going up the elevator immediately after, you will arrive on a high tower where you will find a casket with witchcraft Magic land).
Video of the fight at this link, a 0 hours, 33 minutes and 57 seconds.
Drago di scintipietra Smarag – Facile/Medio
This dragon is found in Liurnia Lacustre, proceeding north from the Grazia del Temple district, asleep on the shore of an islet. Behind him lies the body of a stonecutter sorcerer, who holds the Academy stonecutter key, which you will need to enter Raya Lucaria.
If you've already defeated Agheel in Sepulcris, you won't have too much trouble with Smarag either, since the bosses are virtually identical, if not for the different element (stonecutter instead of fire). Fight on horseback, make the most of the mobility and amplitude of the arena, always get behind him. Attack legs and wings, be it melee or with magic attacks, and watch out for when he knocks on the ground or gives you a tail swipe that will also turn him towards you. When flying high, try to always be aware of him so as not to get hit, be it the swoop or the magic fire (you can also try to run to the right or left in case.
If you defeat it, you will get it 14.000 rune it's a Dragon heart.
Find the video of the fight at this link at 41 minutes and 50 seconds.
Bird of Death (3) - Medium
You will find it in Liurnia Lacustre, just north east from the point of Grazia dell 'panoramic island. ATTENTION: like other bosses of this type, it appears only at night.
Like the other two bosses of this type you have met, only with slightly improved stats, face him as you always have, also using the horse to dodge or go around him.
If you defeat him, you will get 6600 runes and the talisman Red feather branched sword.
Video of the fight at this link, a 27 minutes and 13 seconds.
Bird of Death Rite - Medium (sorcery) / Hard (melee)
You will find it in Liurnia Lacustre, in the northern grace point of the academy's suburbs, take a few steps south to make it spawn. To combat it, it is advisable to have a level equal to or higher than 65 and with an upgraded weapon at least a level 10. (ATTENTION, appears only at NIGHT, go to a nearby grace point, speed up the time until night, then reach the area).
As you will understand at first glance, this type of boss is a more powerful version of the Bird of Death you met in Sepolcride and in Penizola del Pianto. Unlike these, the Bird of the death rite is much more dangerous, because in addition to physical attacks, it also uses a magical component - and real spells - which will annoy you a lot, especially because they will inflict status. "Assideration". The worst part is that its reach is very wide, and will also use some area attacks. Beware of his charges, and his streaks of magic that will reach you. Keep your distance when it charges attacks, such as the explosion or sword. Attention also to the rain of swords.
If you use sorceries you will have more chances of hit it while staying at a safe distance, although some of his attacks are well able to catch up with you, always be ready to dodge, jump and accelerate with Torrente to avoid a bad quarter of an hour. Self playing melee will be much more complicated, try to hit him two or three times while he's not attacking, and the rest of the time try to dodge.
First of all, know that it is practically unthinkable to fight it on foot, and that getting on Torrente's back will be essential to win.
You will kill him and receive sorcery Grudge of the ancient death e 7800 rune.
Night Knight (3)
You will find it in Liurnia Lacustre east, proceeding northwards starting from the point of Grazia Main road of Liurnia Nord (go past the battlefield where spirits and knights are clashing, and go further). ATTENTION, appears only at NIGHT, advance the time until the night from the point of Grace mentioned. This is the first of the two bosses of this type present in Elden Ring in the guide dedicated to Liurnia Lacustre.
It won't be a complicated fight, face it on horseback or on foot, from a distance or melee. If you concentrate on hitting the horse, it will fall and allow you a critical attack before it gets back up. If you will face it having obtained a level 55 and up, you will be in full comfort zone, however pay attention to the location, which could be narrow between rocks and trees.
Defeat it and you will get the reward War Ash: Ice Lance e 5600 rune.
Video of the fight at this link, at 1 hour, 20 minutes and 10 seconds.
Night Knight (4)
You will find it in Liurnia Lacustre, on the road in front of the Grazia del East gate of Raya Lucaria (the one at the right end of the bridge). ATTENTION, appears only at NIGHT, advance the time until the night from the point of Grace mentioned. This is the second boss of this type present in Elden Ring in the guide dedicated to Liurnia Lacustre.
The pattern in which the Night Knights patrol the highways is repeated. Also in this case the location will be between trees and rocks, but with a slightly greater breath than the previous one. His strength is equal to the other knight by Liurnia Lacustre, and also the weapon is the same, as well as the tactics. Dodge his predictable attacks, focus on the horse, and take the loot home.
Defeat it and you will get the reward War Ash: Giant Hunt, Ascialunga of the night riders e 5600 rune.
Video of the fight at this link, a 0 hours 17 minutes and 48 seconds.
Carian Knight Bols - Very easy (melee) / Easy (ranged and magic)
You can find this boss of Elden Ring in Liurnia Lacustre (the second of the guide in a jail), in the Eternal galley of the Cuckoo.
It is a giant, but it also makes use of some very powerful sorcery and physical attacks, some even quite fast. In this case we are faced with a boss who, if attacked hand-to-hand, can go down with a few well-aimed hits, while if you have a magical build you may have a few more problems.
If you attack with a sword, as soon as it is born you can hit it with two or three lunges loaded to the legs, maybe one on each leg: the boss will collapse and you can make a critical attack on the head. As soon as he becomes tangible, repeat. Three or four times should be enough based on your level, and best regards.
For magic or ranged attacks, we know the story well: keep your distance and spam spells, but be careful of the great range of the attacks and the fact that they can reach you quickly.
Kill it and you will have it as a reward 4600 rune and sorcery Phalanx of the Greatsword.
Hand-to-hand combat video at this link, go to 2 hours, 51 minutes and 10 seconds. For the magical ranged one, we refer you to the video below.
Spirit Summoning Snail - Very Easy
You will find it in the Dead road catacombs, a dungeon located west of Liurnia Lacustre, in the outermost strip of land on the coast. A very simple dungeon, which nevertheless sees the need to discover some illusory walls to be completed. First meeting with this type of boss in Liurnia Lacustre and in Elden Ring, as well as the guide.
The boss won't be too uncomfortable a customer, but his summons will be. The Snail will in fact be hidden, but his summons will be annoying. Kill the first enemy she summons, and try to kill her before she summons more or she goes into hiding again. She has neither a great life bar nor a great stamina. Attacking her with the sword, a couple of well-aimed combos are all it takes.
If you feel like it, you can completely ignore the summoning, and avoid making invocations yourself: the Snail will be invisible but it will emit a faint white glow, also quite easy to spot, look for it and hit it, inflicting a lot of damage. She will move a few times, but you just need to find her and repeat. If you manage to dodge the blows of his summoning, you will have achieved the maximum result with minimum effort, very quickly.
If you kill it, you will get the Ashes of the Stonecutter Wizard e 3000 rune.
Video of the fight at this link, a 4 hours, 5 minutes and 42 seconds.
Mother Tree Avatar (2) - Easy
It is located under theLesser Mother Tree located in the upper right area by Liurnia Lacustre. Before facing it, we advise you to kill all the horned creatures in the area, some of which you can safely attack them with a critical behind while they are intent on praying. This is the first of the two Avatars that we will meet in this Elden Ring boss guide dedicated to Liurnia Lacustre.
The fight won't be anything overly complicated, because it is a copy of the Avatar that you defeated in the peninsula of crying, the only thing that changes are some stats. At this point in the game also, if you have a level above 50, you can get by without too many problems, just be careful of his attacks.
Kill it and you will have it as a reward 5800 rune, Broken tear of the veil of magic, Broken tear of the veil of lightning and Broken tear of the sacred veil.
For the video of the fight, go to this link at 1 hours, 2 minutes e 20 seconds.
Onyx Sample - Easy
You will find it in Liurnia Lacustre, starting from the Grazia del Retro of the Carian Maniero, and heading east. It will be in the Eternal galley of the royal tomb. In order to inflict good damage on him and not engage in a attrition fight, it is advisable to face him from the level 70 and up.
It is a very readable enemy, although you will have to be careful of its spells. Magic attacks from a distance. Whether you are using a magical build, or are dedicated to melee attacks, there are simple ways to get rid of him without too much effort.
In the first case, use magic Carian broadsword to destabilize it and stop whatever action or attack it is doing (as well as dealing damage to it), but you can also just dodge and spam spells from a distance. If you have a melee build, dodge his magic attacks, and decide whether to parry or dodge his slow longsword attacks. It doesn't have an excessive amount of health, and the damage you deal with sharp weapons is good. The powerful attacks they will create pretty good openings.
Defeat him to get Sorcery as a reward Meteorite e 3600 rune.
For hand-to-hand combat, go to this link at 2 hours, 30 minutes and 30 seconds. For the magic build combat, follow the video below.
Mother Tree Avatar (3) - Easy
You can find it atLesser Mother Tree in the strip of land to the west at Liurnia Lacustre, just above the point of Grazia della Rebuilt Tower. This is the second Avatar we will meet in this Elden Ring boss guide dedicated to Liurnia Lacustre.
The fight won't be anything overly complicated, because it is a copy of the Avatar that you defeated in the peninsula of crying, the only thing that changes are some stats. At this point in the game also, if you have a level above 50, you can get by without too many problems, just be careful of his attacks.
Kill him and you will get rewards 5800 rune, Cerulean crystal tear e Disruptive crystal tear.
For the video of the fight, go to this link at 2 hours, 42 minutes e 50 seconds.
Real Restless Spirit - Medium / Difficult
You will find it in Liurnia Lacustre, in the Ruins of the King, going down the stairs that lead to the basement, but after having hit them (the entrance is an illusory wall placed on the ground). It is located almost at the northeast corner of the ruins.
You have probably encountered this creature before while exploring the center of Liurnia in the lake, at the Ruins. It is a very fast, uncoordinated, unpredictable enemy, but which fortunately (if faced at level 60 or more) will be able to suffer a fair amount of damage. Give it attacks relentlessly, jet of poison, to sudden leaps towards you, everything will be dangerous, in addition to the fact that this time the arena will be very small.
The advice for whatever build you use is to immediately summon ashes to take damage for you and distract the creature, but always remaining ready to avoid hits with dodging. Avoid too long cast attacks, as the Spirit can escape through an underground portal and you may not hit it (or worse, reach you while casting).
Your reward will be 3100 rune, in addition to the chest that you will open in the next room, which will give you the weapon Frozen Needle.
You can find the video of the fight at this link, a 3 hours, 44 minutes e 15 seconds.
Omen Slayer - Easy
You will find it in Liurnia Lacustre, in Albinauri village. it is a fairly hidden location, try to go there during your exploration. It is located in the southern part of the lake, taking a left slope in the area with the yellowish water.
This is not an irresistible boss, but remember to kill the three dogs first in that area, which will otherwise be thorns in the side. Her combos are very readable and short, but watch out for when she jumps towards you with flat swords, as she will take a good amount of life out of you. If you play melee you will have many openings, but beware of the fire that will spit from the mouth from time to time. Avoid parrying, prefer dodging if you are at least in mid roll. With magical builds you won't have too many problems, but try to always keep a good distance.
If you defeat it, you will get it 4900 rune and Crucible knot talisman.
You can find the video of the fight at this link, by going to 2 hours, 18 minutes and 30 seconds.
Ashen Globe Hunter (2) - Easy (magic) / Hard (melee)
It is located at the Church of the vows, in Liurnia Lacustre, and spawns right inside the church, in the same way as the hunter in the master's hut. (ATTENTION, appears only at NIGHT, go to a nearby grace point, speed up time to night, then teleport to the church grace point, and enter. If you die, repeat again). He is Liurnia Lacustre's first night boss in this Elden Ring guide.
The boss is a copy of the first one you encountered, but clearly with improved stats. We advise you to deal with it with a level di 55 or higher, also based on your build.
First of all, lure the Hunter out of the church, perhaps by exiting the side, as you will need ample space to keep away from him. Attacks with the belongs to the telepath continue to be devastating, and even when you are on horseback they will stun or unseat you. In many cases it will only take two hits to die. However Torrent will be indispensable for the fight.
If you want to attack it with the magic, always keep your distance from its powerful attacks and spam spells, but since it has a good life bar, keep at least a couple or 3 cerulean ampoules in stock, as if all goes well, you won't need those to heal yourself. If you want to attack body to body the situation will be much more complicated, because if you get close he will not discount and he will not miss the opportunity to hit you, you will have to be perfect in dodging his shots with Torrente. The simplest move is to wait for the telepathic sword to return to its owner, and at that moment run towards it and make one, maximum two attacks, and then run away like the wind and repeat.
Take this damn down, and you will get it as a reward 6.000 rune and Globe of meat peddler.
Video of the fight at this link, a 0 hours, 47 minutes and 40 seconds.
Cemetery Shadow (2) - Medium
You will find this boss in Liurnia Lacustre, in the eastern area of the map, in the Catacombs of Black Knives. It is the same location illustrated in the map that Fia will give you. The dungeon is a bit tricky, and this is just one of the two bosses you'll find there.
It is a really uncomfortable enemy, (you have already met him in the Wailing Peninsula) and it will be even more so because you will face him while he is accompanied by 3 skeletons. There can be 2 tactics, one of which is faster and more risky. There prima Is that of kill the three skeletons first (reminding you to give them the coup de grace so as not to bring them back to life) and then dedicate yourselves to the Shadow, the second Is that of catapult you on her (although she will be the one to turn you against) and try to get it over with quickly, with the skeletons that will die with the Shadow.
It can be complicated because the 3 skeletons are REALLY annoying, and a summoning could prove providential to keep the Shadow Broker busy while you take out the minions. Always pay attention to the main boss though, because he inflicts bleeding and his damage is really high, especially with the very fast and sequential combos. Furthermore, he is fast and elusive. The sharp weapons are a good choice, and theUchigatana with the Unsheathed causes very high damage to her. Remember to avoid the green sticky ball, or you will not last long.
Kill her and you get le Ashes of great sorcerer e 3500 rune.
Video of the fight at this link, at 1 hour, 34 minutes and 10 seconds.
Black Knife Assassin (2) - Medium / Hard - Easy with D summoning
You will find this boss in Liurnia Lacustre, in the eastern area of the map, in the Catacombs of Black Knives, also linked to a side quest of Elden Ring (guide here). It is the same location illustrated in the map that Fia will give you, and just by defeating this boss you will get the item you are looking for, of which you spoke with the woman. The dungeon is a bit tricky, and this is just one of the two bosses you'll find there. The Black Knife Killer is located at upstairs, you will have to hit an illusory wall, behind which you will find the yellow fog for the bossfight. We recommend facing it from level 55 and up.
Nothing to do with the old version, tired, slow and with part of the missing life that you encountered in Sepolcride, things could get tricky here. Luckily you can summon D, Hunter of the Dead, which is not only very resistant to her attacks, but will also be able to hold her own for a few seconds. This means you can have an easy time attacking her from behind with critical attacks, or magical ranged attacks.
If you want to fight alone (or with a summon, for somewhere in between), know that he has gods quite varied patterns, mixing ranged attacks, melee attacks, a grapple, and jump attacks capable of one-hit throwing you off balance. However, these remain fairly readable, and if you've come to the mid-point of the game, you shouldn't have a problem learning them. You dodge a lot, and don't get hit by multiple attacks in succession, since although a single attack doesn't take away an exaggerated amount of HP, a well-aimed combo could really hurt you.
Kill it and you will get the talisman Cerulean dagger of the assassin, 3150 rune and the key object Black dagger.
Video of the fight at this link, at 1 hour, 38 minutes and 06 seconds.
(TROPHY) Radagon's Red Wolf - Easy / Medium
This boss is located in Liurnia Lacustre, inside theAcademy of Raya Lucaria. To reach it you will have to proceed inside the academy and get to activate the point of Grace of theSchool classroom, after collecting the Academy Key that is behind Smarag, the Stonebreaker Dragon. We recommend addressing it after reached level 50, and with aweapon enhanced at least to level 10.
It is a mid-boss of which it will be relatively easy to learn the type of attacks, but which has some very deceptive timing. Very reminiscent of Sif from Dark Souls, and will attack you with a mixture of melee and magic. Will summon one sword from its mouth, which it will use to hit you closely, and with a medium reach, however it will try to hurt you even with bites. Pay close attention to his jumping attacks, which are treacherous, dangerous and of good range. The magical attacks of him are magic swords which are fired at a distance at the player, as well as a slightly more powerful single magic attack.
If you play melee, don't be too hasty in dodging, because unlike many other bosses, he will not attack as soon as the animation starts, be patient, because as we told you, he has deceptive timing. If you face him with the parameters mentioned above, he will lose a lot of life with your attacks, and a few well-aimed hits will be enough to kill him. With a magical build you have to be careful that it does not get too close, using the summons to act as a shield. Try to hit it often and with fast attacks, because it may move quickly and you may miss it.
Defeat it and you will get the Memory stone e 14.000 rune.
You can find the video of the fight at this link, going to 2 hours, 12 minutes and 10 seconds.
(BOSS STORIA and TROFEO) Rennala, Regina del Plenilunio – Medium
He is the story boss of Liurnia Lacusre, and is located inside theAcademy of Raya Lucaria. To reach it you will have to start fromDebate room (the room where you defeated Radagon's Red Wolf), jump to the stairs on the right in the outer square of the academy, and proceed to the elevator (alternatively, if you have unlocked the shortcut via the roofs, you can go from the left and spare you the phase with the spinning ball). This is the third story boss you will meet in the Elden ring, the only one in the Liurnia Lacustre guide.
It is a two-stage boss where the difference in difficulty is felt. There first stage will prompt you to stun Rennala destroying his spiritual barrier, and to do it you will have to kill the three creatures which possess a similar yellow glow barrier. They will only be available to attack one at a time, and when you kill her third, Rennala will fall to the ground and you can hit her mercilessly.
If you have a melee build, this phase will be very fast, and if you have enough speed and toughness it might take just one "turn" to go to phase 2. If not, Rennala will recreate the barrier and you will have to kill the 3 creatures that protect the barrier again. The attacks you can suffer are different, such as books and objects thrown at you with telekinesis, chandeliers falling on you, or attacks of magical light. In any case, it will not be overly complicated to avoid them, and if you are careful enough you can access phase 2 without even using an ampoule to heal yourself (inevitably, if you are in the magical build, you may have to use that of cerulean tears).
With the second stage i come problems, since you will have to be very fast and not give Rennala breath, right from the start, since a couple of well-aimed blows from her can bring you down without too many compliments. Before starting the bossfight therefore, equip yourself as much as possible with magic resistance, to limit the damage slightly. When the stage at the end of the video begins, Rennala will try to hit you with the Azur Cannon (a very powerful sorcery), so as soon as the fight starts, start running sideways to avoid being hit. Use these few seconds of his attack to summon an ash, because you will need to attack it as much as possible, and also have a scapegoat. Wolves they can be a good choice, especially if you have upgraded them by at least 2 levels.
The Azur Cannon will only be the first of the problems, because Rennala also has other magical attacks capable of hurting you a lot, some of which they chase you (scapegoats are also useful for this. You can still dodge them by rolling towards her), but also real ones summons of monsters more or less strong who will bully you as soon as they can. However, the advice is to focus on her without giving her breath (she doesn't have much stamina and your attacks will always stagger her), but sometimes she'll be able to dodge and attack.
With a build melee you'll have to load head down as soon as you get close while playing with magic you will be able to stay a little more safe, but you will inflict less damage. You might seriously think of switch to melee for this fight even if you are a wizard, because you will be able to not give way to attack yourself and to take away your whole life slowly.
If you defeat it, you will get the reward Remembrance of the Queen of the full moon, the coveted Greater rune of the Unborn, 40.000 rune.
For the combat video with a tactic and melee build, go to this link at 3 hours 48 minutes and 25 seconds. For the tactic with magical build (but with melee attacks) we propose a video below.
(TROPHY) Loretta Royal Guard - Easy / Medium
You will find it in Liurnia Lacustre in carian manero. Start from the point of Grace of upper floor of the manor. Proceed to the top of the stairs and enter the large open space with the chairs arranged in a circle. This is the third Elden Ring boss with trophy in the Liurnia Lacustre guide.
This is a relatively straightforward boss that you will be able to deal with more easily if you have a melee build and an ash summon (also depends on your level). Loretta is a boss a cavallo, which will attack you not only melee charging you with a long halberd, but also with some magical attacks, including homing daggers, magic bow and small comets. Her paces are pretty tight with ranged attacks, so a scapegoat like the Soldiers of Godrick might be ideal to keep her busy. Be careful to avoid his melee attacks and to heal yourself in case of need, provided you are not preparing the swords to hit you from a distance. Your attacks will hurt her a lot.
If you have one build magica, summon the wolves and spam shots from a distance (for at least acceptable damage, you may need to reach level 70 or so).
If you manage to defeat this boss you will get sorcery Heavy bow of Loretta, War Ash: Loretta's Slash e 10.000 rune.
Video of the fight at this link a 2 hours and minutes 3, with the winning attempt a 2 hours, 11 minutes and 16 seconds (in the videos there are several melee approaches).
(TROPHY) Makar Magma Dragon - Medium
You will find this boss waiting for you in Liurnia Lacustre, immediately after the point of Grace called View on the precipice of the ruins. This is the boss who protects the elevator that will take you to Altus. To reach the location, you will have to go from the village to the northernmost and most remote area of the lake (on the map you will recognize it as a very conspicuous black and orange hole).
First of all, we recommend facing this boss if you have reached at least level 55/60. However, if you decide to use ally summons (there are a couple of golden signs deafult outside the boss door) you could get away with even a lower level, being careful not to get hit by the dragon.
This dragon is different from the ones we have encountered so far, given that will not fly, will make attacks even with a weapon body to body, and will be able to fill the ground with washed. Plus, the arena won't be overly large, so you'll have one limited room for maneuver, and you will have to fight without horse. As usual you can decide between the classic two options to fight the boss, if with attacks body to body or be with the magic.
In case you are an astrologer or the like, it would be better for you to evoke at least one of the spirits at the entrance to distract the creature, and inflict damage from a distance, but always beware of its sudden movements that could make it direct towards you. You can also get help from invocations or objects to try to inflict altered status, but be aware that those that go to melee may have a short life (we therefore recommend the spirit Medusa or archers). Know that anyway they are not essential, and keeping a good distance and dodging charges and flames, you could get away with a little patience, since this boss has a lot of life.
If you want to attack melee instead, you will be much more exposed to his attacks, but being a large boss you can hit him very accurately and repeatedly. However, you will have to be careful with the dodge timing, especially when the Magma Dragon uses his sword to deliver a powerful “guillotine” style blow to the ground, which will also hit you with its shock wave… and it will hurt. Try to focus on your body, not your head, which otherwise will see you exposed to flare-ups and bites as well.
This boss has two phases, and in the second, he will even stand up. As always, pay attention to the timing of the dodges, and try to save the ampoules for this phase.
Defeat it and you will have it as a reward 24.000 rune, for an Dragon heart and the sword Magma Dragon Blade Scale.
For the video of the hand-to-hand combat go to this link, a 4 hours, 0 minutes and 40 seconds. For the fight with magic, we propose a video below.
Elden Ring Boss Guide to Liurnia Lacustre is being updated, the remaining bosses will be added very soon.