


Please note:
The solution is based on the American version of the game, so it is possible to find some differences in the Spanish version.
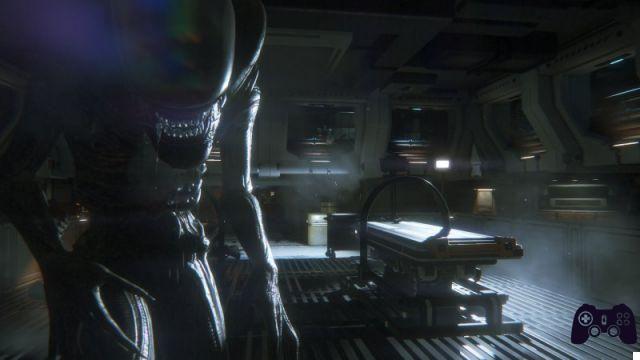
Explore the Torrens
The first mission serves as a tutorial: we will learn how to move, interact with the environment and how to use the weapons that we will collect during the game.
After you wake up, go to the console and log in. After you've interacted with the console, our goal will update: explore the corridors. Before leaving the room, search the lockers to find materials that you will need to build weapons, traps and medkits.
Exit the room and cross the corridor until you reach the door on the left and enter it. Approach Ripley's locker and interact with it to get dressed. In the room you will also find a telephone, that is one of the numerous rescue stations that you will find scattered throughout the game. Also in the room there is also a computer with which to interact and read the messages left by the crew members. Always check every room carefully that there may be lockers from which you can receive precious materials that you will need to create some nice traps.
Once you exit, at the intersection turn right and go straight until you meet Taylor and talk to her. Look around and you will find another terminal with messages to read and other lockers with materials. Exit the room through the same door and turn right to reach Samuels. After talking to him you will get information on how to get to Sevastopol. Now reach the bridge by crossing the room where you found Taylor, turn right and continue along the corridor. After listening to the commander, grab the file from the table to start the cutscene and end the tutorial mission.
Find Help / Sevastopol Spaceflight Terminal - Arrivals and departures
After the little accident, your task will be to find help in Sevastopol's terminal. First you have to change your clothes, save your game and get the materials nearby. Then exit the room with the door on the right and continue down the corridor until you see the fire. Use the air vent you find there on the left and follow the path. Once you exit, continue on the left and you will reach another terminal with messages to read; cross the "bridge" to the other side of the room.
Once you have fallen, follow the road to the chest on the right and take the flare, you will obviously need it to shed light in dark places. Follow the road and crouch to pass the baggage-checking contraption. Continue straight and pass another one by crouching, then there is a button to press on the left that will open the gate, but before entering on the right there is another hole to pass and inside that room you will find other materials to take.
Once you get it, go back to the gate, go through it and go up the ladder. Collect the materials in the room and move on. Keep walking down the hall and up the stairs. You will find 4 terminals (two on each side). Interact with them to update the map. Now you have to restore the power: from where you are there is a small room in the center, enter it and use the generator on the left. Once done, interact with the terminal and select the "restore power" option.
Now, still in the terminal there will be other messages to read, one will contain the combination for the locked door in the hall. Now, knowing the combination, go back to the hall and open the door by entering the combination "0340". In the room, in addition to the materials, there is the project to create the "Medikits".
Grab it and follow the tutorial to create one. Then exit the room and go to the door that has opened. Watch out for the electric cable, crouch down to avoid getting hurt and keep going.
Contact the Torrens / Sevastopol Spaceflight Terminal - Arrivals and departures
Go upstairs and go to the other side until you reach the stairs. Enter the room that looks like a game room and use the device on the left to activate the lighting. Then enter the lighted room, you will find the save console, a dialogue and materials. In the center of the room you will find a panel that you can open by interacting with it, open it, enter it and follow the road until you find another panel to open and exit.
Continue the path, move the cart interacting with it to be able to pass and continue until you reach the main door blocked by an orange device, on the right there is a newspaper.
Get through the main door / Sevastopol Spaceflight Terminal – Security
Now you have to find a way to go through the main door. Then enter the door that was just behind and restore the power. Go back to the main door and go up the stairs on the left. Save your game and on the room in front of you you will find another diary.
Then exit the room and enter the door to the left, then to the right. You will see a corpse and a wrench. Use the vent on the right to reach the corpse and take the wrench. Once you have the wrench, diary and key card, go back. Exit the room and enter the next one, you will find materials and another magazine. Use the air vent to get there.
Go back to the main door, but before opening it you could go back to the door where you turned on the power and open the other locked doors with the wrench, in order to find more materials. Once you've collected everything, go back to the main door and open it.
A movie will play.
Reach the Transit Station / Sevastopol Spaceflight Terminal - Cargo transit
After the cutscene, open the door and follow Axel. Enter the elevator with him and once you exit check around you for other materials. Keep following Axel and doing what he tells you. You will enter an air vent to escape enemies.
When you reach Axel's lair, collect the materials, save and continue. He will give you a flashlight, very useful in dark places, but beware that the batteries wear out quickly. Collect the batteries and look for the ventilation duct marked by Axel, you will find it at the bottom left, before entering it check around the room to find materials and batteries for the flashlight. Once everything is collected, enter the vent and follow Axel.
Find a way to distract the Looters / Sevastopol Spaceflight Terminal - Cargo transit
Now you need to distract the looters. To do this, activate the generator in the room opposite (stay crouched so as not to make noise and not to be discovered).
Enter the panel below the generator to go unnoticed to the next room and go to Axel. Follow Axel until the door opens, save your game with the console next to the door. In the next room you will find a terminal with messages to read.
Axel will tell you that you need to activate the unit. To do this, go to the next room and use the terminal. While turning on the power, Axel will be attacked by a looter, go to help him by hitting the looter. Once that's done, escape with him to the transit link. Axel will soon be killed by a foreigner. Go to the door and call the elevator.
Reach Seegson Communications / Lorenz Systech Spire
After you reach the transit link, go right. Use the left path to get to the upper level of the station and go to the end of the corridor. There is a dead man by the door, search him for materials. Unlock the door and go back to the main room, then go forward. Go to the 1st floor and you will find a console that updates the map. Go ahead to the door on the left and the objective will update there. You will see a looter, but he will escape. At the far end of the room near the door you will find a broken tuner.
After you get it, go up the stairs on your right, you will see the enemies on the opposite side. Go ahead and go to the other side of the room, but beware of a looter. When it is far away, continue and turn right, enter the door and go downstairs, there will be another console that will update the map. Continue down the corridor and enter the room on the left. Go ahead and you will find a location to save the game, a key card and a gun. Once you've got your game and saved it, move on. Use the keycard to open the door and go forward, you will find the blueprint for the smoke bomb and another keycard.
Go to the next room where you will find a corpse and look around to find the flashbang grenade blueprint. Exit the room, go left and, in the room, you will find the Nostromo's black box. After the cutscene, press all the green buttons to open your way and find the piece to make the tuner work. Then go back and enter the room to the right, unlocking the door with the tuner. Inside you will find another newspaper, another card and other materials. Go back to the first stairwell and the objective will update there. Go forward to the closed door and use the tuner to open it. Continue to the desk and interact with the computer to turn off the alarm. You will meet Alien.
Now, staying lowered to make less noise, being careful not to be seen, you have to try to go back and go upstairs. Open the door with the tuner. There will be Alien who will kill the looters who were looking for you before. Now you have to try to get to the central door where you found the tuner and escape. Wait for him to leave and go to the door without running. Use the tuner to open the door and enter the elevator.
Reach Seegson Communications / Seegson Communications - Observation Deck
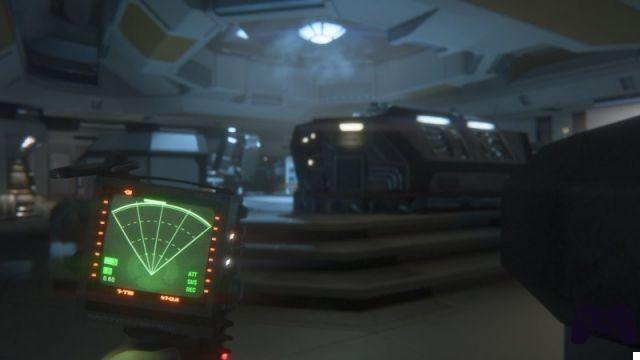
Exit the elevator and update the map. Walk down the corridor until you reach the only available entrance. You will find materials and the motion detector. Log into the terminal and open the door. After collecting the items around there, go right and reach the upper floor, there will be a rescue console.
After reaching the hall, there will be a closed door on the left. Get into the air vent and go forward. You will find the speaker cabinet design on the table. Exit the room and turn left. You will arrive in a room with a closed door. Open it using the tuner. Then go into the outlet at the end of the room. Once you exit, go left, avoiding the motion sensors, and enter the room. Use the terminal to read other messages. Use the rewiring device to turn off the cameras and enter the elevator.
Once exited, save the game with the save console on your left and then update the map with the console on the right. Enter the room on the left and go up the stairs, there will be a terminal to hack. Then go left into the other room and you will find a console, interact with it and the objective will be updated on it. Now you need to find another console to contact your ship. Go down the stairs to the right. Stay hidden and don't let the androids see you. Go ahead and you will find another map update console.
Go to the end of the corridor and enter the room. You will find the EMP grenade blueprint on the table and the rescue console. Use the terminal in the main room. Now enter the vent and escape to Seegson Communications the same way you arrived. After taking the elevator go to Seegson Communications. Use the vent on the left to go unnoticed.
Beware, after exiting the vent there is a possibility that Alien is hiding in one of the crevices in the ceiling, so stay away from it, especially if you see burrs falling to the floor from the crevice. Go through the door to reach Seegson. You will find a rescue console. Save and go downstairs. There will be an android. If he spots you, you must always try to shoot him in the head to take him out. When you reach the elevator, go back to the transit station. From there it is possible to reach Samuels and Taylor. Choose the first elevator on the right to access the Scimed Tower.
Find help for Taylor / Scimed Tower - Transit station
After talking to them, go left and save, then go back and go to the nearest door. Go upstairs and you will see a map update console on the left. Once the map is updated, go right and follow the corridor. You will get a new goal. Use the open elevator to reach the medical facility.

Now turn left and you will see an air vent in the next room. Before entering, take the materials around there. Use the flashlight to help you find your way once inside the conduit. Once out there will be another map update console. Use it and move on. You will also find a rescue station. Go left to talk to Dr. Kuhlman. After the conversation, the objective will be updated.
Help Dr Kuhlman / San Cristobal Medical Facility - Intensive care unit
After the conversation with the doctor, we will have a new goal: to find Dr. Morley's office. Before moving on, search the room and collect the materials. Then enter the vent on the right to get to the next room. You will find a card, materials and the map update console. After collecting the items, you can go back through the pipeline or go downstairs. The second option is the best because doing so will unlock a door.
Go back to Dr. Kuhlman's room and use the rewiring post on the left to move forward. Continue along the corridor until you reach a room with another map update console inside. If you want you can turn on the lights by entering the next room and using the rewiring station. Look around for other materials. Exit the room and turn right. You will reach a room with the rescue console, a diary and materials. Exit through the other door and turn left. You will see a small room with a dead body inside on the opposite side. Search the corpse to find a card. Turn right and continue along the corridor and turn right.
Go down the stairs and go forward. There will be two doors. Hack the right one to get to Morley's office. Use the terminal in the room to get access code 1702. Exit Morley's office, go ahead and turn left. We will find Alien, so you will have to hide under the bed and wait for him to leave and then move on. Once you open the door with code 1702 you will find another map update console. Enter the room on the left to find more materials. At the end of the corridor you will find a door, enter it and you will receive a new objective. Go to the board and examine it to find Morley's rooms. Now go left and go to the staff room. There is another map update console on the left and other materials in the lockers.
Go back to the room with the blackboard and go right. Now you have to go to Morley's rooms to find his key card. Continue through the corridor until you reach the first door on the right. Enter the room and you will find the bomb tube blueprint. There will also be a rescue console. Leave the room and go right. There is a room with some materials on the left, take them and go back to the corridor to reach another door. Update the map with the console on the right, go straight and turn left as soon as possible. There are two bodies in room A-29. Take Morley's access card from one of them and also take the materials in the room.
Exit and you will find a door on the opposite side. Enter the room and open the next door with the tuner to return to Dr. Kuhlman. Once you are done with the doctor go to the elevator and use the Morley card to activate it.
Investigate San Cristobal Medical Facility / San Cristobal Medical Facility - Basic care unit
Exit the elevator and save with the console on the left. Go ahead and take the electric thunder to open the door. Use the terminal and select the last item, then insert the cooling cylinders on the left to open the door to that room and enter it to collect the missing cylinder, return to the room with the terminal and insert the missing cylinder. Operate both of them and enter the room on the right. Use the rewiring station to open the conduit. Before going out, if you look near you there is a card. Then exit the room and enter the shaft in front of you.
When you go out, if you look around you will find crates with other materials. After some exploration, exit the room and turn left. Keep going until a pipe explodes in it. The noise will attract Aliens, so hide in the next room. Inside you will find the map update, materials and a terminal. Use it and start the video. Now leave the room and go left. After crossing the corridor and avoiding Alien, there will be a rescue console, the project for the Molotov cocktail and a terminal. Use it to see the code. Exit the terminal and open the cabinet on the wall.
Go to the next room and open it with Morley's key card. There will be a corpse. Go to the left and you will find another map update station.
Going forward you will find three armed looters. You have three options:
1- kill them with the gun, but you would attract Alien
2- go ahead without getting noticed
3- throw the loudspeaker at them in order to attract Alien who will kill them for you. So you will have to hide and wait for it to go away.
Now continue and enter a room with the medicine for Taylor on the right and the upgrade station on the left. Once you have taken the medicine and updated the map, search around and you will find another card and a terminal with messages. Now you have to go to the waiting room of San Cristobal. Exit the room through the other door and turn right, then left at the end of the corridor. Beware that there is a looter, kill him or go unnoticed. Proceed to the evacuation door and the objective will be updated. Activate the evacuation procedure to open the waiting room door.
Cross the corridor and turn right. You will find another map update on the right. Go through the emergency room and enter the generator room. Your job is to restore the power and activate the systems. There will be switches on both sides, use them. Once the power is restored, an android will activate. Use the electric tonfa and hit it. Hack the console in the center and escape through the waiting room. Beware that Alien will be hiding in the crevices in the ceiling so stay away from it. After the cutscene you have to escape from the fire. Use the ladder in front of you, after going down use the elevator to get to Seegson Synthetics.
Return to Taylor with medical supplies / Seegson Synthetics - Synthetic warehouse
Exit the elevator and enter the vent near the fire. You will see three enemies, throw a speaker, hide and wait for the Alien to do his job and leave. Go forward and then left. You will find a ladder, then go to the end of the corridor to reach a room with a map update and a terminal. In the next room on the right you will find another smoke bomb blueprint, a rescue console and a diary.
Leave the room and turn right. Go down the stairs and open the door in front of you. Go through the corridor until you reach a door on the left. In this room you will find materials and another diary. Exit the room, turn left and enter the warehouse down the hall. Now you have to activate the android.
To activate it you have to go through the warehouse and enter the small room. Here you will find an update for the tuner, a rescue console and a card. Now go back to the corridor and go up the ladder. In the next room you will find magazines and scraps. Then go back down and go activate the android and follow him. Once the android is destroyed, go back and go to the right side of the room. Call the last elevator to create a passage.
After crossing the room, go to the end of the warehouse and call the elevator on one of the shelves on the left to find the cylinder. Once you find it, go back, go repair the elevator and use it. Save the game. Go ahead and you will see some looters. Walk carefully to the door. If it is stuck, open it with the switch in the middle of the room. If the enemies have seen you, take them out, or flee. Once you get to the elevator it will take you to the transit station and back to Taylor.
Reactivate the Transit / Sevastopol Scimed Tower - Maintenance deck
Go through the corridor and save your game. Then go to the door on the left, cross the corridor, open the door with the wrench and call the elevator. In the next room, there is the flashbang project, pick it up and move on. Go to the console in the center of the room and turn it on. One of the looters will go inside. Kill him. Before leaving, enter the room the android came out of. You will find materials and a terminal with messages. Now enter the next room and you will find a gas torch.
Exit the room and go forward. You will come to a closed air vent, but which you can open with the gas torch. You will find other materials, a card and a diary in there.
Go back to the center of the station and call the second elevator.
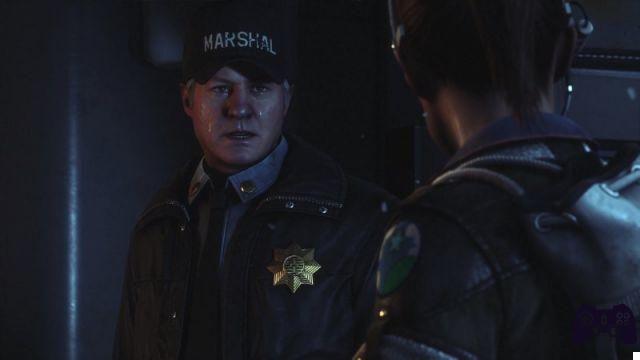
Regroup with Samuels, Taylor and the Marshals / Solomons Habitation Tower - lower level of the Galleria
Before going to the residential area, save your game with the console located near the entrance. Turn right when you can, update the map and go through the door. Go to the main office. You will meet other people, but they are not hostile. Talk to the Marshal and check the room for more materials. Then enter the room on the right and talk to Marlow.
Now you will drive Marshal, the sensor will show you where to go. Follow your companions, you will reach some rocks blocking the way, use a bomb to break through and regroup with your companions again. Turn around and you will reach another ledge. Wait for the companions and then continue towards the alien ship. Follow your comrades. Now cross the room and get a companion to help you climb the ledge and turn off the help signal. Now go back and go down the hole in the center of the room.
Trap the alien in the server room / Lorenz Systech Spire
After hearing Marlow's tale, approach the Marshal to get a new mission: trap Alien. Enter the room to find the flamethrower and other materials. Go back to the transit system and choose the second elevator that will take you to Lorenz Systech Spire.
Once you get out of the elevator, turn right and save your game.
Go ahead, get rid of the android, go to the next room and look to the right there is a button that turns on a fire system. After opening the door, enter the air vent, it will take you to the hall. You will meet two people, but they are not aggressive, you can continue quietly. Go to the hall stairs and go left. Go down the stairs to the lower floor. Go to the office to unlock access to the hub server. Use the terminal and unlock the doors. Go through the door that opened and update the map. Going up the stairs, turn right, go to the back of the room and lock the door with the mechanism next to it. Now go up the stairs again and go right, then left. There is another map update console and a door to lock. Now go back, there is a door on the left that can be opened with the mechanism next to it.
Use the terminal in the center and start the procedure, then go forward to the central section. Unlock the door with the tuner and enter. In the room you will find a couple of materials and a terminal that will also unlock a compartment. Once you have everything, go ahead, go up the stairs and turn right to reach an elevator and use it. Beware of hostile people you meet.
Restore access to Gemini Exoplanet Solutions distribution - Manufacturing and distribution
Save the game and move on. Go through the door and you will see a non-hostile woman. Go forward to the door and go through the corridor to the end. Update the map, enter and move on. There will be a camera, be careful not to activate the alarm otherwise you will alert Alien. Near the door behind the camera you will find the plasma torch. Use it to open the door and you will arrive in a room with an android that will not be aggressive unless he sees you using the terminal. Log into the terminal and unlock the door access. Now leave the room and head for the door on the left. Walk to the end of the corridor and enter the room. Turn left and go up the ladder to get to the upper level.
Once there, go straight into the corridor, turn right inside a room. There is a closed locker. You will find the code in the terminal in the next room (2743). Pay attention to the motion detector, update the map and disable the camera. In the next room there is a lever, pull it and open the nearby door with the maintenance socket, then go down the ladder and return to the lower floor. Go through the door on the right, go down the corridor until you come to another door. You will see another motion detector, turn it off and go to the room in front of you and approach the wall on the left. Pull the lever and return to the center to activate the main console. Once there, before activating it, pull the two levers on the reactor walls. Now log into the terminal. Next to the ladder is a rescue console. Now go back to the room where you met the woman and go left, then left again, open the door, go down the stairs and use the elevator.
Access the Project KG348 Research Labs / Project KG348
Go through the corridor. There is a rescue console in the next room. Turn around and go through the door. You will arrive in a room with other materials. Turn right and go through the door.
Keep going until you get to the last door. Once open, use the console and update the map, then go down the ladder to the lowest level. Now you have to reach the central part of the laboratory.
So, use the way around. Go through the passage marked Synthesis Lab. At the end turn left and go up the stairs. In the room you can save your game and then use the switch.
After switching on, leave the room, in the center of the next room there is a console, use the tuner and activate the emergency protocol. Now you have to escape from the laboratory. Exit the room through the first door and turn right, go to the ladder. After the cut-scene, turn around and go to the end of the corridor where you will see a door.
Restore the pressure in the room and as soon as it is ready, go inside to the airlock.
Find a way inside the Marshal Bureau / Solomons Habitation Tower
Now change, open the door and use the plasma torch to open the next door. Take the first right and grab the shotgun and key card from the corpse. Now go ahead and use the tile to open the next door.
Eliminate the android in the central part of the structure, go through the main door to reach the station. Enter the elevator and go to Solomon's Habitation Tower. Exit the elevator and look for the room. Here you will find a lot of materials and ammo, done that go through the corridor and update the map. the corridor leads to a closed door. When you are there, activate the vacuum cleaner on the right and follow it until you enter the hole in the wall. Once out you will find another project for the EMP and other materials. Leave the room, continue along the corridor and take the first bend on the right and open the door. In the room there is a panel in the floor. Open it and walk through it. Behind a grille you will see a lever, operate it to restore electricity. Now exit the room, take out the androids and go to the corridor on the left. Beware that you may encounter other enemies. Go ahead, a gate will open, so go through it and go right. Go up the stairs and turn left. In the corridor, update the map with the console and head to the exit on the left.
Continue in that direction until you come to a door. On the left will be another map update console. Now go back and go up the ladder. Eliminate the android or pass unnoticed. Once you get to the top, go forward to the door on the left, take out the enemies and continue. Take the first left, collect the materials, save your game and move on. Keep left and turn left at the end of the corridor. Go down the stairs and turn left. Now go straight until you get to an air vent, beware that you will find an android. Once out of the shaft, save your game and move on to get to your destination.
Find Samuels in Seegson Synthetics / Seegson Synthetics - Administration Area
Wait for Ricardo to open the door, then exit the room and head to the transit district of Solomon's Habitation Tower. Go forward in the corridor to the right. On the road you will meet an android, then take the left at the first intersection. You will find another android, once killed turn right and you will arrive at the transit station. Now kill another android and use the third train to get to the Scimed Tower.
Exit and go right. Go through the gate and go right to get to an elevator that will take you to Seegson Synthetics. Exit the elevator and go to the door on the left. Open it using the plasma torch and enter the access code which can be found using the terminal near the reception desk (8382). Enter and go through the vent on the right.
Go up the stairs until you get to an unlit elevator. To exit the elevator, look up and jump up. A little further on you can save the game, then go ahead, exit the room and go right. In the next room, pull a lever that you will see on the left, there will be another in the next room. Now head to the central hall and try walking through the door. It got stuck, so you need to turn off the generators. There are four of them, you have already deactivated two of them, one is near the door and the other in the center of the room. Once the door is open, follow the corridor until you come to another closed door. On the left is a vent, use it to move forward. Once out, activate the button in one of the columns near the desk. To avoid a fight with the androids, run to the door. As soon as you pass it you will be safe again. Go right and enter a small room nearby. Now use the rewiring system to cause a fire to destroy the incoming androids. In the next room you will find another Molotov cocktail and other materials. In the room behind the corpse there is a rescue console and many weapons.
Now go back to where of the closed doors, you will see the androids who are trying to break through the door. As soon as they enter, launch an EMP and finish them one by one. Get the keycard from one of the androids and move on. Restore power by shutting down a generator. then go to the elevator.
Follow Samuels / Seegson Synthetics - Android Orientation
Leave the elevator and go to the guardrail on the right. Press the arrow keys to move to the next area, but watch out for the steam. Follow the corridor to the next area where you can save your game, then go to the next room. Now you will be attacked by two androids, take them out and move on. The next rooms are equipped with motion detectors. Turn them off as soon as you can via the rewiring system. Hack the door and move on. Follow the corridor until you come to a door and an upgrade console. Go through the door and talk to Samuels.
Now to save it you need to turn off the generators in the right order. The correct ones can be recognized by following the cables. The first is the one with the red cable, the second the one with the blue cable, the third is connected directly to a wall socket. The fourth has a deactivated android nearby, while the fifth and last one is near the window, in the center of the room.
After turning off the generators, go ahead. Exit the room and return to the starting point. On the way you will encounter a couple of androids. Go back to the station and use the trolley that will take you to the end. Once there, use the passage to get to the Apollo center. Go left and call the transit shuttle.
Get to Apollo Core / Apollo Core
Go through the door and go forward, you will come to a gate where you have to leave the weapons on the container to pass. Now approach the locked door and activate the Apollo schematics, you will see a code (4930).
Now take the right and come to a room with a console, hack it to access it. Then go back and pass the save console to reach the other side. Once there, there will be a console to interact with. Then go back to the corridor and take the right at the first intersection and enter the vent. Save the game. Enter the door on the left and take the first on the right, there is a gas mask on the control panel. In the next area there are two androids, but having no weapons, as soon as you find the rewiring system use it to ignite the gas and sneak to the right side of the room. You will find a door where you will then be safe.
Follow the corridor and go through the door. Hack the console and save the game. Now you need to activate two main server consoles. Go to the right of the main console, activate the first console from the entrance and go to the vent next to the console. Exit the outlet and go right. Save the game. Watch out for Apollo's security system, press the button and go inside, there will be two consoles above you, one of which must be hacked. Follow the grip on the other side of the core to weaken the system, return to the console and activate it. Once you have hacked the central console, enter the center of Apollo and communicate with him.
Investigate the central reactor / Engineering
Exit Apollo and wait for the doors to close. A door will open for a staircase that leads below to the core of Apollo. Once you get off, enter the elevator. Follow the corridor and return to the central door in order to activate the system that will open the door.
Go through the door, at the end of the corridor there is an android and a motion detector. In order to be seen, enter the vent on the right. You will arrive in a room with a rewiring system, use it to turn off the camera and sneak forward. At the end of the room there will be another vent, update the map and go through it. Once you exit, you will notice other motion detectors, stay on the left of the wall and enter the room, on a workbench you will find the ion torch. Now exit the lab through the same door and cross the room. At the end of the corridor open the air vent with the ion torch and go forward.
Once you exit, save your game and enter the next room. In this room you will find an android, you can kill him or go unnoticed. Now go to the right of the room and you will find the first switch, the second switch is on the other side of the room on the left, then go to the left side of the room to activate the third switch. Now go left and you will find a generator near the door. you will find a staircase that leads you to the upper floor, go through the first door and you will see another block, turn right to take the longer road. In the first room there is an android waiting for you. Now in the next room you will find a shotgun with which you can easily kill the android. Before leaving the room, use the terminal and unlock the door with the code (6832).
Exit the room and turn right. The door is open, follow the corridor and go to the elevator. In this room you will find ammo and a card. Once up, save your game and follow the corridor to a door, then use the elevator that will take you to the lower level of the reactor. Wait until the gun is fully loaded and shoot the androids. Walk down one of the streets and activate the elevator.
Exit the elevator and follow the corridor in front of you. To the right is a flamethrower and some ammo in the crates. Go through the door and you can save the game. In the next room, use the flamethrower to make your way. Use the console on the right and start the procedure, then unhook the mechanism in the middle of the room. Go back to where the save console is and go through the door to the left. Halfway down the corridor you will see a cavity near the floor, go through there. Follow the corridor, then turn left and come to an inactive console. To activate it, you must first redirect the current of the central core. Go left and cross the corridor, halfway through the corridor use the crack to enter the other room. Now restore the power, go back to the previous console and activate it. Escape through the reactor core. So you have to go back to the starting point, take the central path, then turn left and take the air vent in the next room, it will take you to your destination.
When you get out of the elevator you will have to overload the two cores. Go to the main reactor and then turn left to activate the console. To overload it, you have to hack two more consoles around the alpha core. When done, go to the other end of the reactor and repeat the sequence for the other core. Once this is done, you will have a lot of androids behind you. Escape and return to the starting point and activate the overload process, then head to the other side and go through the door. In the corridor on the left go up to the upper floor. Use the two consoles on either side of the room to start the purge sequence, then start the main terminal.
Find a Short-Range Ambulance / San Cristobal Medical Facility
Go through the door in the central area and head towards the transit station. Call elevator 3 to get to Solomon's Habitation Tower. Once you arrive at the station, close the lift and enter the other one, always indicated by number 3, which will take you to the Scimed Tower.
Exit the elevator and go left. There will be a locked door, once open use the elevator at the end of the corridor to reach the medical facility. Exit the elevator and turn left. Cross the corridor and turn left. In the corridor you will find an android. Eliminate it silently or you will alert Alien. Now go ahead, turn left to reach the destination. In the center of the room you will find another diagram of the bomb pipe. Now approach the door on the left and the objective will update there.
Now you will need to find an update for the tuner, it is located on the other side of the room on the left pane. Go back to the door and hack it, then follow the corridor and use the shuttle.
Explore the Anesidora / Anesidora
After leaving the shuttle, save your game with the console next to the main door. Go through the door and follow the corridor until you come to a closed door on the left. Use the terminal on the desk to find the code that unlocks the door (4510). Before moving on, gather the materials.
Go through the door to get to a room with two generators, activate them and hack the console that comes out. Now go back through the corridor and reach the place indicated in the figure. The door on the left has opened. Use the flamethrower to make your way into the next room. Hack the door at the end and go forward along the corridor. Keep walking down the hall until you come to a door and a rescue console. Follow the next corridor and you will come to a small room, use the terminal in the center and listen to Ellen's log. Now you have to stop the merger. Turn left and start the auxiliary generator. Wait for Taylor, then hack the nearby console and turn off the relay. After the cut-scene, escape the station and go to the shuttle. There is only one path, so you can't get lost.
Exit the shuttle and hack the door in the next room to move forward. In the corridor you will encounter many enemies, sneak past or kill them. On the left side, open the air vent with the ion torch and enter it. After leaving the vent, you will find another smoke bomb blueprint and another tile ahead. You will also find ammunition and materials. Go back into the vent and turn left, open the next vent and move forward. You will encounter two other enemies to eliminate. The terminal on the desk can be hacked to open the door. There is an android in the room, so beware. Search all the rooms for badges, ammo, and materials.
After killing all the enemies and searching the rooms, go ahead, cross the corridor on the right, turn left and use the stairwell, then save your game. Go to the reception and talk to Ricardo, then go through the open door to the nearby corridor and call the elevator. Once you exit, enter the room. Inside you will find three armed enemies. Ignore them or kill them. Now go to the corridor on the left, open the door with the ion torch and use the ladder. Once upstairs hack the terminal in order to get inside. Now go to the second console and hack it, then hack the one on the right as well.
Go down the ladder to the lower level and approach the door on the left. Wait for Ricardo to open the door and go inside. Now go inside the elevator. Approach the locker and change. Go to the other side and you will find an elevator on the left. Once used, start the nearby terminal. Use the platform to get to the lower level and enter the dark room. After pulling the lever, go to the right side of the room and pull the other three levers. Once done, turn left to see another lever, use it and go back upstairs. When you log into the console, manually enter the coordinates for the Torrens. The coordinates are displayed on the nearby screen (35 and 75).
Find a way for the Torrens to dock
After entering the coordinates, go back to the nearby elevator and get off, then go back to the station and change. Now enter the elevator and go upstairs, you will see Alien in the distance, then turn left to not be seen, go ahead and use the flamethrower if he sees you. Now enter the elevator and you will arrive on another corridor, go to the reception. After the cut-scene move forward, reach the stairwell.
On the way you will meet Alien several times. Go to the reception, once you arrive go to the elevator that will take you to Solomon's Habitation Tower. Now save your game. On the left there will be an enemy, kill him or go unnoticed, but be careful not to make any noise because Alien could hear you. Open the door with the ion torch, in the next room use the terminal to find the code (1851) and leave the room. You will see a door on the right, enter the code and enter it, use the console.
Go back to the transit station and turn right to get to the reception, use the lever to enter. Keep the flamethrower handy as there will be enemies attacking you. In the room, use the console to start the transit system. Now go right and use the elevator that will take you to the residential area. In the reception, on a bench to the left, you will find a Nostromo register, a card and other materials. Then use the elevator on the right. Save your game and go through the door, watch out for the android. Follow the corridor and turn left, now go unnoticed or face Alien and arrive at a terminal. Get the locker access code (1984).
After taking the magnetic card and the materials from the locker, go to the console, using the magnetic card you will unlock a path, follow it and go left until you reach another door that you can open with the ion torch. Go down the hall and turn left, save your game and get the materials in the room. Enter the vent and then go into the room to the left, make your way with the flamethrower. You will find a magnetic card and a register. Use the tile in the console near the window to open the door to the corridor. Now leave the room and turn right. Follow the corridor and come to the open door on the left. Always be ready with the flamethrower. Use the lever next to the door, now you have to go back to the room with the generator, start it and go back to the room with the broken lever.
Open the door and enter the air vent. Once out, use the elevator, then save your game, go through the door and approach the wall on the right. Crawl and go left, go down the stairs and use the ion torch to open the door where inside you will find another EMP blueprint and a Nostromo log. Exit the room and head to the other end of the station, then take the elevator.
Escape Sevastopol
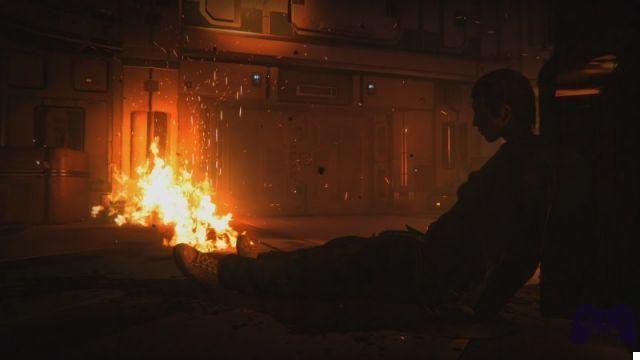
Exit the elevator and save your game. In the next room instead update the maps, then leave the room and follow the corridor to the next room and the objective will be updated. Now you have to hack two consoles on opposite sides of the room while keeping the flamethrower handy. To restore the power, enter the vent on the floor and follow the colored cables until you reach a lever and operate it, then go back to the console and hack it. Now approach the terminal in the center of the room and get rid of the android, then start the process. Go back through the main door and up the stairs until you get to the command center, use the terminal to extend the docking clamp. Now you have to go back, so go down the stairs and go left. Now turn right and put on your suit, you will be attacked, so have the flamethrower ready.
Once they are killed go forward, turn left, crawl under the garbage and go forward. Wait for the Alien to leave and move on again. Go down the ladder and grab the ammo near the door. Turn right and head up, then turn left and cross the corridor. Walk onto the platform and turn right. Jump down and use the ladder. Go ahead, go into the room and use the air vent. Make your way with the flamethrower. Once you get to the elevator, use the ladder on the right to go down. Now down and walk through the flames to the end of the room. Put on the suit and go to the airlock. Once outside, turn left and use the elevator. Keep walking until you come to a transit car, which will take you to the end. Use the two terminals to release the Torrens.
Approach the console in the center and start the release procedure. After the cut-scene head to the bridge, at the end of the corridor go through the door and enjoy the ending of the game!
Click here to see the full solution of the game!
 Alien: Isolation ps4
- ps3
- x360
- pc
- ps4
- Xone
- nsw
Exit date: October 7, 2014


