


Please note:
The solution is based on the US version of the game. There may be divergences from the Spanish version and / or for other platforms.
Prologue
After the skits, you will find yourself in front of the first puzzle.
Puzzle n. 1
The answer is HELPSOS.
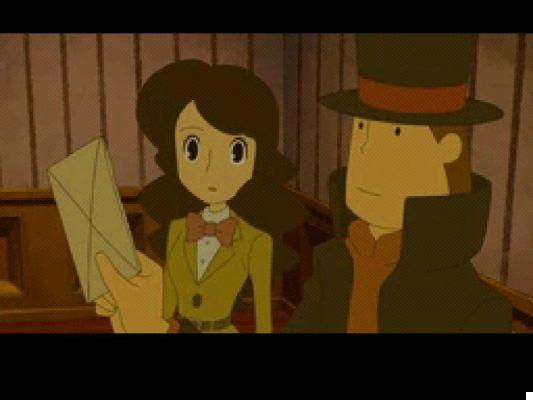
You will therefore have to put up with another cutscene, during which two mysteries will be added to your inventory, and then you can begin your adventure.
Chapter 1 - The Fog of Misthallery
After the skit, you will be told to try interacting with the various play areas to start an investigation. Use the stylus to interact with the environment around you and highlight areas of interest. Interact with the bridge, watch the skit, interact with Aldus. He will ask you to try to find the hint coins: one is in the nearby box, one next to the castle in the lower right, one in the house with the blue roof - in the upper left corner. Then press the shoe icon and proceed to the following area. Talk to Charlie.
Puzzle n. 2
The solution is A, B, D.
So talk to the police officer, get the hint coins: one on the black hat on the right, one from the small tower above the bridge, one from the box at the bottom left. Then press the next bridge to start another puzzle - the bridge is blocked by some ropes, cut the rope on the left to be able to proceed. After the short conversation, run along the bridge, get the three help coins from the three nearby signs. Continue along the bridge to the right. Proceed beyond the blue door, then talk to Brock. Examine the box on the left, starting a puzzle.
Puzzle n. 3
The box you are looking for is on the third row from the top, in the third column from the left.
Then proceed north to a crossroads. Talk to Jasmine to get the following puzzle.
Puzzle n. 4
Take the top left piece, place it in the bottom right corner. Then take the piece in the lower right and place it in the lower left. Take the top right piece and place it between the two pieces you just placed. Take the piece on the left, rotate it once to the right, place it in the upper left corner. Take the last piece, rotate it twice, place it in the only available space.
Interact with the policeman in the center of the screen, he will tell you that you can only pass after solving five puzzles. Press the shoe icon, go left. Interact with Bucky.
Puzzle n. 5
Take the two cats across the river. Go back to the opposite side, get the dog and a chick, take them to the other side. Take the two cats, go back. Take the two chicks, do the same. Go back to the other side, take the two cats, take them over there.
Proceed to the left, interact with Finch, then approach the house. Interact with the mailbox, visualizing a puzzle.
Puzzle n. 6
Take the center piece from the top row, place it in the lower left corner. So take the piece immediately below, place it immediately above, forming the letter P. Take the piece at the bottom right, place it under the mailbox, next to the P. Place the piece at the top left on top of it, forming an O. Then place at the bottom the piece that was at the bottom left; take the remaining piece and bring it to the left, placing it on top of the previous one to create an S. Place the U-shaped piece in the lower right corner, then the last piece immediately above, creating a T, and composing the word POST .
Enter the house, talk to Beth, interact with the wall on the left.
Puzzle n. 7
The solution is 10.
Interact with the door to enter the next room, watch the skits, save the game to get to the second chapter.
Video - Trailer E3
Capitolo 2 - The Boy Who Foretold Disaster
Interact with the mirror on the wall, visualizing a puzzle.
Puzzle n. 8
The solution is B.
Continue to the hall, talk to Beth, go up the stairs to the second floor. Interact with the door on the corridor to start a conversation, during which you have to solve an "unofficial" puzzle. The solution is simple - press the "call Luke" button, then do nothing! Watch the cutscene now, being thrown towards Luke's room. Exit to the corridor, go down the stairs to return to the hall, talk to Beth again.
Puzzle n. 9
The solution is B.
Once out of the hall, follow the arrows at the top of the screen to get to the destroyed house. Talk to Bucky to get the train, then follow the directions that Luke will give you to return to the intersection, from there proceed east, arriving at the library. You will find it closed, so go to the right. After the cutscene, interact with Thomas and talk to him, then examine the pipes on the left.
Puzzle n. 10
Take the lower left piece, move it to the left. So take the piece on the right, move it down. Take the other two pieces of cheese, move them to the right. Take the lower left piece, move it up. So take the small piece inside the bottom right piece, move it to the left. Take the other small piece and move it to the right, then drop the larger piece down. Now take the small piece on the left, move it up and then to the left. Move the key down and to the left. Take the lower right piece, move it up. Take the other large piece on the right and move it to match the other pieces. Take the small piece at the bottom left, move it to the right, then down. Take the angled piece and move it down. Take the small piece in the upper left corner, move it down and to the right. Move the key to the left, then down to the opening. Take the top left piece, move it right, up, right. Move the key to the red area.
Go back to the fork and walk along the path where the police officer was before. Talk to Mido.
Puzzle n. 11
Side A is uphill.
Go up to the park, then talk to the police officer. Right. Talk to Aldus, then follow his instructions to interact with the tube below him. Retrieve the objects he will point out to you; Aldus will then tell you to return to the area where you first met him. Go back to the bridge, examine the crates. Talk to the officer, go back to Ely Street, continue north, entering the hat shop. Talk to Mr. Browne, then north again. At the hotel, repeatedly examine the trees to the right to find a hidden puzzle.
Puzzle n. 145
Take the piece with the pool and place it in the far left square, rotating it so that the pool is in the lower left corner. Next to it is placed the piece with three "paths" and three "trees", rotating it in such a way that no road proceeds to the south. The piece with the four paths and the two trees on opposite sides of the road goes to the right of the last piece placed. The piece with the four paths and the two trees still goes to the right of the last one, rotating it so that the streets are aligned with the pieces around it. The piece with the three paths and a large tree is placed at the bottom, rotating it so that the trees are at the bottom right.
Enter the hotel; after the conversation, talk to the reception to get a puzzle assigned.
Puzzle n. 12
The answer is 25.
Then go up the stairs, reach the door at the end of the corridor, watch the scene and save your game.

Capitolo 3 - The Specter Appears
Explore your room to retrieve the coins. Exit the street, go left towards the entrance. Examine the tree on the left to see a puzzle.
Puzzle n. 13
Proceed north to the wall, then walk around its perimeter. At the dead end, take down, right, down to the first X, pass the second too, reaching the goal.
Enter the bar, talk to Paddy, then use the menu on the right wall to view a puzzle.
Puzzle n. 14
The solution is A.
Examine the area under the chair for a chipped teacup. Go outside, head south, talk to Dominica.
Puzzle n. 15
The solution is the restaurant A.
Examine the water for a "particular splinter". Continue south, talk to Clarence, then south again to return to the atrium of Triton's possessions. Talk to Doland to get a puzzle.
Puzzle n. 16
Brown's ship is the A.
Go back to Ely Park, go left, talk to Bobbi.
Puzzle n. 17
The solution is C.
Continue north to the apartment complex. After the conversation, talk to Hugo, continue west to the central dock. After a conversation, always make your way north and talk to Mido inside the forest. Swerve west to reach the laboratory. Enter the building. Talk to Marion.
Puzzle n. 19
Draw a line from the second point from the top on the left wall to the fifth point from the right on the bottom wall. Draw a second line from the third point from the bottom of the left wall to the second point from the right on the top wall. Draw a third line from the fourth point from the left on the top wall to the fourth point from the bottom on the right wall. Draw a fourth line from the third point from the left on the bottom wall to the third point from the top on the right wall.
Examine the shelf above Marion for a hidden puzzle.
Puzzle n. 146
The solution is 18.
Go back to the forest path, head north, arriving at a house. Examine the pool to locate a hidden puzzle.
Puzzle n. 147
The solution is A, C and E.
Examine the house to hold a dialogue, thus entering Keats' residence. Examine the door repeatedly, obtaining a bottle. Following the teacher's instructions, head to the bar. Going past the harbor, talk to Bucky, then examine the lamp for a puzzle.
Puzzle n. 18
The solution is zero, since it will be day in 12 hours.
Head east to an apartment complex. Talk to Hugo.
Puzzle n. 20
The solution is 8.
Go back to Paddy, talk to him, then head to the hotel, stopping in the meantime at the hat shop, where you will have to talk to the owner.
Puzzle n. 21
The solution is 978564321
Continue inside the hotel, watch the scene, then turn south to get to Great Ely. After the dialogue, go through the park to the west. Talk to Clarence, go west. Talk to Hugo, then north. Once in the apartment complex, you can enjoy the scene at the end of the chapter.
Capitolo 4 - The Shadowy Manipulator
Talk to your room, then examine the bed on the left for a feather. Then examine the chair next to the corner table, visualizing a puzzle.
Puzzle n. 22
Starting from the top right, cut the entire first line to the right, then down from the bottom left corner of the hole, then left, down, left, down.
Exit to the corridor. Talk to Bobbi, go down the stairs, arriving at the hotel lobby. Talk to Joseph, go outside, talk to Chippe for a puzzle.
Puzzle n. 23
Create a line that starts between 9 and 10 and goes between 3 and 4.
Continue west to the bar, talk to Aldus.
Puzzle n. 24
The solution sees you turning your tears to create a heart.
So enter the bar. Talk to Paddy for a puzzle.
Puzzle n. 25
Just taste a donut - you can then determine that the round donuts are creamy, while the square donuts are chocolate.
So head to the park, talk to Clarence to get a puzzle.
Puzzle n. 26
Move the yellow and red blocks down. Move the purple blocks to the upper right area. Move the L-shaped blocks towards the middle row. Move the red block into the hole, the yellow block immediately to the right. Move the blue block down, then to the right. Slide the orange ball to the empty top left corner. Move the light blue block to the area where the orange map was, then the dark blue block immediately to the left. Move the purple blocks to the middle row, then move the orange ball to the right, move the purple blocks to the upper left area. Move the yellow and red blocks next to the dark blue block, move the orange ball to the target area.
Swerve to Murray Street, talk to Jasmine for a puzzle
Puzzle n. 27
The solution is cottage D.
Proceed north, arriving at the apartments. Talk to Hugo.
Puzzle n. 28
In the first row it should be placed white, white, black, black. In the second white, black, black, white. In the third black, black, white, black. In the fourth black, white, white, black.
Go back to the park, then south towards the intersection. Talk to Finch.
Puzzle n. 29
The solution is - six years for the two older brothers, one year for Nat.
Then examine the area under the sign on the left, taking a ceramic container. Enter the library, talk to Olga.
Puzzle n. 30
The solution is 16.
Examine the shelf below Olga to get a rare tome. Exit, then east, cross the bridge to the east, arriving at a closed factory. After the dialogue, talk to Sebastian.
Puzzle n. 31
The solution is 4 feet.
Examine the wall on the left, revealing a hidden puzzle.
Puzzle n. 148
The solution is: only five chests contain gems.
Proceed west to Triton Manor. Talk to Beth to get a puzzle.
Puzzle n. 32
Forniamo la soluzione per ogni riga: 1) 23-22-21-20-19-18; 2) 25-25-26-15-16-17; 3) 29-28-27-14-13-12; 4) 30-31-32-9-10-11; 5) 35-34-33-8-7-6; 6) 36-1-2-3-4-5.
Enter the destroyed house, talk to Brock, continue south along the twin bridges to the entrance to the market. Talk to Taffy, then examine the bushes to the right.
Puzzle n. 33
The solution is B.
Proceed north to the market. Talk to Tweeds, then examine the fruit stand next to him, causing a puzzle to appear.
Puzzle n. 34
You will need to place two apples in the larger basket, two in the middle, one in the smaller one. Then, place the small basket in the large one.
Continue north, talk to Nabby. Continue south, then east, to the market. Talk to Socket and Wren, examine the bushes near the bakery to locate a hidden puzzle.
Puzzle n. 149
The solution is C, so the first section is the same as the second.
Walk north, then west, to the market. Talk to Scraps on the right, then Badger on the left to get information. Following Badger's instructions, go back to Aunt Taffy, until the market entrance. Talk to Taffy again to unlock a puzzle.
Puzzle n. 35
The solution is: 4 diamonds, 3 sticks, 4 hearts, 2 swords.
Follow Taffy, returning to the Tweeds residence. Talk to him to unlock a puzzle.
Puzzle n. 36
The solution is 53.
Received the first medal, move east, reaching the market. Talk to Socket and Wren, then continue north, then west. Talk to Scraps, then to Badger.
Puzzle n. 37
The solution is: flip one of the coins that give heads, then place it on one of the other coins that show heads.
Go back to the market entrance. Talk to Louis for a new puzzle.
Puzzle n. 38
Enter the hole on the right, then follow it to the far left. There will be a crossroads, but you can freely choose one of the two paths, as both lead to the exit.
You will then get the second medal. For the third, examine the second building chimney on the right. Then continue east. At the entrance to the market, examine the umbrella on the candy cart to get the last medal. Go back to the north area of the market. Talk to Nabby.
Puzzle n. 39
Move the 2 down to the empty area on the left. Then the 3 towards the area on the right. Slide the tail, heart and left wing up. Move the 3 out, down, right. Move the right wing to the area where the 3 was. Move the 2 out, down, left. Place the left wing where the 2 was. Slide the 1 and the heart down. Move the left wing into its own slot. Move the 1 up, slide the heart to the free space to the side, then move it down one more. Move the tail down, slide the right wing, heart and tail into the appropriate spaces. So pull up 1, 2 and 3 towards the appropriate spaces.
Go down into the hole. Click repeatedly on the pool, thus gaining access to a hidden puzzle.
Puzzle n. 150
From the platform go right, down, up, up, right, right, left, down, right, down, left, down, right, left, up, up, right.
Continue inside the tunnel, talk to Shackwell to get some information. Examine the back table to the left to get a Clown Mask. Go through the door, arriving at the Bazaar. Now talk to Black Raven, thus having to complete a small "secondary" puzzle: to the first question you will have to answer C, also to the second, while A to the third.
Having solved the puzzle, talk to Crow and follow him to the back. Talk to Crow again, examine the paintings on the left, recovering an item. Go back to the intersection, then continue to Paddy's house. Talk to Greppe, head towards the apartments, then continue north to the arch, where the chapter will end.
Capitolo 5 - The Witch's Castle
Before proceeding forward, go back to view some puzzles along the forest path. Talk to Badger.
Puzzle n. 40
The solution is A-3.
Go back to Grand Bridge, talk to Louis to get another puzzle.
Puzzle n. 41
Place the blue piece at the bottom of the green piece, so that a star is formed.
Go back to Highyard Arch, head north to the square, talk to the man on the left.
Puzzle n. 42
The solution is 15:55.
Right, examine the large window on the house to discover a hidden puzzle.
Puzzle n. 151
Move left, up, right, down, right, up, left.
Continue to the right again, arriving at the police headquarters. Talk to Chippie.
Puzzle n. 43
The solution is D.
Examine the bushes below for a hair clip. Go back to the Grand Plaza, take west, then east, then north. Talk to Chippie for another puzzle.
Puzzle n. 44
The solution associates the red hat with II, the black hat with III, the green hat with IV, the blue hat with V.
Left, then north to the north side of the pier. Examine the sign above the door, displaying yet another puzzle.
Puzzle n. 45
Press the top left, top right, bottom left, bottom right, then center panel.
Continue east, arriving at a dam. Examine the trees on the right.
Puzzle n. 152
The solution is B.
Examine the water under the bridge for a compass. Then right towards the ancient gate, enter and go up the stairs arriving at the desolate garden. Examine the path to bring up a puzzle.
Puzzle n. 46
Starting from the left area, you will have to follow the listed moves: right, down, left, down, down, down, right, up, up, right, right, up, left, up, right, up, left, left, left, up, up, right, down, right, up, right, down, right, up, right, right, right, down, left, left, down, left, down, down, down, down, left, left, down, right, right, right, right, up, left, up, up, up, right, up, right, down, down, left, down, right, down, down.
Continue north to the Barde manor. Examine the door, continue left after the conversation, entering the tower. Go up the stairs, then click on the central pillar for a puzzle.
Puzzle n. 153
The solution is "9 million".
Examine the bushes on the left, removing them. Go up the stairs to the platform, memorize the order of the numbers, go down to the area where you had visualized the torches, activating the puzzle - the solution is 4, 1, 2, 3. A path will open that allows you to go up, follow it. So examine the door for a puzzle.
Puzzle n. 47
The solution is 86.
Go through the door, arriving at the atrium stairs. Click on the candlestick to activate a puzzle.
Puzzle n. 48
The solution is 2 and 4.
Go down the corridor.
Examine Ariadne's door to enter, then go down the stairs to the entrance. Examine the painting on the left wall.
Puzzle n. 49
The solution is C.
Exit and proceed to the left, arriving at the lake shore. Examine the water for a sparkling scale. Go back to the old gate; after the dialogue, talk to Socket and Wren, then continue to Riverside. Talk to Bucky to unlock the closest area, then with Goosey, make your way to the arch by talking to everyone around. Talk to Mimi, then follow her instructions, moving left. Talk to Sean, go back to the market. Talk to Taffy, walk along the market and converse with everyone present. Continue to the back, talk to Crow for a puzzle.
Puzzle n. 50
The solution is the Jack of Wands.
Back at the intersection, proceed east, past the library, into the eastern district. Talk to all citizens, you will be awarded an "unofficial" puzzle. The answers to be provided are BBA. Go back to the manor of Barde, look at the scene, proceed to the right, arriving at the tower. Another skit, then proceed to the police headquarters. Talk to Chippe, enter the reception to complete the chapter.
Capitolo 6 - London's Hidden Secrets
Proceed inside, talk to Dean in the lobby.
Puzzle n. 53
The chosen book is number 8.
Enter Layton's office, examine the professor's table to get a puzzle.
Puzzle n. 54
Rotate the purple block to the right, then place it to the right. Rotate the green block to the left, then place it to the left of the purple block. Place the orange block on top of the other two.
Examine the closet on the left to see a puzzle.
Puzzle n. 55
Position the orange block at the bottom, rotate the purple block twice, place it in the upper right corner. Rotate the green block twice, place it in the upper left corner.
Take the Professor's notes from the top left cabinet. Exit, examine the scooter, head to Scotland Yard. On entering, talk to Colby, then go up the stairs and talk to Monica on the second floor. Exit and take the following street. Talk to Augustus for a puzzle.
Puzzle n. 56
The solution is D.
Examine the flowers for a strange seed. Continue along the road until you reach the bus stop. Talk to Hanna, examine the red sign.
Puzzle n. 57
The first line must be placed towards the "empty" seat immediately below the starting line of Bus D. The second line must be placed on the last empty slot, taking the same Bus as a reference.
Proceed to the museum, talk to Mick to get access to a puzzle.
Puzzle n. 58
The solution is A.
Enter the museum itself, talk to Ewan to get another puzzle.
Puzzle n. 59
The solution is "the space room" with satellites and asteroids.
Examine the dinosaur bones to gain access to a subsequent puzzle.
Puzzle n. 60
The solution is 326.
Go up the stairs to the second floor, talk to Chappy, then go back to the Scotland Yard reception. After the skit and dialogue, go down the stairs to the archives. Talk to Chelmey, then examine the second library to get access to a puzzle.
Puzzle n. 61
The solution is 29.
Examine the third shelf of the library for a wrapped map. Go outside, interact with the scooter, return to Misthallery.
Capitolo 7: Third Eye Jakes
From the police station, go to the Twisted Light to talk to Hans. Then left, talk to Maggie.
Puzzle n. 62
The solution is "E".
Then talk to Otaki-san, head left to the town, talk to Sean.
Puzzle n. 63
The solution is "L".
North, along the downhill path. So talk to Tweeds.
Puzzle n. 64
The solution is 10 inches.
Examine the rock wall at the back.
Puzzle n. 155
Swap the orange arrow at the top with the yellow arrow at the bottom.
North, towards the excavation base. Talk to Dugan to get access to a puzzle.
Puzzle n. 65
Move the dark blue and yellow blocks to the right. So move the light blue and green blocks up to the right. Move the treasure up, move the green block into the hole where the treasure was. Now move the treasure down so it is next to the pink block. Move the blue block and the other green block to the left, then down. Move the yellow and blue blocks to the left. Move the green block towards the target (top). Move the purple block to the right, up. Slide the treasure right. Move the yellow and blue blocks down. Move the purple block to the right. Move the green block out of the target to the left. Move the treasure towards the goal.
Continue north to the excavation site. Examine the cave in the center for a puzzle.
Puzzle n. 66
The sail and the line with four circles must be positioned on the left, together with the butterfly; the pineapple, the cat with headphones and the design with two circles as well as the artifact with three disjointed designs should be placed on the right.
Interact with the explosive, then with the top of the cave to get some silver ore. Head south, talk to Dugan to get a new puzzle.
Puzzle n. 67
The solution is 546.
Continue to the library to the south. Talk to Hugo to get a puzzle.
Puzzle n. 68
You will have to go right, down, right, up, left, down.
Make your way to the library. Talk to Clarence.
Puzzle n. 69
The solution is "4 meters".
Swerve north to talk to Dominica.
Puzzle n. 70
From left to right: the blue roof is associated with house C, the yellow roof with house A, the red roof with house B.
Proceed towards the hotel, entering. Talk to Joseph to get a puzzle.
Puzzle n. 73
Take two bottles in the first round; then, depending on how many bottles Joseph will take, take a number sufficient to reach a total of 9, then 5, therefore 1.
Talk to Bobby.
Puzzle n. 74
The solution sees you placing a lamp in the third column of the first row. A second in the first column of the second row, then a third in the last column of the same row. A fourth in the first column of the fourth row, a fifth in the last column. A sixth in the central column of the fifth row, then a last one in the center of the quadrant.
Exit outside, then south. Talk to Browne.
Puzzle n. 72
Take the second row, the second hat man on the left, and move it to the man directly above it. Take the same man from the third row, then move him to the third man from the left in the fourth row.
Continue south, talk to Charlie for a puzzle.
Puzzle n. 71
Open the valve on the opposite side from the one opened by B. So keep opening the valves on opposite sides to guarantee victory.
Head to the library, talk to Goosey.
Puzzle n. 75
The solution is 5.
Talk to Olga, then exit the library and continue east across the bridge. Talk to Bucky, then to Finch.
Puzzle n. 76
The solution requires swapping C and D.
Continue east, reaching a closed factory. Talk to Sebastian to get a puzzle.
Puzzle n. 77
For the bell at the top, hit the blue hammer twice. For the bell on the left, hit both hammers once. For the bell on the right, hit the red hammer twice.
South, towards the market. Once you pass Bucky near the twin bridges, talk to him to add the zone to the "teleportation" points. So head to the market. Talk to Taffy.
Puzzle n. 79
The solution is C.
Continue to the north side of the market. Talk to Nabby for a puzzle.
Puzzle n. 51
Bring both adults to the other side. Go back with the one of the two who hadn't rowed before. Take the two children, return with the adult. Go beyond with both adults. Go back with the child, then ask the last child to row, to end the trip.
Move left, talk to Scraps to get a puzzle.
Puzzle n. 52
The solution is "the hourglass".
Proceed to the black market. Talk to Shackwell to get a puzzle.
Puzzle n. 80
The solution is 7.
Continue on Layton-mobile, proceeding to Gressenheller University. In the lobby, talk to Delmona.
Puzzle n. 81
The solution is 40 cm.
Enter Layton's office, talk to Rosa.
Puzzle n. 82
Place the blue piece on the top left. The green piece on the right. The pink piece on the far right. The orange piece in the center. The yellow piece at the bottom. Rotate each piece to match the slots.
Head towards Scotland Yard, going up to the second floor, where the reception is located. Talk to Monica.
Puzzle n. 83
Take the second ball from the left in the row with four balls, jump over the ball just above. Then grab the ball on the far left, jump to the right. Overcome the two consecutive balls. Jump using the ball on the left. Then upwards consecutively, until you reach a point where there are two balls next to each other on the same row. Take the one on the right, jump to the left. Grab the ball below, jump to the top. Jump left, then left again to complete the puzzle.
Exit and proceed along the street until you meet the florist. Talk to Augustus.
Puzzle n. 84
First click on the first flower of the first row. Then on the third flower of the third row. So on the second flower of the second row. Then on the fourth flower of the first row. So on the first flower of the last row.
Move north to the museum. Talk to Mick for a puzzle.
Puzzle n. 85
The solution is 5.
Enter, go up the stairs to the second floor, talk to Chappy.
Puzzle n. 86
Take the orange piece, place it in the upper left corner with the hole at the bottom. Take the dark brown piece and place it in the upper right corner, with the hole in the lower left. Take the light green block and place it in the lower right corner, with the hole at the top. Take the zigzag piece, place it next to the green piece on the right. Take the gray piece, place it at the bottom left, with the point up. Take the sand-colored piece and place it on the left wall, with the hole in the lower left corner. Take the white piece and place it in the center. Take the brown piece with the two holes and place it in the last free area.
Return to Misthallery, proceeding to the Triton Manor. Talk to Beth.
Puzzle n. 78
You will need to form a lateral T, cutting from the upper right corner of the "destroyed" area to the lower right corner, then from the middle of that line to the lower left corner.
Head to the police headquarters.
Puzzle n. 87
Move to the reachable hole by moving once diagonally from the starting position. So, follow the only path available. At the crossroads, take the elevated path, then follow it to its natural end.
East towards the entrance to the police station, go down the corridor. After a cutscene, head back to the chief's office, examine the fireplace for a puzzle.
Puzzle n. 88
The solution is 11.
Examine the flag on the left to get an item, exit and head to Clark's study in Triton Manor. Talk to Clark, go down to the cellar. Examine the bottles on the left, revealing a puzzle.
Puzzle n. 89
Place a bottle of white in the first column of the first row, a bottle of red in the third. One of red in the first column of the second row, one of white in the fourth. One of white in the second column of the third row, one of red in the fifth. One of red in the second column of the fourth row, one of white in the fifth. One of white in the third column of the last row, one of red in the last.
Examine the lower right sack for an item. Go outside, go towards the intersection. After the cutscene, save your game.
Capitolo 8 - Face to Face with the Specter
Continue towards the arch; after the dialogue, head to Paddy's home area. Talk to Greppe.
Puzzle n. 91
In the third column of the first row, place a subject with medium range capabilities. In the fifth column of the second row, place a short-range subject, as well as in the week. In the last column, a medium-range one. In the first column of the third row, place a short-range subject. In the fourth column of the fifth row, a long-range subject. In the last one, a medium-range one. In the last row, a short radius in the second column, a long radius in the seventh.
Proceed to the market to meet Crown. After a few cutscenes, examine the door for a puzzle.
Puzzle n. 92
The solution is "key A".
Exit the door, go down the corridor to reach a puzzle.
Puzzle n. 93
Follow this path: right, down, down, right, down, left, left, down, right, right, right, up, up, up, right, down, down, down.
Proceed outside, talk to Hans.
Puzzle n. 94
Place an officer on the third X of the first row. Another on the fourth of the second. A third on the second X of the third line. A quarter on the first X of the fourth line.
Continue west to the square. Talk to Maggie.
Puzzle n. 95
The solution is 64.
Talk to Otaki-San for another puzzle.
Puzzle n. 96
The solution is associated with the upper right tower.
Continue south to the arch. After the dialogue, examine the tube to trigger an unofficial puzzle. Choose answer A, then B. So save your game.
Video - Launch Trailer
Capitolo 9 - The Specter Becomes Clear
Use the ruined arch as a bridge to reach the door on the left. Talk to Naiya, get the coins around you. Examine the table under the phonograph, recovering a toy. Exit, go north, then left. Talk to Sean.
Puzzle n. 97
The solution is 5.
Continue north. Talk to Tweeds.
Puzzle n. 98
The solution is D.
Continue further north, to the base of the excavations. Talk to Dugan.
Puzzle n. 99
The solution is D.
Proceed to Barde's manor, thus entering Ariadne's room. Then continue to the lake beach. Talk to Tony, continue towards the arch, reaching the old gate. Talk to Wren and Socket.
Puzzle n. 125
The solution is E.
Continue to the police station reception. Talk to Chippie.
Puzzle n. 126
The solution is E.
Enter the interrogation room, examine the phone.
Puzzle n. 127
The solution is 8.
Continue to the destroyed arch, talk to Mimi to activate a puzzle.
Puzzle n. 128
Draw a line from the intersection on the second vertical line from the left with the fourth horizontal line from the top, bringing it to the intersection of the seventh vertical line from the left and the fourth horizontal line from the top. So create a line between the intersections of the fourth and fifth vertical line from the right with the ninth vertical line from the top.
Continue south. Talk to Hugo.
Puzzle n. 100
The solution is E, F, A.
Make your way to the fish lab, talk to Marion.
Puzzle n. 101
Draw a line from the upper left corner of the head to the lower right corner of the body. Then draw another line from the top right point of the body to the bottom left point of the head. Continue to Murray Street.
Talk to Jasmine.
Puzzle n. 102
The solution is "33 pieces".
Continue east to the north section of Ely Park. Talk to Clarence for a puzzle.
Puzzle n. 103
The solution is "upward".
Now head north, talk to Dominica.
Puzzle n. 104
The solution is "the seventh house".
Continue north again. Enter the bar, talk to Aldus.
Puzzle n. 105
The solution is "63 flowers".
Enter the bar, talk to Greppe to get an episode of "Sorrow and Joy". Proceed to the hotel. Talk to Joseph.
Puzzle n. 107
The solution is "40 rooms".
Talk to Bobbi to get another puzzle.
Puzzle n. 108
The solution is C.
Exit, proceed south. Talk to Charlie.
Puzzle n. 106
Create a line that starts at the intersection of the second line from the bottom and the wall, ending at the intersection of the first line from the bottom and the third line from the left.
So head to the Triton. Talk to Hanna.
Puzzle n. 111
Wife C goes into the second slot.
Go back to the intersection, head south. Talk to Brock for a puzzle.
Puzzle n. 112
Place four of the blocks vertically, so that there is an empty space at the top, where to place the fifth block horizontally.
Continue to the market, talk to Taffy, then west again. Talk to Marilyn.
Puzzle n. 113
The solution is C.
Continue north, talk to Crowe.
Puzzle n. 114
The solution is 5.
Make your way north. Talk to Nabby
Puzzle n. 115
Draw a line from the top right corner to the bottom left corner.
Continue west, talk to Scraps for a puzzle.
Puzzle n. 116
Change the position of the panels so that the purple and blue diamonds on the edges are complete. It will be enough to make 3-4 almost random movements to achieve this goal.
Proceed to the black market. Talk to Shackwell.
Puzzle n. 117
In the first row, we have: sticks, sticks, hearts, spades.
In the second row: spades, hearts, hearts, hearts.
In the third row: sticks, sticks, hearts, sticks.
In the fourth row: sticks, hearts, hearts, sticks.
So make your way to the bridge. Talk to Louis.
Puzzle n. 118
Place a star on the third slot of the first row. Another on the first slot of the second. A third on the penultimate of the third. A fourth on the second of the fourth. A fifth on the third last of the fifth. A sixth on the last of the sixth. A seventh on the fourth of the seventh.
Use the car to make your way to Gressenheller. Talk to Delmona, he will offer you a puzzle.
Puzzle n. 119
Start from a corner, then use the larger pieces and scale the smaller ones, continuing to turn and rotate them repeatedly until they fit into the appropriate slots.
Enter the office, talk to Rosa.
Puzzle n. 90
Take the yellow piece, place it in the area that "comes out" upwards, so that it looks like an upside-down L. Place the blue piece on top, so that the part that comes out is above the eye. So place the pink piece just below the blue piece. Place the green piece under the pink piece so that the part with four blocks is at the bottom. Rotate the orange piece to make it coincide with the last slot.
Talk to Rosa.
Puzzle n. 120
Rotate the orange piece so that it coincides with the area at the top. Fill the ravine with a pink piece. Place the green piece at the bottom, making sure that the four joined blocks are at the bottom. So place a yellow block on top of it. Fill in the empty space on the left with a blue piece.
Make your way to Scotland Yard. Talk to Monica.
Puzzle n. 121
The solution is 3.
Exit, proceed to the Augustus florist.
Puzzle n. 122
The solution is 2.
Continue north. Talk to Mick.
Puzzle n. 123
The solution is A and D.
Come in, talk to Ewan.
Puzzle n. 124
The solution is D.
Go back to Layton's car, then to Misthallery, and then forward to the library. Talk to Olga.
Puzzle n. 109
Swap the orange and green books on the second line. Then swap the green and red books on the fourth row. Move the red book to the fifth row, in front of the blue book.
Exit and proceed east. Talk to Thomas.
Puzzle n. 110
It is not possible to provide detailed solutions for this puzzle. The strategy requires that you always move towards the center, never the other direction, at most sideways.
Proceed to the old factory, talk to Sebastian, then head west. Cross the bridge to the back entrance. Examine the door for a puzzle.
Puzzle n. 129
Press C three times, then press the first, fourth and sixth keys.
Examine the stream below to get one of the many items. Go through the door to get to the abandoned factory, enter it, then click on Bram to activate a puzzle.
Puzzle n. 130
The solution is 8, 1, 9, 2.
Pull the lever to the left, enter through the door. Examine the tunnel for a puzzle.
Puzzle n. 131
You will need to follow these steps: down, right, up, right, right, right, right, down, right, down, left, down, left, left, left, left, down, left, down, down, right, right, right , up, right, right, right, right, up, left, up, right, right, down, down, down.
Talk to Goosey for a new puzzle.
Puzzle n. 132
The solution is C.
Examine the crane for another puzzle.
Puzzle n. 133
Move the red circle and green triangle to the right of the purple star. Move the purple star and the red circle to the right of the blue square. Move the red circle and the blue square next to the green triangle. Move the blue square and the green triangle next to the purple star.
Examine the boxes on the left for some spare metal. Turn the lever to the left, continue forward. Talk to the chief engineer.
Puzzle n. 134
Rotate the bottom left piece once to the right, place it on top. Now take the top right piece, place it in the top right corner. Rotate the top left piece, place it in the bottom left corner. Rotate the piece to the right once, place it in the lower right corner. Rotate the piece at the bottom left, place it on the right side, in the center. Rotate the piece to the left twice, place it in the center of the left side.
Examine the panel on the right, proceed forward without interacting with the lever. Examine the ravine.
Puzzle n. 135
The solution associates red with A, yellow with B, blue with C, green with D.
Examine the metal equipment in the center for a broken gear. Interact with the lever on the right, then examine the door.
Capitolo 10 - A Legend Revealed
Head to Triton Manor, talk to Beth for a puzzle.
Puzzle n. 136
The solution is B.
Go to Bucky and head to Pier 3, then go left. Talk to Socket and Wren.
Puzzle n. 137
The solution is 3.
You will now find yourself facing the final battle. Start with the far left leg.
Puzzle n. 138
You will need to interact with the top and bottom threads of all.
Puzzle n. 139
Press A, then D.
Puzzle n. 140
The solution is 15.
Puzzle n. 141
For the first row you will have to connect C, H (turning it twice), E, B (turning it once to the left). For the second row you will have to connect G (turning it once to the left), F (turning it once to the right), A (turning it once to the right), D (turning it twice).
Puzzle n. 142
The solution is "the triangle within the circle".
There will therefore be an "unofficial" puzzle to be solved. The answers to be given are B, C, A, C.
Puzzle n. 143
The solution is: B connects to the X at the bottom right, C connects to the C at the bottom left, D connects to the X at the top.
Epilogo - The Last Gift
Parlate con Loosha.
Puzzle n. 144
Press the big button on the top left, the big button on the bottom right, the small button on the bottom right, the big button on the bottom right. So rotate each bird twice.
Video Solution - Playlist
Click here for the playlist!
Video Solution - Chapter 1
Video Solution - Chapter 2
 Professor Layton and the Call of the Ghost ds
- ds
Exit date: November 25, 2011


