Please note:
The solution is based on the American version of the game, so it is possible to find some differences in the Spanish version.
The Great Wall
Climbing up to the Wall
At first run until you get to the opening, swim through the "pool" on the right. Climb on the block and follow the road until you get to the ledge. Jump and then continue to the left, climb the block, turn around and take a running jump to reach the highest ledge.
Secret 1
Jump to the ledge on the right and follow it to the end, grab the secret and return to the previous ledge.
Go up the steps on the left until you reach the wall. Turn left and run a jump to get to the next ledge.
1st key
Turn right and go up to the window, in the right corner there is a trap door, go down and after surfacing go up to the block at the top of the room. Take a jump on the run, grab the ledge and pull up. Use the switch and leave the room through the open door.
On the wall
Grab the guns and shoot the three crows. On the right is a large opening, go down, dive into the underwater tunnel and collect the key. Swim to the surface, then draw your weapons and take out the tiger. Then climb up the green blocks and go back to the big wall and open the door with the key. Take out the spiders, climb the ladder and take out another spider.
The second key
Collect the rusted key in a corner, climb up again and use it to open the next door. Follow the path paying attention to the spiders. On the right next to a skeleton you will find a large medipack and rifle cartridges. Exit, jump into the water and then walk straight to the left wall. Jump to the ledge and go right.
Spiked Traps
Run all the way and turn right, enter the crevice and jump over. In the chamber below, go left and grab the ammo. Follow the path and run, jump over the blades and eventually go left.
Secret 2:
Take the secret that you find there on the ground.
slide
Collect the small medipack and move on. Kill the spiders. Go down to the other side, kill the two tigers and follow the path to the right to the large door to finish the level.
Venice
1st switch
Turn around and follow the path, take out the dog and the killer on the balcony. Go ahead and take out another dog and another enemy. Take the small medipack. Jump into the river and go under the dock door. Press the button in there and exit.
1st key
Go to the palace, grab the rockets and use the switch to get the hatch down. Follow the ladder and press the second button to close the hatch and open the one on the ceiling. Use the ladder and reach the roof. Shoot the window and head up into the building. Go through the corridor and go up to the opposite side. Jump to the red roof and go to the balcony, grab the key from the corpses and jump back to the rooftops. Turn right and shoot the dog. Follow the corridor and use the switch. Go back to the hall, shoot the window on the right and go up to the ledge.
Lever Above the River
Take a running jump to reach the canopy on the other side of the river. Grab the ledge and pull up. Jump to reach the ledge with the lever and pull it. Go back to the dock to the other side of the river and take out the killer. Take the weapon left by the enemy and enter the dock to take the speedboat.
Motorboat
Take the speedboat to the right and go through the open door, turn on a flare to make it light. When you get to the dock, leave the boat, kill the rats and shoot the enemy behind the window. Pull the lever and leave the room, use the ladder to go up, use the lever to open the door and get back to the boat. Go ahead with your boat, turn left and then right. Always go straight between the wine gondolas to the big gate. Jump off the boat at high speed once you pass the second motor boat. At the dock, shoot the enemy, jump into the water and go over the fence, follow the corridor and go first right and then left. Go to the bridge and shoot the window. Swim to the dock and press the button. Go left, then right and back through the corridor until you get to the open gate to finish the mission.
Bartoli's Hideout
Getting into the Building
Drive the boat to the dock and exit, take out the mice, turn left and follow the stairs. Take out the enemy and other rats later on. Press the button at the end of the tunnel to open the main door and take out another enemy. Return to the stairs and enter the building.
Inside the Building
Take out the enemy on the balcony and another a little further on. Turn left and go outside and clean up the dogs. Go back inside and use the lever in the dark room.
Jumping over Canopies
Next to the main door on the left is a ladder, go up it, go left and get the items, then go to the right of the ladder, take a running jump and then Lara will slide down. Continue following the road until you come to an opening.
Through the Chimney
Take out the dogs that come down the stairs and then walk them. Take out the enemy in the room to the right. Turn right to enter the building again. Climb up and go forward, then swim to the dock and get to the end.
Candlesticks
Shoot the enemies, then jump down into the room. Climb up and jump to the ledge towards the chandeliers. Follow to the right, jump onto the wooden beam and use the lever.
Library Key
Collect the library key and return to the last chandelier. Jump to the lever on the right and shoot the window. Jump to the open hatch and swim to the surface.
Library
Use the key and open the library, take out the enemies, go up the block and activate the button. Return to the entrance hall and jump to reach the balcony.
Detonation Key
Turn around and jump to the roof of the hut. Collect the uzi and take out the enemy. Leave the building once everything is collected.
Library 2
Swim to the gate, take out the enemies and return to the library. Exit the building through the windows and run left.
Detonation
Use the detonation button and take out the enemies on the balconies. Jump into the water and go to the destroyed house. Follow the path and you will get to the next level.
Opera House
1st switch
Go left and pay attention to the swinging chest. Jump to the next platform on the left and then jump to the platform on the opposite side of the river. Activate the switch.
1st key
Jump back and turn left, run a jump and grab the key. Go up the stairs and take out the enemies.
Way to the roof
Jump to the roof, turn right and go forward. Walk on the broken glass and follow the path.
The Roof of the Opera
Take out the enemies on the roof and go near the swing crate.
The stage
Jump on the hatch and go down the ladder. Run down the slope. Take out the enemies in front of you and swim to the stage.
Under the Stage
Go to the room to the left and flip the switch. Then go to the room on the right and shoot the two enemies. Cross the bridge and run to the end. Continue to the right staying close to the edge.
Relay (Lift)
Swim and turn left twice. Use the button on the left. Swim into the upper tunnel, climb the ladder at the top and head right.

Lift/2
Jump into the elevator. Leave the room and go to the panel on the right. Use the switch and go through the gate on the right. Take out the enemies and follow the tunnel.
Ventilation Shaft/2
Use the switch and go to the ventilation tunnel. Collect the key and push the crate until you reach the top platform. Shoot the window and go up.
Under the Roof again
Climb the left wall and go right. Jump in and use the key to open the door. Jump and use the switch.
Back on Stage
Swim to the stage and take out the enemy. Use the button in the back room and follow the path.
Badguy
Jump down into the room and fight the bad guy. Go up to the small chest, go to the right pile, go left and flip the switch. Follow the road to finish the level.
Offshore Rig
Getting out
Pull the crate with the faded label towards the right wall. Climb on it and push the other crate. Go through the open passage. Use the button, exit the tunnel and then out the door on the left.
Deactivating the Propelle
Beware of enemies. Go left avoiding them and use the switch to deactivate the propellers. Jump and swim to the dock.
Getting Weapons
Take a walk along the dock and go down the hatch to collect the guns.
Pass Card/Weapons
Jump into the water, go back to the enemies and take them out. Use the pass collected from the corpses to open the door. Disarm the alarm and collect the weapons on the roof.
Red Pass Card
Run through the passage, jump to get to the ventilation shaft and turn right. Climb up and take out the enemy. Take the red access card. Follow the path and go through the broken window.
Room With Two Pools
Go through the open door and take out the enemies. Avoid the barrels, go up to the balcony and go up to the platform to the right.
Opening the Trapdoor
Jump to the opening on the left. Follow the tunnel and take out the enemy. Use the switch to the right of the room. Go back to the tunnel and run a jump to get past the pipes. Go back to the pool, follow the path and go through the open hatch.
The Big Water Room
Follow the path down to the right. Jump into the water and swim to the right. Draw the harpoon and take out the enemies underwater. Climb the block with the yellow ribbon and go up the ladder. Take out all the enemies.
Green Pass Card
Jump, shoot the window and grab the green access card. Run to the right and drop into the hole. Follow the path and go through the door using the tile. Use the lever and go through the open gate. Follow the path to finish the level.
Diving Area
1st switch
Follow the path, reach the ladder and follow the path again. Pull the underwater lever to the left and take out the enemies just ahead.
Swinging Hooks
Stand on the edge to the right and grab the ledge. Turn left and jump again to the ledge of the other block. Run and jump to the catwalk.
Blue Pass Card
Go right and then left and enter the room. Take out the enemies and go up the ladder to the right. Run left and jump through the hole in the railing. Get the blue pass and head down.
The "Circle" Passage
At the end of the path there is an opening. Exit and use the ladder to go up. Now use the pass and take out the enemies, then continue to the right.
1st Door With Wheel
Turn the wheel to open the door. Follow the path and immerse yourself. Use the lever at the end and leave the pool. Go up the stairs on the left.
2nd Door With Wheel
Take out the enemies and run into the tunnel. Grab the chip and go back to the stairs.
1st Door Again
Go back into the room and pull the chest on the left wall. Insert the chip and go through the door. Take out the enemies and follow the tunnel. Use the switch and get out of the water.
2nd Door Again
Take out the enemies and leave the room, go to the pool and go to the opposite side. Exit through the door on the left and follow the path.
Circuit/Red Pass Card
Run through the door and jump to the concrete block. Use the panel to deactivate the trap and grab the red pass.
Red Pass Card Slot
Go back to the other side and use the pass to open the door. Clean up the enemies and follow the water tunnel. Go down the stairs to complete the level.
40 Fathoms
Way Into The Wreck
Turn left and follow the signs to the wreck. Swim to the various rooms taking your breath when you can, following the path.
1st switch
Follow the path and use the lever. Take out the enemies and exit the room through the opening.
Big Trapdoor
Use the hatch and take out the enemies. Jump to the red area and reach the opening near the ceiling.
Fire Traps short
Follow the path and turn right. Jump over the pipes on the floor and use the lever to open the gate.
Rocks
Shoot the barracuda and reach the tunnel and follow it. Use the lever you find and climb the rocks to the left.
1st Ladder
Go up the ladder and go left. Reach the opening and pull the lever. Leave the room and go up the stairs.
2nd Ladder
Follow the passage to the end and climb the rocks to the right. Follow the passage and jump into the water.
Water Chamber
Take out the enemies and pull the lever. Run into the tunnel to finish the level.
Wreck of the Maria Doria
Beginning
Follow the passage to the left. Take out the diver and dive into the tunnel. Climb up and let yourself slide backwards. Grab the ledge. Take out the other enemy and go to the next room.
The Right Passage
Jump down and take out the enemies. Go right and run to the left corner. Continue on the left.
1st Circuit Breaker/1° chiave
Run a jump to reach the opposite side and use the switch. Jump down and collect the key. Return to the tunnel and exit on the other side.
The Left Passage
In the green room, run and go to the upper right. Use the key on the lock on the right and take out the enemy in there.
2st key
In the next room, push the chest and grab the key below. Follow the path to the right and then go to the left. Jump over the barrels and shoot the enemy.
The Wooden Boat
Use the lever underwater and run to the open door. Go right, go through the hole and leave the room.
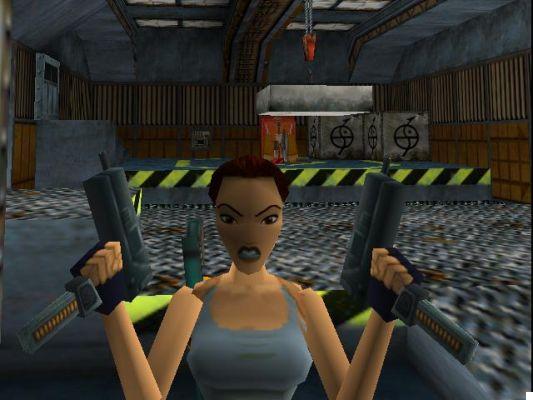
2nd Circuit Breaker
Follow the path and shoot the enemy. Turn left and follow the path. Jump to the open trap door to the right.
3rd Circuit Breaker
Open the door with the wheel. Follow the path and go up. Go down to the other end. Shoot the enemies and go to the large room.
Circuit Breakers / Fire Traps
Jump into the water, use the lever and leave the trap door. Use the three switches to deactivate the traps, go to the exit of the room and jump to the metal platform.
The Bridge
Take out the barracuda and go left. Go to the open door on the other side of the bridge. Turn right and then left to enter the passage with the uneven floor.
3st key
Take out or avoid three barracudas and two sharks. Collect the key next to some algae. Go up and open the door with the button.
Into the Water
Go back to the cabin and use the hatch. Turn left and get rid of the enemies. Dive into the tunnel next to the barrels and move forward to finish the level.
Living Quarters
The Barrels
At the beginning of the level you are still underwater. Use the lever in the next room and exit the hatch.
Trigger For The Pistons 1
Follow the road, turn left and reach the railing. Run a jump to reach the ledge above the traps. Climb the ladder in the next room and use the lever at the end of the corridor.
The Pistons 1
Go down the hole, walk and reach the piston. From the ledge, always jump up to the top.
Trigger For The Pistons 2
Jump to the platform in front of the exit. Follow the path and take out the killer. Follow the passage to the end. Follow the path and then drop into the hole.
The Pistons 2/Lever High Up
Go up the pistons and use the lever.
Water Filled Room
Go to the open door at the end of the room and shoot the enemy underwater.
Back Into The Wreck
Immerse yourself in the opening in the rock. Stay on the left to avoid the moraines. Use the lever at the bottom of the wall and go through the open hatch in the wreck. In the bridge position, jump and grab the ledge of the ventilation shaft. Follow the path.
Little Pool
At the end take a running jump to go to the platform on the left. Follow the path and take out the enemy. Let yourself slide down the slope to the left.
Jumps
Jump between the pillars and grab the ledge on the wall. Go right and go into the passage behind the pillar.
The "Quarters"
Take out your weapons and take out the enemies. Jump into the hole and collect the key under the chest. Now go back to the right area and follow the passage to the left. Use the key to open the theater.
The Theater
Take out the various enemies you find a little further on and use the switch in the right corner. Turn left and use the switch on the opposite side. Leave the seat, go back to the big room, swim through the pool and go up to go to the next level.
The Deck
1st key
Run to the right and take out the two enemies. Turn right to cross the bridge. Go through the windows and swim to the left. Enter the tunnel and follow the path to the right.
The Crates
Follow the path, climb on the crate and move them, behind one there is a door. Use the lever on the right and take out the enemy. Drop down and follow the passage.
The Big Lake
Swim to the boat, turn left and swim to the shore. Clean up the enemies and go through the crevice in the rock to the left of the lake. Follow the path.
The Path Ahead/2° chiave
Collect the key and dive back to the left of the cave. Go back into the cave and follow the path again.
The Path On The Left/Upper Deck
Climb the rocks and go to the front of the ship. Jump down to the left side of the ship.
Stone wall
Jump and climb the platforms until you get to the top and jump to the cliff.
In The Rocks
Follow the path until you reach a slope, climb the block on the left and take a running jump to overcome the blocks. Jump again to get to the top and exit the caves.
The Roof
Climb up and take out the enemies, follow the path and use the switch. Leave the room through the open door.
The Locked Chamber
Turn left and then right to see the open door on the right. Open the door with the key, use the button inside and run to the left.
3st key
Follow the road until you reach the stairs and go down the hole in the floor. Collect the key and follow the path going down carefully.
The Artefact
Jump down to the right side of the ship and take out the enemies. Use the key on the door to the left and collect the artifact in the chamber to complete the level.
Tibetan Foothills
The Avalanches
Shoot the eagle above you. Run to the right and head down. Run up the hill and climb the wall. Take a running jump across the ice wall.
The Canyon
Enter the cave and jump over the pool of water. Follow the path to the right and go left. Go down and run out to the left.
Snowmobile
Climb to the left and go to the hut taking out the two enemies. Get on the snowmobile and go into the tunnel, take the first right. Park it on the ramp, climb it to the top and jump out of the cave.
The Ramps
Get back on the snowmobile, take the ramp and jump full speed onto the next ramp. Follow this ramp to the left and go full speed into the cave.
Inside The Big Cave/Lever
Follow the path and shoot the two enemies waiting just ahead.
Big Ramp/Avalanches
Now jump over the hole in the ramp at full speed. Turn left and stay left to avoid the avalanche.
1st key
Park the snowmobile and walk towards the crevasse. Jump onto the ladder and let yourself go. Use the lever below and go up through the open gate and up the ladder.
2st key
Enter the cave, take a running jump and grab the ledge to return to the other side. Now use the switch on the left of the drawbridge and cross it.
Back to the hut
Go back to the snowmobile and return to the cave with the drawbridge. Now take the ramp on the left, take out the leopards a little further and go to the hut.
Lever In The Hut
Open the door of the hut with the key and use the lever. Kill the enemies and collect the ammo.
Next Snowmobile
Kill the enemy outside the hut and grab his snowmobile. Continue on the left side of the pit and take the ramp to reach the other side.
Canyon With Lake
Down in the valley, shoot at enemies and go forward with the snowmobile. Swim to the platform and follow the path to finish the level.
Barkhang Monastery
Getting into the monastery
Follow the path and wait for the people in the courtyard to finish fighting. Shoot the enemies, but not the monks. Shoot the crow on the left and continue to the ledge. Slide down and grab the lower ledge. Shoot the windows and enter the convent.
1st key (Main Hall)
Follow the corridor to the left and go up the ladder. Then follow the path to the right and turn left to enter the platform and take the key to the main hall.
Way to the First Prayer Wheel
Return to the walkway and turn left. Follow the passage, jump into the pool, exit, reach the doors and open them.
1st Prayer Wheel
Wait outside the room and wait for the enemies to come out to take them out from behind. Collect the prayer wheel on the platform to the left.
Way Back From The 1st Prayer Wheel
Jump and go to the left ladder. Go back to the catwalk and go down the ladder.
2° chiave (Strong Room)
Kill the enemies if the monks haven't already. Then go to the room on the left, collect the key and return to the main room.
3rd key (Roof)
Turn left and pick up another key in the back room. Now go down the corridor and open the door with the key. Climb the stairs to the roof.
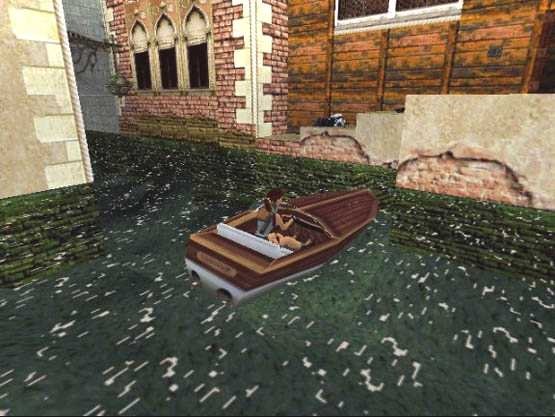
On The Roof
Quickly climb the ladder to the right to avoid some enemies. The monks will fight them.
The Two Gem Stones/2nd prayer Wheel
Now use the lever in the courtyard and go down through one of the open hatches. Shoot the shop windows and collect the two gems. Use the lever in one of the corners and go up the ladder. Collect the other prayer wheel and return to the main chamber.
Statue In The Main Hall
This time follow the second passage on the right, go up the ladder and follow the path. Jump off the ledge and use the gem.
Swimminpool/3rd Prayer Wheel
A trap door has opened under the statue. Jump in and follow the path. Use the lever in the chamber and pick up the third prayer wheel.
4th key (Trapdoor)
Climb the ladder again and follow the path to the left. Now go through the passage and go right to avoid a trap. Collect the hatch key and follow the path. Go up the ladder and turn right.
outdoors
In the main chamber, go to the trap door on the left and use the large lever on the left. Climb the ladder and go left. Climb off the walkway and go right.
Hut/4th Prayer Wheel
Shoot the enemy on the other side of the bridge and use the lever at the bottom. Then go back and return to the monastery where you will encounter other enemies to take out.
Wide Passage Next To Statue
Go back to the monastery and go through the big gate, get to the courtyard and use the lever.
5th Prayer-Wheel
Climb the ladder and cross the platform, where you will find the fifth prayer wheel.
Prayer-Wheel Chamber
Go back to the monastery and go up the stairs in the corridor to the right. Go to the room to the left of the statue and use the five prayer wheels to open the door. Enter it to finish the level.
Catacombs of the Talion
1st switch
Continue on foot, being careful not to be hit by the ice. Go down the ladder and shoot the yeti. Use the lever on the right and go back up the stairs.
Big Chamber With Lake
Shoot the leopards and go down the stairs. Run and exit the street. Follow the passage behind the pool on the right.
1st Mask
Use the lever on the wall located in the other path near the pool, by doing this the pool will empty and there will be a passage. Enter it and follow the path.
Avalanches/2nd Mask
Use the mask, run up the hill and jump to the right to avoid the avalanche. Take out the leopards and go to the cave on the right. Collect the diving mask and go back up. Go up to the cave where the avalanche came down.
Yeti-Chamber
In the cave, follow the path collecting the materials and taking out the yeti.
The Lake
Go up the opening on the other side of the ramp and follow the path to the open door. Enter the next cave and use the lever. Then draw your weapons, walk through the door and go outside.
Chamber above the Avalanches
Follow the ramp until you reach a well. Take a jump on the run and activate the avalanche in front of you. Shoot the leopards and go back upstairs. The boulders have opened a passage where you can enter.
Timed Riddle
Climb up and go first right and then left. Jump to the entrance and run to the open door on the right. Take the ladder, go down and follow the path to finish the level.
Ice Palace
Two Bells
Shoot the bell to open the door and climb the crates behind the cage on the right. Go down and shoot the second bell. As you fall down, grab the ledge to slow the fall.
The Bigger Platform
Use the lever on the platform and shoot the three Yetis. Go through the door and take out the other yeti. Jump forward and shoot the next bell. Go slowly down to the ground.
The way up
Run through the two open doors. Shoot the bell and jump to the left. Turn around and take another running jump to overcome the gap. Shoot the yeti and move on.
1st Mask
Climb into the hole the yeti came out of. Shoot the tigers and grab the mask. Return to the cave entrance and follow the passage.
Chamber with Spiked Traps
Shoot the yeti. Drop down and then climb into the window and use the mask. The nearby door will open. Cross the bridge and go left. Use the lever and let yourself slide down.
Pool under the Melted Surface
Immerse yourself in the cave and follow the path. Once you get out, watch out for the yeti.
Little Chamber on the Left
Take him out and leave the room.
Avalanches on the Right
Beware of the avalanche. Follow the passage and climb into the opening in the middle.
Ice Palace
You will come to a kind of platform where you will find a large gong. Use it and drop down. Go to the left side of the ice palace and go up the hole on the right.
The Guardian of the Talion
Once outside, quickly climb up the building and take out the strange bird above, use the M16 to hurry up and you'll finish the level.
Temple of Xian
Waterfalls
Follow the path and jump off the falls paying attention to the fish.
Roof of the Temple
Dive through the opening in the rocks and make your way to the temple. Shoot the tigers on the left side and jump down until you get to the wooden platform.
Room filled with Lava
Climb the ladder and go left, jump to the next ladder and level up again.
Spiked Traps
Follow the path into the chamber with the traps and go up the ladder. Climb into the alcove on the left and jump into the water.
In The Temple
Climb between platforms to continue climbing into the temple.
Spiked Walls and Boulders
You will fall down. Use the lever, follow the open passage and go up again using the ladder.
Under the Roof
Use the lever on one of the corners and go to the next room. Watching for the traps, jump to the switch on the red wall and use it. Exit the door at the other end.
Dragon Seal
Follow the passage and you will come to a walkway. As soon as you pass the trap door, a boulder will chase you. Jump to the other side and collect the dragon seal.
Lavapool
Use the lever, jump running to the next platform and continue like this between one platform and another.
Slope
Quickly jump right to avoid the next boulder and continue between platforms.
Rolling Blade and Spiked Ceiling
Use the lever and jump through the open trap door. Go ahead, activate the various other levers and quickly exit the open door.
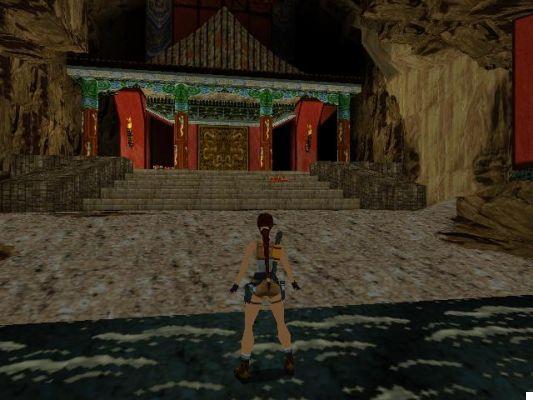
pool
Jump into the water and use the lever. Use the lever just ahead and follow the underwater path to return to the main chamber.
1st key
Use the lever on the right wall and you will fall into the water. You will come to collect a golden key. Go forward and use the lever between the two pillars. Climb out of the water and keep going.
Spider Cave
You will end up in a cave. Follow the path by taking out the spiders that will come out.
2st key
Collect the silver key and dive through the opening on the ground. Once outside, exit using the opening at the bottom and cross the bridge.
Bridge with Rolling Blade
You will be chased by a boulder. Run and then jump to the platform on the left and use the switch. Shoot the eagle and then return to the bridge.
Catapult Platforms
Go to the left ledge and enter the lava cave.
Inside the Temple
From the large entrance platform, jump to the block on the left and climb the ladder at the end of the room. Go up and follow the passage. Use the lever you will find at the end of the path.
Dragon Statue 1 / 3rd key
Go back and enter the room on the right. You will find a dragon statue. Go left, jump to the other platform and pick up the key. Go down and go back to the entrance platform.
Main Chamber Lock
Climb the ladder and follow the passage. This time, enter the room on the left.
Dragon Statue 2
Climb the ladder and follow the path to finish the level.
Floating Islands
The Cage
Head down to the left and follow the platform. Jump to the other side and use the lever. Jump onto a platform that leads to another large platform.
1st Mystic Plaque
Go through the open hatch and take out the enemies. Use the lever near the green platform and take a running jump to reach the alcove.
Island Jumping
Climb to the left, follow the path to the end and jump to the last islet.
2nd Mystic Plaque
Run right and take out the flying enemies. Collect the item and jump between the islets.
Island Jumping Again
Reach the green ramp again and go left. Follow the path and climb up the green blocks. Turn right and jump to the last islet.
Behind the big gate
Go to the green rocks to the left and jump up the ramp with the boulder. Drop off the platform after all the boulders have slid down.
Way to the Slide
Shoot the flying knight, climb the pillar and follow the path.
The Slide
Take out the knight and use the lever. Now take out the other two knights that arrive and enter the small room.
Back to the Slide
Get up and go up the ramp where the boulder was, turn right and jump to the other platform.
Slide 2/Lava Chamber
Drop down and take out the knight. Use the lever and head back down.
Water under the Lava
Keep going forward until you find another lever to use, then turn right and jump to the ground. Take out the flying knight who will arrive shortly thereafter.
Higher Passage
Follow the path, activate the lever and go through the open gate on the right.
The Green Hole
Follow the path and take out all the knights one at a time.
Lava and Spike Traps
Continue following the road and climb onto the chest. Follow the path to finish the level.
The Dragon's Lair
Knights
Use the lever just ahead and take out the knights.
Killers with Knifes
Use the item collected earlier to open the gate leading to the dragon a little further on.
The dragon
Use your weapons to take out the dragon. Once on the ground, quickly go to his red spot on his belly and take out the dagger. The ceiling will begin to collapse. Run outside and follow the path to finish the level.
Home Sweet Home
Go to the small room next to the bed. Use the key to open it and take out the enemies that come. Once you have taken out all the enemies, you will complete the game!
 Tomb Raider II pc
- pc
- iphone
- ipad
- ps1
Exit date: November 11, 1997



![Guides Sophia's Shop Guide [100%] - Persona 5 Strikers](/images/posts/1f5e1c7629d56d6c792ac770a5d6b182-0.jpg)