


TRAINING
1. Obstacle course. Lie down and crawl under the barbed wire, go around the obstacle and enter the door. Go down the corridor and open the door to complete the mission.
2. Light weapons. Grab your assault rifle and hit all targets. Activate the zoom of the sniper rifle. Repeat the process with the gun and enter the door.
3. Grenades. The higher you aim, the farther you will be able to throw the grenade. It will probably take you a couple of tries before completing the sub-mission. With the grenade launcher, grenades explode on impact and it is much easier to aim. Go through the door.
4. Heavy weapons. Shoot the tank and carrier with the rocket launcher to complete the mission. But be careful: the launch of the rocket causes a certain backfire, so before you shoot make sure you have no one behind you.
5. Machine guns. There aren't many in the game, but it's good to practice anyway.
6. Demolitions. Place the mine in the indicated compartment (by pressing and holding R1) and let it explode by pressing R1. Go through the door to reach the next area.
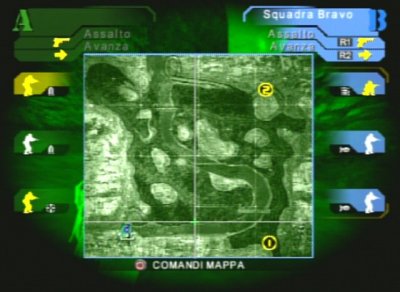
7. Commando. Hold R2 to give the good team a quick order and press L1 to view the map. When establishing a point on the map (by pressing X) you can hold X to further adjust their field of view.
TACTICAL EXERCISES
Exercise 1: Firefight
During this mission, your objective is to eliminate the enemy forces. If you take a look at the map, you will find that the intel has reported some good shooting positions for your team, and it is highly recommended that you follow the default provisions and weapons, as they are the best to take on the mission. Try each of the small arms at your disposal to get to know and use them. There are also positions with machine guns.
The goal is to eliminate enemy vigilance. Go around the rock and reach the three enemies that await you. After taking them out, go up the hill to the right, where you will encounter more enemies. Go back the same path you came from, towards the waterfall, then go up the hill, where another couple of enemies are hiding near the house. When you have eliminated all the enemy forces, you have completed the mission.
Exercise 2: Saving
Intel found that one of your downed pilots was being transported aboard a train to a secret location for questioning. Thanks to well-placed explosives, the train derailed. Your task is to reach the point of the derailment and save the pilot. Try to get to the driver quickly with one team while providing cover with the other. There are few enemy soldiers in the area, but reinforcements will arrive soon, so be careful. Once you have recovered the pilot, reach the pickup point as soon as possible.
Go up the hill and you should see a house. There are three enemies on the other side, along with your pilot. One of them may turn the corner and see you, alerting the others, but don't worry, the pilot doesn't run the risk of an execution. Go to the other side of the house and kill all the enemy soldiers, then tap the pilot to make him follow you. The pickup point is along the fence, move quickly as enemy reinforcements are on the way.
Exercise 3: Demolitions
Intel informs you that a shipment of new torpedos has just arrived at an enemy base. Your mission is to infiltrate the depot and plant explosive charges. Once the explosives are in place, return to the pickup point as quickly as possible. The charges will detonate as soon as you leave the area, but the now alert enemies could reach you very quickly.
At the beginning of the mission, move to the crates in front of you and kill the enemy you see from a distance (you may need to use the sniper rifle). Continue along the wall killing anyone who appears along the way and enter the warehouse. Place the explosive charges in the center of the room, between the warheads. Be careful when you are about to leave, as reinforcements have been called in in the meantime. Kill the mass of enemies and take advantage of the moments of calm to reach the collection point. Mission complete.
Exercise 4: Anti-vehicle
Some enemy armored vehicles escorting two trucks were lost. You are in charge of finding and destroying them. Intel once again points out on the map a couple of good points from which to launch an attack. Reach these locations quickly and try to take the enemy by surprise. Anti-missile rockets are indispensable for eliminating tanks and armed vehicles in general. Instead, you can destroy the trucks using only grenades and rockets. So try to keep your demolition men alive, otherwise you will have failed the mission. Headquarters has selected the best team and the most appropriate assortment of weapons to successfully complete this task, which is to eliminate enemy vehicles. Don't complicate your life by dragging on, head straight for the northernmost point and get rid of the enemies using the rocket launcher. If you run out of ammo from the rocket launcher, you can alternatively use the grenade launcher or fragmentation grenades.
Exercise 5: Defense
The camp radio equipment must be defended at all costs. The enemy forces will try in every way to destroy it. You can find the position of the radio curtain on the map. Intelligence has reported the best locations from which your teams can cover all possible entry points into the base. Then position the team as indicated and good luck!
The only goal is to defend the base by eliminating all enemies. Do not abandon the base, or you will automatically fail the mission. Most of the enemies come from the north, while some others come from the west. Keep firing on anyone who tries to get close and everything should be fine with no further complications.
ISLAND THUNDER
Missione 1: Watchful Yeoman
Your first task is to simply capture smugglers. One of your patrol helicopters spotted a cargo plane dropping suspicious crates on an abandoned tobacco plantation. Upon landing, the helicopter crew managed to push away the men who were moving the crates, but help is needed to complete this task. The orders are simple, you will be transported to the plantation by helicopter and from there you will be in command of the ground troops. First take control of the old plantation buildings, as the guerrillas are using them as cover. Then secure the crates, clearing the entire area of enemy presence. Enemies will likely try to retrieve the crates as soon as they see the helicopter leave, so the action looks excited.
The objectives are therefore:
- conquer the plantation
- secure the first crate
- secure the second crate
- no deaths within the team (bonus)
Cross the field to the west. There are enemies on the sloping road, but if you crawl they shouldn't notice your presence. Crawl to the top of the hill, having the team follow you. Below you will see some buildings. Five or six enemies are to the south and two inside one of the buildings - whenever you see an enemy, stop, crouch and shoot. In this way, the aim will be more precise and it will be more difficult for you to be hit. Kill all the enemies in this first area (you'll know you're done when the objective completed warning appears) and head to the larger white building, where the first load is stored. Kill the guards and touch him to complete the objective. Exit the door on the opposite side, crawl along the path and kill the other enemies, paying attention to the watchtower. The second cargo is in the middle of the field: touch it to end the mission.
Mission 2: Angel Rage
The guerrillas are beating the countryside and telling people not to vote, but fortunately what is thought to be one of their training camps has been located in the hills of Pinar del Rio. Bringing many troops to that spot is neither easy nor profitable, and for this reason you have been instructed to reach it, in order to locate and neutralize the camp. Destroy the guard turrets that guard any intrusions, then conquer the area. Be careful: the troops inside may not be perfectly trained for combat, but they have the numbers on their side.
The objectives are therefore:
- destroy the two guard towers
- acquire control of the field
- no team member must die (bonus)
Go up the hill to the north and turn west. Position yourself in order to find a good spot from which to kill the enemies on the opposite side of the hill. If you still don't get the objective completed message, you've probably forgotten the man in the turret. From this point to reach the second tower you will have to walk a lot. If you don't want unnecessary problems, don't cross the field but walk it along the edge. The second target has three men: one in the turret, one in the small building and a third on the west side, with a machine gun. The best choice is to kill the latter and the enemy on the turret with the sniper rifle and only then deal with the man in the building. Turn around and look at the field. From this point you can take out a couple more enemies. Go to the nearest entrance to the camp along the wall and take care of the remaining soldiers. Clean up all the buildings, and when you have killed them all, the mission will be completed.
Mission 3: Jaguar Maze
The Pinar del Rio camp was not the only one used by guerrillas for training recruits. An MV-22 was destroyed, and this leads us to think that the guerrillas have a good part of what was the arsenal of the Cuban Army in their hands. The terrain in which you will operate is steep, rocky and difficult, practically in the middle of nowhere. The primary objective of the mission is to find survivors of the crew of the downed helicopter and save them, after which you will have to find the location of the SAM and disable it. A helicopter will come to pick you up. If you can, also try to retrieve the MV-22 code book so it doesn't fall into enemy hands.
Main objectives:
- recover the crew of the downed aircraft
- neutralize the enemy SAM
- reach the pick-up point
- retrieve the MV-22 code book (bonus)
First, head to the southeast corner of the map. There are no enemies at this point, so you can run to the crash site, where there are 4 or 5 soldiers standing guard. Kill them and get the code book. Go northeast towards the crew of the downed aircraft, you will probably have to fight a couple of enemies. The crew is behind a large rock ... there are only them there, so don't risk confusing them with enemy soldiers. Go to the point marked 2 on the map (represents the location of the SAM), killing the enemies as you approach. Gain control of the demolition character and destroy the SAM with the rocket launcher. From here to the pickup point there are only a couple of enemies. Kill them and you will have completed the mission.
Mission 4: Hidden Specter
You will be transported to the landing strip of a marshy area on the west side of the island, which the guerrillas have chosen as a base of operations for the trafficking of weapons and drugs. By destroying it, you will eliminate their main supply channel. This time you will arrive aboard a boat and your two main objectives will be the landing strip and the weapons depot. You will need to place some explosive charges and escape as soon as possible. The area is unlikely to be well defended, but you can never tell ...
Goals:
- conquer the airfield
- place the explosive charges in the weapons depot
- reach the pick-up point
- neutralize all forms of resistance
Go north, where the small group of houses and some enemies are. You should be able to take them out before they can see you. From here, go northeast, east of the airfield. Select the sniper rifle and kill all visible enemies one by one, then clean the buildings with the rifle. Go northwest and enter the weapons depot, where there are some enemies. Place the charge anywhere in the building and the mission will be completed.
Mission 5: Rapid Python
It seems that among the rebels the number of deserters is increasing day by day, and this is a very good sign for the upcoming elections. The main turncoat is Esteban Ordonez, a high official in Priego's presidential campaign until a few days earlier. However, it seems that his assistant sensed his intentions, but Ordonez managed to escape and hide very important documents before being captured. Your mission is to rescue Ordonez and recover the documents in question.
Goals:
- find the documents
- free Ordonez and escort him to the extraction point
- neutralize the BMP
Activate the night vision, proceed north and order the bravo team to reach the bridge in the southeast corner. Collect the documents across the bridge, destroying the two enemy vehicles before they have a chance to get too close. Head north to your destination, and you should see a group of enemies escorting Ordonez. To the west you will find the BMP to destroy, but in this area there are a lot of enemies, so to face them with greater tranquility it would be better to also gather the good team. Blow up the BMP and escort Ordonez to the extraction point. Mission complete.
Mission 6: Liberty Storm
Election day has finally arrived, and every single soldier must be committed to protecting polling stations. The area you will deal with is one of the most difficult, and your main task will be to ensure that citizens can go to vote in complete safety. Guerrillas can be found in all adjacent streets, so you'll have to keep your eyes peeled in all directions. News has come that some citizens have been taken as hostages: find them and save them. The last but not least task will be to locate the rebel command center.
Goals:
- escorting civilians who go to vote
- defend the electoral section
- conquer the rebel command center
- no death in the team (bonus)
From the starting point, go right, taking care of the snipers on the balconies. Behind a vehicle there is an enemy with a civilian: accompany the civilian to the electoral section, then go and get the other civilian in the building a little further on: go up the stairs and once you reach the balcony, save the hostage and protect him while goes to vote. Send the good team to defend the outside of the constituency. Go to the last hostage, in the building with only one enemy, free him and accompany him to vote. At this point some enemies will approach the electoral section: if you are fast enough you can kill them from a distance with the sniper rifle, otherwise wait for them to approach and open fire. Go to the rebel command post and throw a grenade inside to complete the mission.
Mission 7: Ocean Forge
Priego favors Colombian interests, which they hope will rise to power, transforming Cuba into the ideal cocaine warehouse for trafficking with Florida. But since this will not happen based on the outcome of the elections, Priego has asked for help from his allies, who have sent reinforcement troops. Your task is to destroy the column of Colombian vehicles and defend the beach. Enemy troops will receive reinforcements, so stay ready for a second attack wave. You will have to secure the piers and destroy the makeshift command post that the enemy has placed on one of them.
Goals:
- annihilate the column of vehicles
- clean up the beach
- acquire control of the AGS
- take possession of ammunition on the piers
Head north to the first objective, killing all the enemies with the sniper rifle, and when you get close to the compound vehicle, get help from the good team. Eliminate all the enemies to complete the first objective. Go to the building on the right (there must be someone inside) and get ready for a long fight on the beach. Once you have killed all the enemies in the vicinity, use the sniper rifle to eliminate the ones from a distance and thus complete the objective. Tap the crates on the first dock, walk down the beach, secure the AGS and tap the ammo on the second dock to end the mission.
Mission 8: Righteous Archer
Priego is running out of both allies and space. Most of his supporters have already been eliminated and the big shots in Colombia have decided to reduce their losses by abandoning him to his fate. Priego then retired to an ancient fortress in Sierro de los Organos. The building is located on top of a hill, and is very well guarded by some external guard posts. Neutralize these positions and penetrate inside the fortress, where you will have to try to capture Priego alive, so as not to make him a martyr. Make sure he can't escape with the helicopter to the back of the building.
Goals:
- capture Priego
Send the bravo team to guard the helicopter's runway while the alpha team take care of the fortress. Follow the road to the checkpoint, then continue through the camp. Kill as many enemies as possible with the sniper rifle, paying particular attention to the machine gun. Priego should be in the last building on the left. Reach him and touch him to complete the mission. If, in the meantime, Priego has managed to escape towards the helicopter's take-off runway, and you have positioned the good team there, all you have to do is eliminate the soldiers of his escort and reach him before he can escape.
JUNGLE STORM
Mission 1: Totem Ground
In Colombia the situation is very delicate. In fact, a struggle is underway between three parties: the government, the paramilitaries and the rebels, a struggle that is expanding towards the borders of Ecuador and Peru. Local governments have asked for help in stabilizing things, at least in the most densely populated areas.
Your long-term goal is the MFLC (Movimento de Las Fuerzas Libres). Once the leaders of that group are eliminated, things will likely settle down quickly. As for the short-term goals, you are faced with a team of archaeologists who refused to evacuate the Alto Magdalena area and a group of Belgians who tried to persuade them and were the victim of an ambush. The survivors were taken prisoner. Fortunately, the camp has been located. Your job is to neutralize the rebels and free the prisoners. Be careful though, since the camp has a series of caves behind it, and it is not known exactly how many enemy forces there are.
Goals:
- conquer the enemy camp
- find all three hostages
- reach the extraction point
- no deaths within the team (bonus)
Go straight to the enemy camp and kill anyone you meet. Head to the mountain, getting as close as possible to the cliff above the sea: from this point you should be able to see a man on a platform and his other companions near the sea. Kill them. Go down the slope and enter the cave entrance. A couple of hostages are being guarded by some guards, and as long as you stay in hiding you shouldn't have any difficulties. To avoid problems, exit the way you came in. Go to the boat: if you've already dealt with the rebels on the beach, you shouldn't meet anyone anymore. When you reach the boat, you have completed the mission.
Mission 2: Vapor Knife
The rebels have got their hands on the railway line connecting Cieraga Grande and are using it for their supplies of fuel, weapons and ammunition. This means that you have to destroy it. The Colombian government is not very happy with this solution, it would prefer that the infrastructures remain after the fighting, but if this problem is not immediately and definitively addressed, there may no longer be any country to govern. You will be transported to a rebel base which is right next to the railway line. The terrain is swampy, with a lot of vegetation and many points from which the rebels could ambush you.
The first thing to do is destroy the garrison guard in a nearby street, to prevent the rebels from sounding the alarm. Then place explosive charges on the tracks, so they can't be repaired any time soon. From here you can proceed to the extraction point.
Goals:
- conquer the guard post
- place the explosive charges on the railway exchange
- reach the extraction point
- conquer the rebel camp (bonus)
Head to the base. Kill any enemies you can see with the Sniper Rifle, then advance with the Riflemen. Walk along the grassy stretch to another camp, on the road there is a shed with two enemies. Clean up the camp (there should be three or four rebels) and head north from here. You will find a small shed next to the tracks that has the switch inside it: place the explosive charge here. Go through the area to the northeast to reach the extraction point.
Missione 3: Ocelot Desert
A train station has been identified on the edge of the Tatacoa desert region, an area of the country where rebels have heavy settlements. Intelligence has identified a train loaded with weapons ready to leave for the rebel camps. The Colombian government has recommended not to cause further damage to the railway lines, so you will have to deal with it without touching the infrastructure. You will be placed next to the train depot. Once there, gain control of the area to make sure the rebels can't carry reinforcements along the railway line. With supplies so limited, they will likely retreat to existing depots in search of other weapons. Your second goal is to penetrate these depots and blow up all the ammo. In addition, Francisco Lever, the commander of all northwestern Colombia, is on the spot. You don't have to kill him, just place a beacon on his helicopter and let him escape. With any luck, he will take you straight to his hiding place.
Goals:
- destroy the radio
- place explosive charges in both depots
- placing explosive charges in the missile depot
- hide the beacon on the helicopter
Activate night vision. On the right there is a small path that leads up a hill, take it. When you get to the other side, turn left and proceed to the other hill, where there are two enemies. Kill them, then grab the sniper rifle and kill the rebels on the other side of the valley as well. Turn left again and you should see a building. With the sniper rifle, kill all the people outside it and on the surrounding hills. When no one is around, go to the radio station (it's a group of tents), kill everyone and blow up the communications. Go to the depots and place the explosive charges anywhere in them. Go back to the missile depot, perform the same operation and go to the helicopter. When you reach it, place the marker and the mission will be over.
Mission 4: Ocean Hammer
Intelligence believes that Lever is in charge of the West Coast drug export facility, and now that he has been tracked through the helicopter beacon, your job is to intervene and stop the drug trade. Identify how shipments take place and prevent them from continuing. However, ensure the safety of civilians in the village Lever is using as a base of operations, making sure that the locals are not involved in the gunfights.
Goals:
- conquer the village and the fields
- capture Francisco Lever alive
- avoid civilian deaths (bonus)
- escort Lever and place the explosive charges on the submarine
Go to the fields, where many rebels mingle with the civilians: avoid the civilians and shoot only the enemies. You can take care of the rebels by the river with the sniper rifle. Go to the guard tower, shoot the guy inside and proceed further to the small cave, where there is a door that you will return to later. Proceed towards the village, hit all the rebels, as usual, avoiding the civilians. Watch out for the sniper on the church tower. You get to the other side of the village, through another passage in a cave, and here you meet the bravo team. Head to the mansion where Lever is hiding. Take care of the guards outside, inside you will find him along with his bodyguard. Kill the bodyguard and tap Lever to capture him. He will tell you about a drug shipment aboard a submarine. Go back to the door in the cave, the one you didn't enter. Kill anyone nearby and place the explosive charge on the submarine to complete the mission.
Mission 5: Tutan Bolt
A reconnaissance flight has identified an abandoned port that the MFLC is using as a point of entry for shipments of weapons: drugs are exported and weapons are imported, and the battle continues. You have already dealt with drugs, now it's time to fix the arms trafficking. You will be placed near this port, which you will then have to reach on foot. The area is filled with shabby buildings, making it a potential sniper haven. Clean up the whole area, walking slowly and carefully, finding the transport containers and blowing them up. The last target is Marco Abreu, one of the top men of the MFLC, who is in one of the boats: catch him alive.
Goals:
- eliminate enemies on all boats
- place the explosive charges on both containers
- kill enemy snipers
- capture Marco Abreu
This mission is not linear, and neither are the simplest three. Go through the area around the boats first trying to take out all the enemies, then deal with the snipers, then head to the storage area with the containers and blow them up. Then move to the building in the southeast corner, where Marco Abreu is located. Kill his bodyguard and capture him to complete the mission.
Mission 6: Silver Spider
Marco Abreu spoke, revealing the location of the main base of the MFLC. The air attack is impractical, as the enemies have a SAM capable of putting any type of aircraft at our disposal at risk. The base must be attached by land. You will work together with a Marine unit. Coordinate and destroy the SAM first. Then take care of the base and eliminate any kind of resistance.
Goals:
- meet with the Marines
- destroy the SAM
- reach the extraction point
- no deaths within the team (bonus)
Go west, cross the bridge and watch out for the enemies in the trench, throw a grenade. Continue on to the other small bridge, kill the enemy on the guard tower with the sniper rifle and continue. Blow up the SAM with the rocket launcher and free the marines inside the tent. Go to the extraction point to end the mission.
Mission 7: Whisper Station
The general situation has improved a lot following your previous interventions. However, the MFLC still has prisoners with them, and the rebels are supposed to be more likely to kill them than to free them. Abreu has provided enough information to identify the place where the hostages are being held, your job is to break into this facility and free them. Along the way, you'll also need to find the armory and destroy what's inside. This is a surgical intervention: don't worry about killing all the enemies, this will be done by the reinforcements that will be sent later to your support. Just destroy the armory and find the prisoners.
Goals:
- free both hostages
- place the explosive charge in the armory
- reach the extraction point
- no deaths within the team (bonus)
At the gate there is a tank: destroy it and with it kill the enemies that accompany it. There are two more near the buildings on the south side of the base. The alarm will cease as soon as you are able to reach the inner gate. Turn south at the next gate, where there is a rebel with an automatic submachine gun, which can be easily annihilated if you take the stairs to the left and kill him from above. There are two more at the south gate, one on each side. You will find the two hostages in one of the buildings in this area. Proceed to the north gate and kill the two enemies. Place an explosive charge in the armory and leave the field. Don't get distracted, you're not done yet: five more enemies await you just outside the camp. Take cover behind the tank, and when you've killed them all, go to the extraction point. Mission complete.
Mission 8: Eagle Clarion
Finally the main base of the MFLC has been identified, and once it is destroyed, all fighting will end. Unfortunately, there are still dormant rebel cells across the country, waiting to attack simultaneously, unless they are given a radio order not to. The place where the secret code that can prevent the attack is kept is, even if it is on purpose, in the main base of the MFLC. You will have to infiltrate, look for the documents with the code, take possession of the radio tower and thus be able to transmit the code. There's a duty officer, you have to keep him alive to get him to pass the code. Once the signal is transmitted, you can blow up the radio tower.
Goals:
- defend the camp
- recover the code and the decryption key
- force the officer to transmit the code
- destroy the radio tower
Defend the starting area for a short time. You will know that you have accomplished this first objective once the slope of the hill is completely clear. If you still can't see the second target on the radar, it means there are still some enemies left to eliminate. When you're done, move west and take out all the enemies in the small camp. Search one of the tents for the documents you need, then continue to the second camp by advancing east and bypassing the rock. Kill everyone and look for the decryption code in one of the tents. Proceed to the third objective, kill the gunner at the top of the hill where the building is located before entering it. Find the officer and shoot (without hitting him) to get him to pass on the code. With the code transmitted, place the explosive charges on the radio tower on the roof. Mission complete.
Solution summary:
TRAINING
TACTICAL EXERCISES
Exercise 1: Firefight
Exercise 2: Saving
Exercise 3: Demolitions
Exercise 4: Anti-vehicle
Exercise 5: Defense
ISLAND THUNDER
Missione 1: Watchful Yeoman
Mission 2: Angel Rage
Mission 3: Jaguar Maze
Mission 4: Hidden Specter
Mission 5: Rapid Python
Mission 6: Liberty Storm
Mission 7: Ocean Forge
Mission 8: Righteous Archer
JUNGLE STORM
Mission 1: Totem Ground
Mission 2: Vapor Knife
Missione 3: Ocelot Desert
Mission 4: Ocean Hammer
Mission 5: Tutan Bolt
Mission 6: Silver Spider
Mission 7: Whisper Station
Mission 8: Eagle Clarion
 Ghost Recon: Jungle Storm ps2
- ps2
- the
Exit date: March 11 2004


