


HOUSE OF NIKIFOR
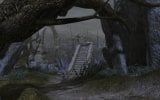
Access the inventory at the bottom of the screen, take a look at the diary, then head to the locker in the corner, open it, read the book inside, then exit the room, head left and then left again first of the double door. Examine the next entrance, then go to the left of the balcony and then enter the door on the left. Take a look around Nikifor's bookcase, then head to the locker to the right of the ladder, click on the scroll, take the key to the cabinet, use it to open it, read its contents, then go back to the bedroom and compare the symbols found. on the sheet with those of the book initially analyzed. Then study the photos, which have animals and other natural elements as subjects, closely, then turn the various rings of the globe in this order (wheat,?, Owl and elephant). The second from the top must be carried on the crocodile. This will unlock the opening and you can retrieve the keys to the generator door. Then turn around and take a closer look at the desk, read the captain's diary, then take a look at the topographic map and listen to Nikifor's explanation. Click on the locker at the top right of the diary, take a good look at the image of the generator, then read all the pages to insert them in the diary to the right of the inventory bar, studying them very carefully, as they contain various clues useful to solve the puzzles that will arise later. Then search for the crystals and activate the various machines, then approach the door, turn left and reach the pedestal, take a look at the diary to see which icons must be selected (VI, II and V), then use the arrows on the left panel to activate the one on the right. Then click on the buttons to see the number of crystals associated with the various icons above the pedestal, then exit the study, go down the stairs, go outside, take a look around and then go back inside, subsequently entering the door to the left of the stairs. Insert the keys taken from the globe into the slots under the arrows and turn them to reproduce the symbols seen above in the order you prefer. After solving the puzzle, enter the door and go down, turn right and advance into the other passage, take a look inside the pump room, then approach the shelves to the left of the door, take the wrench from the table , look carefully at the drawing on the wall, then proceed towards the machine, insert the tool in place of the missing lever on the left, click on it and do the same with the one in the middle, bringing it one click higher than the previous one, and with that to the right, which will have to go up another step.
Then approach the pedestal to the right of the door, click on the third icon, then exit the room, then go right to see another pedestal, click on the green section of the circle, then go forward, open the panel at the back of the room to see that two crystals are already in place, open the room upstairs, click on a crystal to light it up and then press the white button in the upper left. Exit the area, go up, then go back to the second floor, enter the room next to the bedroom, take the rope to the right of the door and the lamp above the barrel in the corner, then open the second cabinet in the column on the opposite side. , take the oil can and the capsule, turn around, open the hatch, take the hook and the metal pipes, attach the rope to the pipes, get off the window, go forward, look towards the house, return to the front of the rope, take the crowbar on the left, climb and exit the warehouse, then enter the double door on the left and, subsequently, one of the two side doors of the opposite wall. Take a look around, then go down and go to the library, click on the button in the middle of the library, go down to the engine room, light the two crystals, press the black button at the top right, go back to the library and click the button again , then take a look at the black icon near the desk, take the monocle, then go to the other side of the room, pick up the crystal above the chest, open it and take the painting, then press the button on the desk, the one that was under the monocle, to try to open the cabinet in the corner, but it won't open. Then exit the room, leave the bridge, pull the handle to the right of the niche, then exit and click on the roof or sky, take note of the icon to the left of the motor, then use the crowbar on the rock that blocks the gear , go back inside, pull the handle again to make the elevator go down, then go upstairs. Go right, click on the pedestal with the yellow icon, go down again to the engine room, take the capsule from the inventory and insert it in the free slot on the left, then activate the crystals, then click on the yellow button above the pedestal. Then go back to the telescope room, examine the pedestal to the right of the elevator, then take a good look at the photo of the spaceship and click on the various pieces in this order (top, bottom, right, left, then right, bottom, top, left, then bottom, right, top and left). Take the telescope key, go left, click on the second piece of the pedestal from the left, then after activating the pedestal, go right, open the locker and insert the key you just found, then click on the lens to look with the telescope, thus starting an animated sequence.
Go forward twice, then turn left and, after noticing the presence of several guards, go back, then head towards the house, click on the lamp if you see little or nothing, go around the building, save when Umang tells you to be careful, then approach one of the two rusty tricycles, use the oil to unlock the gears, then the capsule to recover the power of the crystals in both vehicles. Go back to the front of the house and climb the rope again to get back inside, then go down to the engine room, place the two stolen crystals in the free slots, click on them and on the third button at the bottom to activate the bridge, then examine the pedestal near the stairs, then go back upstairs. Go to the left of the valve, click on the first piece on the left, then carefully examine the icons, then go downstairs and reach the table next to the bookshelves, take a good look at the map, read the diary, insert the icons seen on the panel, then pull the upper right lever three times. Then look at the part of the map in that direction, then use the arrows to enter, in this order (N, E, S, E, N, E, E, N and N), the coordinates read in the diary. Take note of the path to take to reach your destination, then go down to the crystal room, turn on five, press the button in the center on the right, go to the valve on the bridge and enter the code evoked by the map, then click on the lever on the ground. the one to the left of the valve. Then go down to the pumping room, take the crystal on the left of the table with the capsule, then put it in the usual panel, press the red button at the bottom right, then go to the library, press the button on the desk if you have not already done so , then enter the secret room, open the locker and click in order on pipes 2, 5, 6 and 3, then run away to avoid the effects of the tremendous explosion.

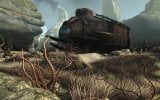
MANULA VALLEY
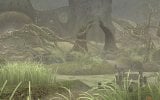
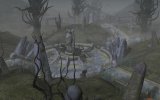
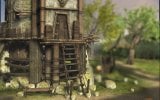
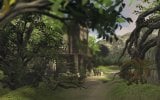
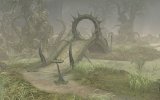
Turn around, take a look at the caravan blocking the canyon, then take the iron bar on the right, then proceed along the path inside the canyon, turn right at the crater, then go ahead, observe the ferry on the island in the center and proceed on your way until you reach the ruined building, the one surrounded by the statues. Then look carefully at the circles on the ground, the statues and the pedestal connected with a pipe to the floor below, then return to the path, go forward three times, turn left, go up the stairs, approach the statue in the center and examine it, then give a look also at the pedestal and at the floor. Talk to Michael, the portal supervisor, listen to what he has to tell you, then study the pedestal with the rings, look at the ones on the left and the pattern of clues on the right, then click on the one in the center and the one inside to see if even those on the ground move. Reset the puzzle, go down to the area where the rings are on the ground, look down to see a hole in the outer ring, insert the iron bar to prevent the ring from turning, then go back up and try to move again. the pedestal. Click on the middle ring five times and the one inside four times, listen to Michael, then as soon as he disappears, go down the stairs, go left and head towards the ferry. Open the control box, insert the key and turn the rudder, then stand on the platform and click on the handle, then go forward in the carriage and press the button in the lower right, followed by the lever in the center. Once you reach your destination, go down to find yourself inside a green area, go ahead, talk to the man sitting near a shed, then go up the stairs, go further, have a chat with the sick woman, then go out. from construction. Go down and continue on the path, in order to reach an abandoned mine, at the bottom of which there are bells to ring. Once you've done that, go back and talk to the man, Nafal, to get him to tell you some stories about where you are. At the end of the story, go back to the shed and talk to the sick wife, Sarah, who will explain how to get to the depths of the mine, where Fird is.
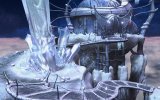
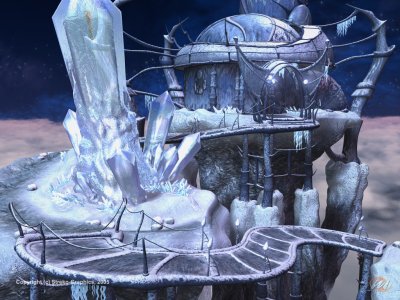
Then take the flask on the table to the left of the door, exit the shed and go back to the carriage / trolley, then click on the button in the upper left and pull the lever so as to leave for the world of ice above the clouds. Exit the trolley, approach the door, pull the rope on the right to see the box on the left come out, put the amulet inside it, click on the door, enter, talk to Himus the alchemist, then go forward and turn right to find yourself in the human experiment room. Look closely at the books on the left, open the one on formulas, turn the pages and read the one for Tincture Lukerii, consisting of one part of Cure Oil and one of Moon Elixir, then go to the right and take a good look at the dispenser with the reagents on the counter. Click on the tubes at the top, precisely on those labeled with the component icons and mix the reagents in the cup below, preparing the tincture by entering the ingredients exactly as listed in the book. After putting together both the Cure Oil and the Moon Elixir, mix, put the bottle under the cup, pour the contents of the latter into the container, then exit the building and go back to the cart, click on the button below right and then pull the lever. Go ahead, go up to the shed, give Sarah the bottle with the elixir, take the music box, go back to the abandoned mine, put the object in the cup under the bells, click on the music box to hear the five tones necessary to recall the elevator, then click on the bells in this order (4, 5, 4, 2, 5 and 1), thus making the music box disappear. Go into the elevator, watch Umang go down, then go back to Sarah, who will be furious because the medicine you brought her doesn't suit her, approach the table to the left of the ladder, then take the bottle with the elixir, go out and go back to the cart. Then click on the button at the bottom left, pull the lever, then once you reach your destination, go down to see a bridge blocked by a force field. Approach the pedestal to the right of the structure, press the second button from the left, then go to the front of the force field and use the crowbar to destroy it, enter the gate and advance towards the house. Study the drawing on the door, go inside, then turn around and go through the door again, then do the same thing again to finally find yourself inside the building. Go left, talk to fairy Reina three times, then take a look around, get the phosphorus on the bookshelf, read the spell book, then go out and go forward, climb the ladder to the roof, look at the statue , then go down, advance and then turn left, exit, go left before climbing the stone bridge, then go all the way to see a butterfly to the right of the path. Click on it, then go back to the cart to leave the area, click on the button on the top left and pull the lever, then once you reach your destination, go down and approach the door, enter, take the book of Himus on the table, go forward a little longer, go up the stairs and enter a room with panels covered with symbols.
If you can't solve the puzzle, go back to reset it and then try again until you can "insert" this color sequence. After the metal box in the center of the room is lifted, grab the Book of Alchemy to add some information about the elixir to the diary, then try to leave the room to find that the door is closed. Then put the volume of Himus on the pedestal, in order to open the passage, exit, return to the cart, click on the button at the bottom left, pull the lever, then once you reach your destination, cross the stone bridge, turn into the swamp on the right, take the Lukeria flower, then go back to the shopping cart and click on the button at the top left. After returning to the world of ice, approach the bookcase and the grinder on the shelf, put the bottle under it, open the lid and insert the Lukeria flower, then click on the knob and then fill the container. Go back to the cart, click on the button at the bottom right, pull the lever, go up to the shed and give Sarah the bottle with the elixir, then go back to the usual means, press the button at the bottom right, pull the lever, go Go ahead to the gate and open it, then talk to Salan, then go back to the cart, click the button at the bottom left, pull the lever, go back to the house and give the Book of Alchemy to Reina. Click on the button at the bottom right, pull the lever, talk to the undertaker's husband, then go to the shed to check if Sarah is okay, then climb back into the cart and head to the cemetery. Enter the gate on the side, watch the interlude sequence, go forward to the roundabout with the statue in the center, then go under the arch on the other side, turn left, enter the mausoleum, click on the plaque on the right, read it, then open the door to the tomb, remove the tile from the handle, then pulling the handle down. When the door opens, lift the lid, take the stick, exit the mausoleum, return from the roundabout, turn right, go forward until you find the mausoleum on the right, look at the puzzle closely, go back, then give a look down and click on the phosphor you found in Reina's room. Watch the intermission sequence, then return to the puzzle by clicking on the various candles in this order (20, 23, 13, 11, 12, 15, 24, 14, 1, 25, 19, 18, 4, 10, 5, 21, 22, 8, 9, 7, 16, 17, 3, 2 and 6). Enter the mausoleum, click on the pedestal on the left to blow out the candle, look down, then click on the pedestal again, enter the second niche on the right, take the urn, exit the cemetery through the gate on the side, go forward, hide before Salan can see you, wait for him to pass and then reach the cart.

Then head to the abandoned mine, put the music box in the cup and ring the bells in this order (4, 5, 4, 2, 5 and 1), then stand on the elevator platform, go ahead and talk to Fird. Then approach the table on the left, pick up the piece of paper and observe it to insert it in the diary, exit, return to the trolley, then go again to Reina, read the spell book and get ready to solve the riddle. You will have to move the statues, numbered from 1 to 5 for convenience (1 is the smallest, 5 is the largest), in this order (1 from left to right, 2 from left to center, 1 from right to center, 3 left to right, 1 center to left, 2 center to right, 1 left to right, 4 left to center, 1 right to center, 2 right to left, 1 center to left, 3 right to center, 1 left to right, 2 left to center, 1 right to center, 5 left to right, 1 center to left, 2 center to right, 1 left to right, 3 center to left, 1 right to center, 2 right to left, 1 center to left, 4 center to right, 1 left to right, 2 left to center, 1 right to center, 3 left to right, 1 from center to left, 2 from center to right, 1 from left to right). After solving the puzzle, go down and talk to Reina, then go to the trolley, press the button at the bottom left, go to the ruins, go up the stairs, put the stick on the statue behind the pedestal, go back to Reina, click on her and then watch another cutscene sequence.
KEEPERS PALACE
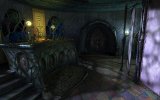
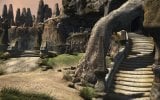
Take a look around, then go forward and, after seeing that the path is not safe, go back and turn right just past the second arch. Climb on the plants, walk on the rocks, cross the stone bridge and also advance on the one on the left, then cross the stone bridge again and go left. Use the monocle to study what is seen in the space between the rocks, go back, position yourself behind the statue above the guard, save the game, use the crowbar on the base of the sculpture, so as to make it fall on the guy. Go back, go through the two points, get off the vines, go forward, pass the guard, grab his sword, go through the arch, then turn left to see a skeleton hanging from the ceiling. Approach the rocks, then go forward until you are blocked by the dead trees, then turn right, go forward, then left, then right again and then left again. Drop down on the ledge of rock, go around the roughness, climb using the sword, then turn around and move forward again, prune the plants with the sword, then proceed until you feel the water. Turn right, touch the raised point on the right with the sword, then go down to the waterfall, fill the lamp, then go back up and proceed to the entrance on the left, then turn left again, go forward twice, then again left, in order to enter the cave. Proceed to the end, use the lamp when you can't see us anymore, go up the ramp that leads to the ceiling, go right, look down to see a guard near the door, then approach the wall and enter the hole you find there in front of you. . Peek through the window on the left, watch the cutscene, take a look at the various torture machines, then approach the Iron Maiden on the back wall, look closely at the lock, study the drawing in the diary, then move the buttons in this order. (1, 3 and 4). Enter the door, watch the animated sequence, pick up the piece of paper at the base of the sarcophagus, insert it in the diary and study it carefully, then move the buttons again, but in another order (1, 3, 4, 4, 2, 5 and 1), then exit to find yourself in a corridor with three cages. Proceed to the end, click on the two levers on the side, then reach the third cage, study the sheet of paper on the floor, go down the stairs at the end of the corridor and enter the door on the right, look at the locker against the wall, then go back to the torture room, use the chains on the guillotine, put them on the table, turn the wheel in the upper right, put the chain back on the table, turn the wheel again, then go back to the previous room to solve another puzzle.
Start by turning the right end to match the knob with the one next to it, click on the chain attached to the third knob from the left, turn the last block twice, click on the third to take the chain and put it in the inventory, then turn the first block from the left, click on the chain of the second block from the left, turn the first block twice, take the chain from the second and put it in the inventory. At this point, turn the right end again, click on the chain of the third block from the left, turn the last block until you see the red bar of the first three match, then turn the last block to flank the last part as well of the bar. Go down the elevator, talk to Trey, save, take Mila's amulet from the inventory and use it to figure out which entrance to use. Go ahead, enter the door on the right, use the amulet, then look around and approach the walls, then use the crowbar on the right one to see Mila's skeleton. Use the amulet on the latter, talk to Mila, then take the stone on the counter on the right, exit the room, enter the door at the end of the corridor, turn left, go up the stairs of the tower, enter the door on the left, then go back to the stairs, click on the door on the right, then use the stone on the wheel and click on it to raise the bar. At this point, go up the stairs, enter the door on the left, pass the gargoyles, advance into the passage at the back, then go through the door in the back of the room, then go down the stairs, pull the lever on the floor, then go right and go up the stairs, wait for the guard to pass, then go downstairs, enter the corridor to the right, go a little further, access the guardhouse, save, open the first door on the left, then after seeing that there are two guards present, go back and open the one on the right, take a look around, take the spear on the right side of the room, then go out and enter the door at the end of the corridor to find that it is the library. Look at the deal in the center, click on the base, notice that a key is missing, go up the stairs to the right of the door, approach the windows, take the card from the windowsill, then go back to the watchtower through the guardhouse, go up, click on the door left, peek through the lock, then climb to the top, enter the door, look around, then go right to see a control panel, turn the wheel, move the arrow, then go up the stairs to the left. Look across the parapet to see a tower lit in that direction, then look up to find a rope, then go back to the previous door and climb the ladder to the left of the passage.
Look around, then go left to find a rope hanging from a winch, then click on the spyglass of the lighted window, take a close look at the winch and click on the wheel handle to drop the rope. Arrange the latter so that it is one click from the ground, then go down to the lower level, approach the control panel of the crossbow, turn it to the left, then position yourself with the cursor over the crank of the wheel on the right and turn it so as to point the crossbow down. Then go to the left side of the parapet, take the metal ring at the end of the rope, turn around and use it in combination with the crossbow, then go left to go around the parapet, click on the back of the crossbow, then run towards the parapet to the right and use the spear on the rope to launch into Gugon's tower. Then look out the window to see a guard enter, click on the spellbook until you see the one that can turn people to stone, study the drawing in the volume, take note of the lines on the left page, then solve the riddle and save. . When you hear Gugon coming, hide behind the dais, wait for the wizard to cast his spell, then approach the door and take the key, exit, go down the stairs, cross the passage on the other side of the room, go forward again, then enter the door to the left of the destroyed spiral staircase, opening it with the key you collected earlier. Examine the bed on the right, also take a look at the desk and take the card and the key, then click on the left side of the mirror to move it, then examine it carefully, then look at the windows and click on the discrepancy shown in the mirror. Approach the brick in the wall, click on it, then go through the bookcase down underground, observe the magic spheres, then move the mirror by clicking on the left side, then look inside. Click on the blue light to hear a sound, then grab the ball at the bottom right, then go down to the chapel on the ground floor of the watchtower, insert the ball into Mila's skeleton, then climb back up to where the crossbow is, climb the ladder and watch the animated sequence.
SACRED RINGS WORKSHOP
From the watchtower, go to the balcony, then go down the stairs and proceed to the library. Use the tabs on the insect-like sculpture, then go behind it, open the bottom panel, put the key in the hole, turn all the others so that they are horizontal, then move the valves 4, 11, 9 and 6. Go again in front of the statue and insert the card on the right in the inventory, take the book and look at the photo of the laboratory, then use the other card to see the images of all the worlds that have been accessed with the Sacred. Rings. Then reach the stairs of the tower and go down to the first door on the right, enter and go through the next one, in order to find yourself inside the torture room. Enter the door in the middle, click on the iron maiden in which Trey was imprisoned, watch the man scare the guard, then exit the room and then, through the first door on the left in the corridor, from the prison. Go up the stairs, enter the second door from the top, then go to the left of the large room, advance into the passage, go around the Sacred Rings and observe the four pedestals on the internal balconies. Then go up the two stairs in front of the Sacred Rings to see a lever, then go down, examine the metal box, use the images seen before to activate the sacred rings, go around them again and program the pedestals according to the photos, pressing the buttons highlighted by the circles. Then reach the staircase in the center, open the metal cover at the base, insert the tetrahedron into the cavity, climb to the top of one of the side stairs, pull the lever on the platform, then reach the staircase in the center and open the metal cover again. base of the Sacred Rings. At this point, save, and then choose one of the various destinations, the one you prefer, in order to see one of the many available endings. At the end of each of these, exit the laboratory and go left, enter the door, climb to see the portal, go around the central ring, put the tetrahedron on the pedestal, then go to the bottom of the platform and click again on the solid to finish the game.
Solution summary
HOUSE OF NIKIFOR
MANULA VALLEY
KEEPERS PALACE
SACRED RINGS WORKSHOP
 Aura 2: The Sacred Rings pc
- pc
Exit date: April 26 2007


